Geeks in Phoenix

Geek Blog


How to find compatible computer parts online

Building your own computer or upgrading your existing system can be a dream or a nightmare. Simply finding parts that are compatible with each other can be challenging. But there are some really helpful websites that can make finding the correct parts easy.

How to find compatible computer parts online

There is no greater satisfaction than being able to say you built or upgraded your computer yourself. Whether it be upgrading the memory or drive in your computer or building a entirely new system from the ground up.

But picking compatible computer parts can be daunting. Most of the time, you have to use the different parts' specifications to determine which components will work together.

We at Geeks in Phoenix have been building custom-built computers for over two decades and have written numerous articles on the subject. Let's run down some of our more popular articles on computer building and computer upgrading.

Make your computer faster by upgrading the hardware

Things to consider when replacing or upgrading computer components

How to upgrade the hard drive in your computer

How to upgrade or add more memory to your computer

How to add an expansion card to your desktop computer

Things to keep in mind when building a custom-built computer

How to build a computer

But none of these articles will do you any good if you cannot find compatible computer parts. If you're working on an older PC, say five to ten years old, you will have to use the different manufacturers' specifications to find compatible parts.

Now, if you are looking at upgrading a relatively new computer or building a new one, then the following websites will come in handy. When it comes to finding compatible computer parts, the websites seem to be broken down into two categories; complete systems and just memory.

Complete computers

Let's start with websites that can help you find every part of a custom-built computer. Several websites will give you a list of components that work together, but only a couple allow you to customize the different elements truly.

The first website is PC Part Picker. You can select any component (motherboard, processor, etc.) and assemble a list of compatible parts for a complete system. Or you can use it to find compatible parts to upgrade your existing computer.

The nice thing about PC Part Picker is that it will notify you when you have selected an incompatible component. It usually will not even show you parts that will not work together. That way, you are assured of getting completely compatible parts.

And almost every part listed has a link to where you can purchase it and its current price. I noticed that the majority of the links go to Amazon, but sometimes they have the lowest price.

The second website is Newegg. They have a section on their website specifically for custom PC building that is similar to PC Part Picker. The only difference is they link to products they or their affiliates sell.

Separate computer components

The PC Part Picker and Newegg websites can also help find individual components. As long as the manufacturer is still selling the component, you can use either of these websites to find compatible parts for your computer.

Let's say you built a computer recently and want to upgrade the processor. All you would have to do is find your specific motherboard, and these websites will show you what processors are compatible with your motherboard.

But as I always say, the biggest bang you can get for your buck is a memory upgrade. And most of the memory manufacturers have what they call 'memory finders'.

All you have to do is find your computer make / model or motherboard make / model; their websites will show you which of their memory modules will work in your computer.

Crucial

Kingston

Corsair

Newegg

CDW

FYI - If you are trying to get the lowest price on a component, you can check a vendor's website to see if they do price matching. I have used price matching to get some terrific deals on hardware.

If you have found a website with a computer parts configurator that we do not have listed, please let us know. Just send us the information via our contact page.

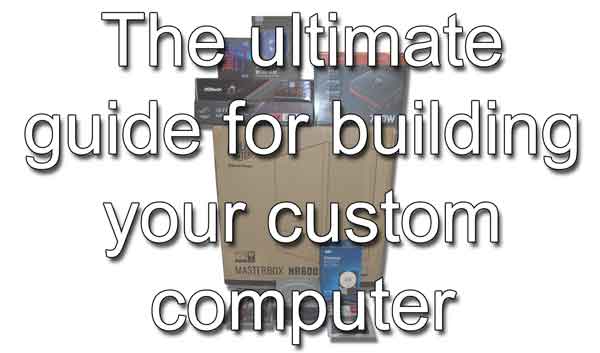
How to build a computer

Updated May 19, 2020

Are you thinking about building a computer? Have you already got the parts and don't know where to start? If so, I am going to show you how to assemble a computer.

How to build a computer

In a recent article, I discussed things to keep in mind when building a custom computer. There are plenty of websites like PC Part Picker that will generate a parts list. But once you have purchased all of the parts, you'll have to put them all together.

In this article, I am going to assemble a computer from all the separate components. If you don't have all of the tools or are kind of scared of possibly making a mistake, please contact a local computer shop and have them assemble it for you. If you live in the greater Phoenix, Arizona area, feel free to give us a call.

Tools required to build a computer

Tools required to build a computer

  • Anti-static wrist strap
  • Wire ties
  • Snipers (for trimming wire ties)
  • Needle nose pliers (optional)
  • 3/16" nut driver (for stand-offs)
  • #1 Phillips screwdriver
  • Thermal compound (may or may not be required)

Building a computer step by step

Cable management is one thing you will need to keep in mind as you are building your computer. Take the time to secure all wires, even if it is temporary.

Don't be surprised if during your assembly that you have to cut and replaced some wire ties. When you perform cable management, this is normal. Just make sure you have plenty of extra wire ties handy.

And remember to put on the anti-static wrist strap and attach the clip of it to a metal portion of the computer case before you start building your computer.

  1. Unpack the computer case.
    Unpack the computer case
    Make sure to do an inventory of all the parts (screws, drive caddies, etc.) that come with it.
  2. Install the I/O panel in the rear of the case.
    Install I/O panel in rear of case
    Be careful installing the I/O panel as the metal edges can easily cut your hand.
  3. Install the stand-offs for the motherboard.
    Install the stand-offs for motherboard
    Some cases have stand-offs built-in, others do not. If your case does not have them built-in, check the hole pattern on the motherboard or the motherboard manual to ensure you have the stand-offs in the correct locations. Hand tighten them using a 3/16" nut driver.
  4. Install the motherboard.
    Install the motherboard
    You may have to work it a little bit to get it under any tabs on the I/O panel. Then attach it to the stand-offs using the supplied screws.
  5. Install the CPU.
    Install the CPU
    Make sure you have the notches in the CPU aligned correctly to the socket on the motherboard. Refer to the motherboard manual for the correct way to secure the CPU in the socket.
  6. Install the CPU cooler.
    Install the CPU cooler
    If you are using a new cooler, it will have thermal compound already applied. If you are rebuilding an existing computer, you will need to clean any current thermal compound from the CPU and cooler. Then you will need to apply a new layer of thermal compound. Just spread a thin coat of thermal compound across the entire surface of the CPU. A business card works great.
  7. Install the memory modules.
    Install the memory modules
    The modules will have a notch in them, so they will only go into the slot one way. Check the memory modules against the memory slots on the motherboard for the correct orientation. Also, refer to the motherboard manual for the proper installation order.
  8. Install the case fan(s).
    Install the case fan(s)
    Some cases come with fans already installed, and some don't. If you have to install the can fans, make sure you have the airflow correct. The airflow should go from the front of the case to the rear of the case. The fans have directional arrows printed on one side of them. Once installed, connect them to the appropriate fan header(s) on the motherboard. Refer to the motherboard manual for the locations.
  9. Connect the front panel connectors to the motherboard.
    Connect the front panel connectors to the motherboard
    Refer to the motherboard manual for the locations of all the pins (power button, power LED, hard drive LED, audio jacks, and USB jacks) for the connectors.
  10. Install the drive(s).
    Install the drive(s)
    Depending on your case, you may have separate carriages or combination carriages for Solid State Drives (SSD) and Hard Disk Drives (HDD). If you are installing an M2 SSD, refer to the motherboard manual for the correct location. If you are also installing CD / DVD drive(s), you may have to remove knock-out metal panel(s) from a 5 1/2" bay in the front of the case. Be careful, twisting it back and forth to break it free, as the metal can be sharp and cut your hand.
  11. Install the cables for the drive(s).
    Install the cables for the drive(s)
    Refer to the motherboard manual for the port location and numbering. If you have M.2 drive(s) installed, check the manual to find out if it shares resources with any of the SATA ports. You will want the primary (boot) drive to be attached to port 1.
  12. Install any expansion cards (graphics, Wi-Fi, etc.).
    Install any expansion cards
    Refer to the motherboard manual for the locations of the PCI-e slots. Here is an article we wrote about installing expansion cards.
  13. Install the power supply.
    Install the power supply
    Depending on the power supply, it may or may not have the power cables already attached. Route the wires thought the case making sure not to cut them on any sharp metal edges.

Make sure to trim all of the wire ties, and remove the protective film from the case. Attach the keyboard, mouse, monitor, and go into the BIOS (Basic Input / Output System) to verify and change any of the settings. Refer to the motherboard manual on how to do this. When you have finished editing the BIOS settings, you will be ready to install the operating system.

Things to keep in mind when building a custom-built computer

So, you are thinking about building a computer. There are a lot of things you have to choose. So here are a few things to keep in mind when assembling your custom-built computer.

Things to keep in mind when building a custom-built computer

Building your system can be quite satisfying, like being able to say "I built it myself". And you can also perform any service on it since you know the location of all the components.

But if you do not plan it out, it can be a nightmare. For instance, if you have to return incorrect components. It can be a real headache if you order them online and have to ship them back.

So, let's take a look at some of the details you have to consider before purchasing the components for your custom-built computer.

Form vs. Function

It is an age-old problem: Form vs. Function. Do you want a system that is cool looking or takes up very little space (Form)? Or maybe a system that can run intense graphic games or can hold a ton of components (Function)?

Over the years, I have built both types of computers for my personal use. My first few were made purely for function, playing games and a ton of storage using a RAID (Redundant Array of Independent Disks).

They were big and not very pretty to look at, but they served the purpose. But systems like that have one big issue: cooling. Trying to keep all of the components at a reasonable temperature was tough.

Now a few years ago, I decided that I was tired of having to leave the side panel of my computer case off and having a fan blowing air into it. It just didn't look right to me or others that I might have come into my office.

I wasn't playing the games anymore, and the size of hard drives had increased, so I did not need to have a RAID anymore. So, I decided to start using a case that was more appealing to the eyes.

A custom-built computer based on Form

If you are thinking about building your custom-built computer based on form, then the first thing you have to decide on is the case. They come in all sorts of sizes, ranging from the ultra-small mini-ITX to an ATX bench case.

You can go with a conventional-looking case or something unique, like clear Plexiglass. You can get computer cases with a ton of LEDs or just plain.
A computer case with a custom finish
You can find them in all sorts of colors, or you can finish it yourself.

Custom cases: Faux Stone and Chalkboard
Custom cases: Back in Black
Custom Cases: The Antec Skeleton

Or you can go with something utterly open like an Antec Skeleton.
An orginal Antec Skeleton case
It comes down to how you want your custom-built computer to look. Once you have decided on a case, the case will dictate what components you can put inside (motherboard, graphics card, power supply, etc.).

If the case you want to use can hold a micro-ATX or standard ATX motherboard, follow the Function factor instructions below. If the case you want to use is a mini-ITX or mini-ATX Form factor, finding a motherboard is the next step.

Since mini-ITX and mini-ATX cases are small, the motherboards for them will have limited CPU (Central Processing Unit) options. Remember that the faster the CPU runs, the more heat it will make.

And with smaller mini-ITX and mini-ATX cases, CPU cooling options may be limited to just air-cooled heatsinks. It just depends on how much space inside the computer case you have available.

When it comes to GPU's (Graphics Processing Unit), you may or may not have room for one. But if you are not using your system for graphic-intensive programs like Photoshop or games, you can easily use the onboard graphics built-in to the motherboard.

In some mini-ITX and mini-ATX cases, you can use a GPU if you use a riser board that comes up off of the motherboard. But keep in mind that some cases can use full-height expansion cards, and some can use only half-height expansion cards, so double-check the computer case specifications.

When it comes to drives, you will probably have to go with a 2.5" drive, either a (Solid State Drive (SSD)) or (Hard Disk Drive (HDD)). Of course, it all depends on what size drive(s) you can mount inside of the case. The same holds for a CD / DVD / BD optical drive.

You will also need a power supply that fits the case size. Some cases come with them, so do not. And be prepared to pay a little more the smaller form factor, mini-ITX, and mini-ATX, power supplies than micro-ATX or standard ATX ones.

You will need to make sure the power supply has enough of the proper connectors (ATX12V, SATA, PCIe, Molex) for all of the different components. If you are going to use a GPU, make sure you have enough PCI-e (6-pin or 8-pin) power connectors.

And lastly, you are going to need some memory modules. Just check the motherboard specifications to find out what type of memory and how many it can handle. You can usually install one memory module, but I always recommend installing them in pairs (2, 4, 6, 8, etc.). You can get a better price on memory modules if you buy them in twin-packs and quad-packs.

A custom-built computer based on Function

If you are thinking about building your custom-built computer based on its Function, then the first thing you have to decide is what CPU (Central Processing Unit) you are going to use (AMD or Intel).

As strange as it may sound, the CPU will dictate everything else in your computer. For example, let's say you want to build a high-end gaming or 3d rendering machine, and you want to run an Intel Xeon or Intel I9 processor.

First, you will need to find a motherboard with all of the features, like PCI-e slots, you want, and the correct socket type for the processor you have chosen to use. Always check the motherboard's specifications to make sure that the processor you want to use is supported.

Remember that even if a motherboard has the correct socket type, the BIOS (Basic Input/Output System) may not support the CPU you have selected. I always go to the manufacturer's website and double-check the supported CPUs.

Now that you have the CPU and motherboard selected, how are you going to cool the CPU? Air or liquid? Air-cooled heatsinks sit on top of the CPU and can get large (tall), so you will have to have a case that has enough room for it.

The same thing holds for liquid coolers, but they utilize radiators than need to be mounted inside of the case, either on the rear, top or front. I preferred the top or front-mounted liquid CPU coolers, as the radiators have far more surface area for cooling the liquid than ones that mount in the rear of the case.

And if you are thinking about overclocking your CPU, then go with a large, top-mounted liquid CPU cooler. But remember that overclocking will, in some cases, void the CPU manufacturer's warranty, so be careful and keep it cool.

The next thing to consider is the GPU (Graphics Processing Unit) / graphics card(s). Most high-end GPUs require more space inside of the case, and if you want to use multiple GPU's, then you will need a computer case that is large enough to hold them all.

By now you have a good idea of what size of computer case you will need. You are probably looking for a mid-size or full-size tower. Keep in mind that proper airflow inside the case is essential. So, having at least one fan in the front and rear of the computer case is recommended.

The next thing to look at is the power supply. Since you are looking at a mid to full-size case, a standard ATX type power supply is what you are going to need. You need to know how many watts all of the components you want to use will require. A 600 to 700-watt power supply should be sufficient.

You will need to make sure the power supply has enough of the proper connectors (ATX12V, SATA, PCIe, Molex) for the motherboard and components you want to use. Keep in mind what additional power the GPU (6-pin or 8-pin PCI-e) might require. Each PCI-e connection for the GPU is roughly 75 watts.

And of course, you are going to need some memory modules. Just check the motherboard specifications to find out what type of memory and how many it can handle. You can usually install one memory module, but I always recommend installing them in pairs (2, 4, 6, 8, etc.). You can get a better price on memory modules if you buy them in twin-packs and quad-packs.

As far as drives are concerned, you can usually go with either 2.5" (Solid State Drive (SSD)) or 3.5" (Hard Disk Drive (HDD)) drives. If you are building a high-end system, you will want to go with one of each (an SSD as the first (boot) drive with an HDD for storage as the second drive). A CD / DVD / BD optical drive is entirely optional.

With all of that said, you should be ready to assemble your custom-built computer. And if you feel overwhelmed with it all, go ahead and contact a local computer technician, like Geeks in Phoenix, for assistance.

Free computer diagnostics

Repairing a PC can sometimes be expensive, and that is why we offer free basic in-shop diagnostics. Give one of our professional and experienced technicians a call at (602) 795-1111, and let's see what we can do for you.

Check out our reviews

Geeks In Phoenix LLC, BBB Business Review

Customer service is #1

Here at Geeks in Phoenix, we take pride in providing excellent customer service. We aim to give the highest quality of service  from computer repair, virus removal, and data recovery.

Bring your computer to us and save

Repairing a computer can be time-consuming. That is why we base our in-shop service on the time we work on your computer, not the time it takes for your computer to work! From running memory checking software to scanning for viruses, these are processes that can take some time.

Contact us

If you have any questions, please feel free to give us a call at (602) 795-1111  and talk with one of our Geeks. Or you can send us a message from our contact page contact page , and one of our Geeks will get back to you as soon as possible. Or you can stop by and see us. Here are our hours and location.

Like Geeks in Phoenix on Facebook

Follow Geeks in Phoenix on Twitter

Watch Geeks in Phoenix on YouTube