Updated March 18, 2024
Are you considering building your own computer? Have you acquired the necessary components but need help with how to proceed? If so, you have come to the right place. In the following article, I'll walk you through the step-by-step process of building your computer. From unpacking the parts to connecting the wires and cables, I'll provide clear and concise instructions to ensure your computer is built safely, correctly, and easily. Let's get started!

I will assemble a computer from all the separate components in this article. If you don't have all the tools or are scared of making a mistake, feel free to contact a local computer shop and have them assemble it for you. If you live in the greater Phoenix, Arizona, area, feel free to call us.
Tools required to build a computer
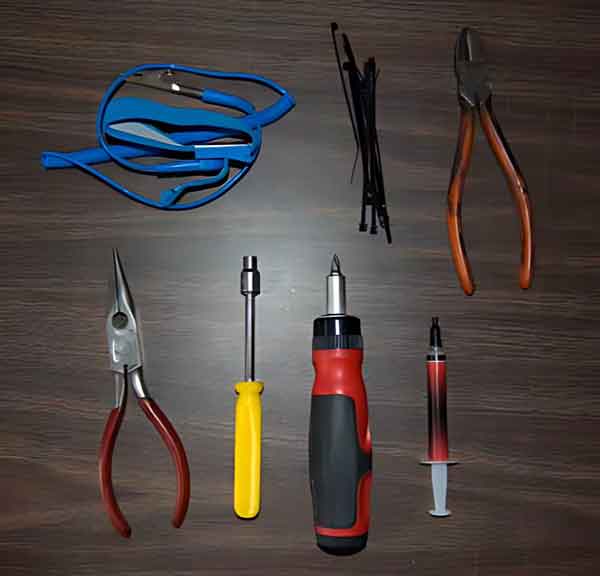
- Wire ties
- Snipers (for trimming wire ties)
- 3/16" nut driver (for stand-offs)
- #1 Phillips screwdriver
- Thermal compound (may or may not be required)
- Anti-static wrist strap (optional)
- Needle nose pliers (optional)
Building a computer step-by-step
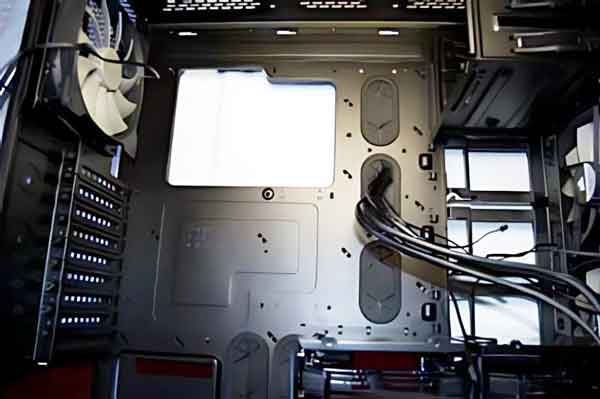
Cable management is one thing you will need to keep in mind as you build your computer. Take the time to secure all wires, even if it is temporary. It's okay if, during your assembly, you have to cut and replace some wire ties. When you perform cable management, this is normal. Just make sure you have plenty of extra wire ties handy.
Remember that if you are going to use an anti-static wrist strap, you need to attach the clip to a metal portion of the computer case before you start building your computer. I like to assemble as many components on the motherboard as possible before installing it in the case. Installing the CPU, M.2 drive(s), or memory modules can be a hassle when the motherboard is inside the case.
- Install the CPU.
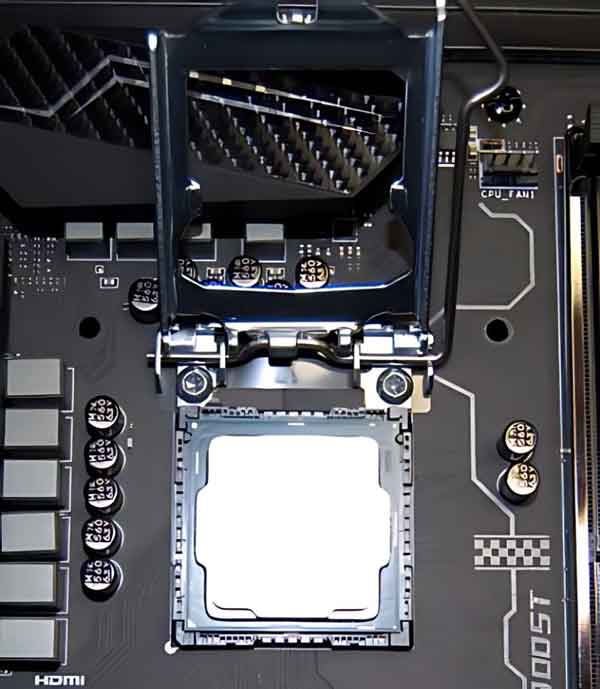
Ensure the CPU's notches align correctly with the motherboard's socket. Refer to the motherboard manual for instructions on securing the CPU in the socket.
- Install the memory modules.
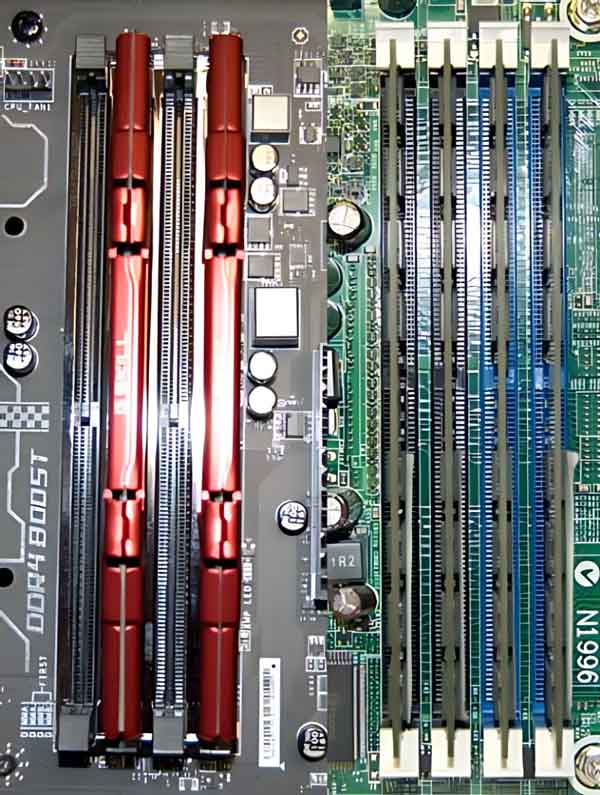
The modules will have a notch in them, so they will only go into the slot one way. Check the memory modules against the memory slots on the motherboard for the correct orientation. Also, refer to the motherboard manual for the proper installation order.
- Instal the M.2 drive(s).
.jpg)
Installing an M.2 drive with the motherboard outside the case is simple. Now is the time to do it.
- Unpack the computer case.
Make sure to do an inventory of all the parts (screws, drive caddies, etc.) that come with it. If the case did not come with a manual, download a copy online. You will be referencing it quite a bit during the assembly.
- Install the I/O shield in the rear of the case.
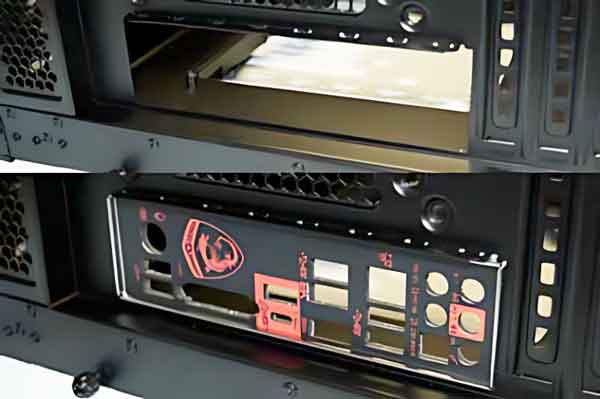
Some motherboards come with the I/O shield built into them, and some do not. If your motherboard has a separate I/O shield, be careful when installing it, as the metal edges of the case can easily cut your hand.
- Install the stand-offs for the motherboard.
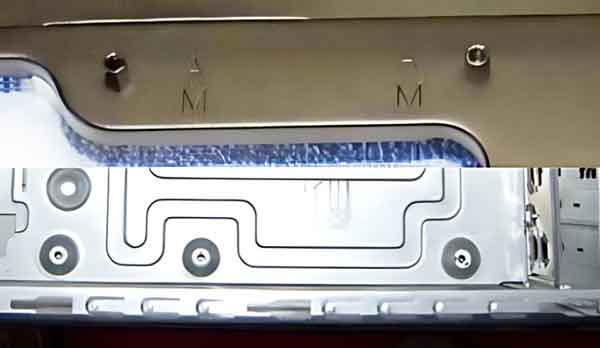
Some cases have stand-offs built in, while others do not. If your case does not have them built in, check the hole pattern on the motherboard or the motherboard manual to ensure you have the stand-offs in the correct locations. Then, hand-tighten them using a 3/16" nut driver.
- Install the motherboard.
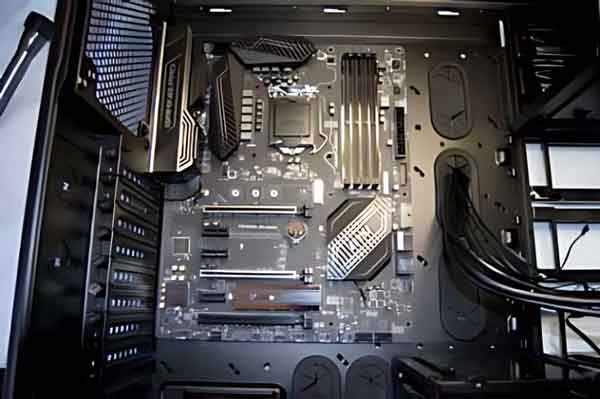
You may have to work it a bit to get the I/O ports under any tabs on the I/O panel. Tilting the motherboard at a 45-degree angle will allow you to get any I/O ports under the tabs on the I/O shield. Then attach it to the stand-offs using the supplied screws.
- Install the power supply.
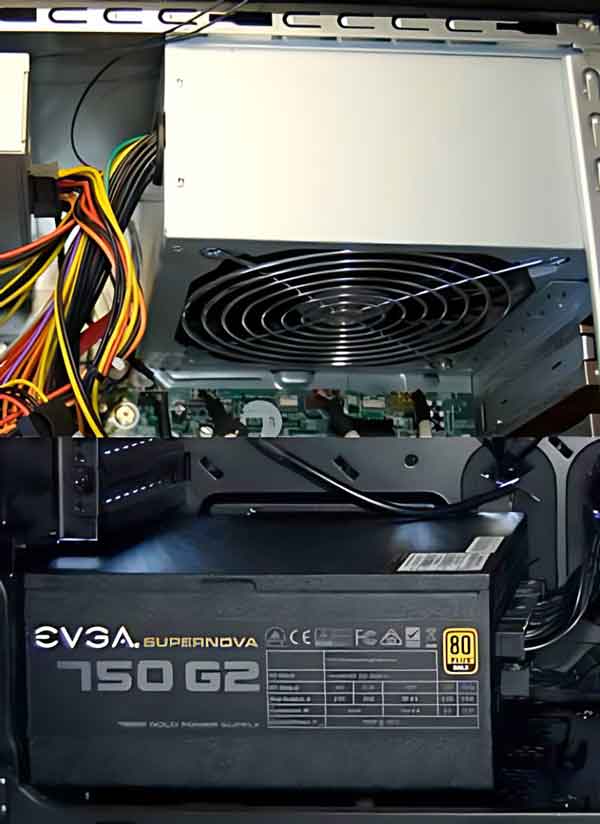
Depending on the power supply, the power cables may or may not be already attached. Route the wires through the case, making sure not to cut them on any sharp metal edges. Make sure to connect the ATX12V 8-pin (4+4) and ATX 24-pin (20+4) power cables to the motherboard now, as you might not have access to the ATX12V power connector after installing the CPU cooler.
- Install the CPU cooler.
If you use a new cooler, thermal compound will already be applied. If you are rebuilding an existing computer, you will need to clean any current thermal compound from the CPU and cooler. Then, you will need to apply a new layer of thermal compound. Spread a thin coat of thermal compound across the entire CPU surface. A business card works great.
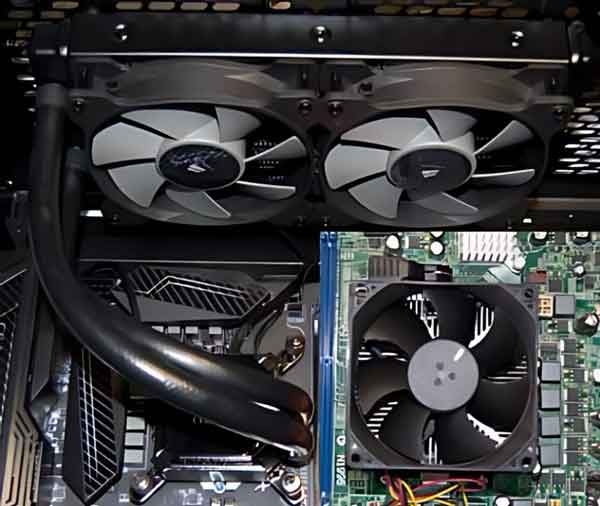
- Install the case fan(s).
.jpg)
Some cases come with fans already installed, and some don't. If you have to install the can fans, make sure you have the airflow correct. The airflow should go from the front of the case to the rear of the case. The fans have directional arrows printed on one side of them. Once installed, connect them to the appropriate fan and LED (optional) connector(s) on the motherboard. Refer to the motherboard manual for the locations.
- Attach devices to the I/O connectors on the motherboard.
The locations of all the pins (power button, power LED, hard drive LED, audio jacks, USB jacks, and case LEDs) for the connectors are in the motherboard manual.
- Install the drive(s).
.jpg)
Depending on your case, you may have separate or combination carriages for Solid-State Drives (SSD) and Hard Disk Drives (HDD). If you are also installing CD / DVD drive(s), you may have to remove knock-out metal panel(s) from a 5 1/2" bay in the front of the case. Be careful, twisting it back and forth to break it free, as the metal can be sharp and cut your hand.
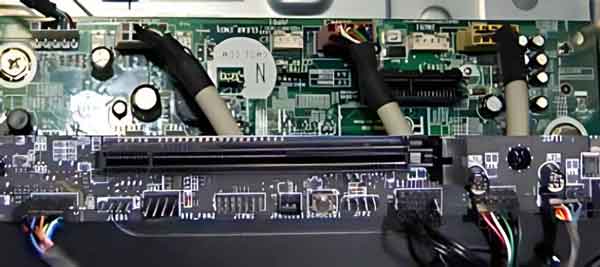
- Install the cables for the drive(s).
.jpg)
Refer to the motherboard manual for the port location and numbering. If you have M.2 drive(s) installed, check the manual to determine if it shares resources with any SATA ports. You will want the primary (boot) drive to be in the M.2._1 slot or attached to the SATA 1 connector.
- Install any PCI-e expansion cards (Graphics Card(s), Wi-Fi, etc.).
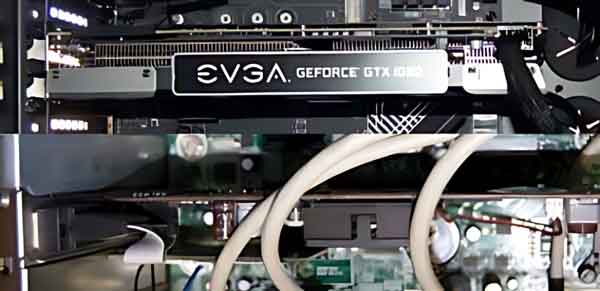
Refer to your motherboard manual for the location and types of the PCI-e slots. If your GPU requires additional power, carefully route the required PCI-e power cable through the case to avoid cutting it with any sharp metal edge. Here is an article we wrote about installing expansion cards.
Trim all the wire ties and remove any protective film from the case and the components. Attach the keyboard, mouse, and monitor and go into the BIOS (Basic Input / Output System) to verify and change any settings. Refer to the motherboard manual for instructions on how to do this. After editing the BIOS settings, you will be ready to install the operating system.
c80a9071-77ce-463a-9f5e-6771a209df67|1|5.0|96d5b379-7e1d-4dac-a6ba-1e50db561b04