Geeks in Phoenix

Geek Blog


How to make your computer look and run like brand-new

Updated June 21, 2023

For most people, there is nothing better than a brand-new computer. But of course, you cannot get a new computer every few months. But you can get that same feeling. Here is how to make your computer look and run like brand-new.

How to make your computer look and run like brand new

For most of us, getting a brand-new computer every year is not financially possible. It would be nice, but realistically it is out of the question. But with a little work, you can get that brand-new feeling from your existing computer.

Looking brand-new

Perception is everything. If it looks new to you, it will feel new to you. And with a little cleaning and maybe a couple of hardware changes, it can look brand-new.

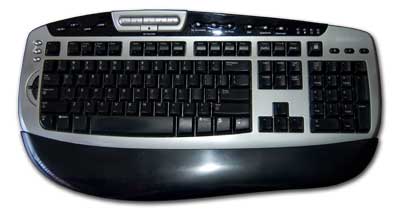
The first place to start is with the keyboard. Most keyboards are black and will show dirt and grim like no tomorrow. You will be amazed at how a good cleaning will make it appear brand new.

A really dirty keyboard before cleaning
A filthy keyboard before cleaning

Now when cleaning your keyboard, you will need to turn off your computer. That way, you do not accidentally press the wrong keys. I have seen it happen, especially with laptops with FN keys.

Since most of us eat while we work, compressed air can help dislodge anything that may have gotten in between or under the keys. A good spray of compressed air should get rid of the massive debris.

When it comes to psychically cleaning the keyboard, remember that liquid and electronics do not mix. Never spray a cleaning solution directly on your keyboard. Always apply it to the cleaning material (cotton swab, paper towel, etc.) first.

Lightly dampen a cotton swab or paper towel with a cleaning solution and ring out any excess liquid before cleaning. It may take some time to clean all of the keys, but remember how long it took to get them dirty (months? years?).

That same dirty keyboard after being cleaned

Now, if the printing has faded or worn off, maybe it is time to go ahead and replace the keyboard. Desktop keyboards are easy to replace; laptop keyboards can be a little harder. For new laptop keyboards, I recommend LaptopKeyboard.com.

When it comes to your mouse, the body will get dirty, and the buttons get looking worn. The same cleaning technique used for your keyboard applies to your mouse.

If it is a wired mouse, turn off the computer. If it is wireless, turn it off. Clean both the top and bottom with a lightly dampened paper towel. Use a lightly damped cotton swab to clean the optical lens on the bottom.

The next thing you might want to clean is the monitor. As with the keyboard and mouse, you will want to turn it off, unplug it and let it cool down. Once it is cooled down, you can start to clean it.

Just like with your keyboard, you want to start cleaning your monitor with some compressed air. If your monitor is dusty, you may want to take it outside before clean it with compressed air.

Use the compressed air to clean out all of the ventilation holes in the case. Make sure you get as much of the grime out as you can, as dust does conduct electricity.

Now lightly dampen a paper towel with a cleaning solution and wipe the outside of the case. When you get done with that, it is time to clean the screen.

To clean the screen, I recommend using a soap-based, not ammonia-based, glass cleaner, and microfiber towels to protect the finish. Never directly apply the glass cleaner to the screen to prevent damage to it.

Lightly dampen a microfiber towel with glass cleaner and thoroughly wipe the screen. Now before it has a chance to dry, wipe the screen off with a dry micro-fiber towel to remove any streaks that may have appeared.

The last thing to clean is the outside of the computer case itself. Please make sure you turn it off and unplug the power cord (desktop computer) or ac adapter (laptop computer) before you start to clean it.

Lightly dampen a paper towel with a cleaning solution and wipe down the outside (front, sides, top, bottom, and back). If you have any old and faded stickers, this would be a great time to remove them.

To remove stickers, I recommend using an adhesive remover like Goof Off. Just make sure the area with the label is laying completely horizontal, so you can let the adhesive remover sit on it for a little while.

Once you have let the adhesive remover soak in, use a plastic razor blade or plastic putty knife to scrape the label off. If the sticker has been on there for a while, it may take a few passes to get it removed.

When all of the labels are gone, go ahead and clean it with a paper towel with a cleaning solution. You want to get any residue from the adhesive remover off.

The next thing we want to do is clean the inside of the computer with some compressed air. For this step, we will need to disconnect all cables attached to the computer and take it outside.

Now the procedure is about the same for desktop and laptop computers. For desktop computers, here is a detailed article we did a little while back on how to clean the dust out of your computer.

The same procedures in the article above apply to laptops as well. All you have to do for a laptop computer is to locate the air intake for the cooling fan(s). But instead of using a nonmetallic rod to hold the cooling fan(s), use a straightened-out paper clip.

Running like brand-new

Now that you have the outside and inside clean, maybe it is time to get the operating system and programs cleaned up. Using the Windows built-in Disk Cleanup tool is an excellent place to start.

Windows 7 Disk Cleanup

Windows 8.1 Disk Cleanup

Windows 10 Disk Cleanup

Windows 11 Disk Cleanup

Once you have used the Disk Cleanup program, you can now look at getting rid of some of the programs you no longer need. You will need to get to the Control Panel to do this. The quickest way to get to the Control Panel is by using the Run dialog box.

How to get to and use the Run dialog box in Windows

My favorite (and the fastest way) to bring up the Run dialog box is to press the Windows logo key Windows logo key + R keys simultaneously. When it appears, type control and then select OK.

When the Control Panel appears, select either Uninstall a program (category view) or Programs and Features (icon view). You can then start to uninstall the programs you no longer use.

Now, if you want your computer to have that brand-new feeling, you can reset Windows 8.1, Windows 10 and Windows 11. The procedure is similar for Windows 8.1, Windows 10 and Windows 11.

How to reset Windows 10

How to reset Windows 11

But if you want that brand-new feeling, a clean installation of Windows is the way to go. Follow the instructions in the following article to perform a clean installation of Windows 10 or Windows 11.

How to perform a clean Windows 10 installation

How to perform a clean Windows 11 installation

You can use the same procedures listed in the article above for Windows 8.1, but you will have to download the Windows 8.1 Disc Image.

Windows 8.1 Disc Image

What you can do with an ISO file

What you can do with an ISO file

Updated October 25, 2022

Have you ever downloaded an ISO file and did not know what to do with it? More and more software companies are now distributing their software using ISO files. Here is what you can do with an ISO file.

What you can do with an ISO file

Nowadays, it seems like everyone is starting to use ISO files for distributing software. ISO files are just an image of a CD or DVD. You commonly see them used to deliver bootable software.

Now really quick, ISO stands for International Organization for Standardization. They have a set standard (ISO 9660) for the file system used for optical disks (CD, DVD, BD, etc.).

Even Microsoft is now using ISO files for distributing Windows. If you download Windows 7, Windows 8.1, Windows 10, or Windows 11 from Microsoft, you will get the option of downloading an ISO file.

But once you download the ISO file, what can you do with it? If you are running Windows 7, Windows 8.1, Windows 10, or Windows 11, you have three (3) options; mount it as a virtual optical drive, burn it to a disk or create a bootable USB drive.

You can also create ISO image files. For more information, check out How to create ISO files from your software disks.

How to mount and access files in an ISO file

By default, Windows 8.1, Windows 10, and Windows 11 can mount an ISO file as a virtual optical drive. Windows 7 requires a third-party program to mount an ISO file.

Once you mount an ISO file as a virtual optical drive, you can access the files and folders inside it. Most of the time, you will use this feature to run a software installation.

For Windows 7, we are going to use the open-source optical drive emulator WinCDEmu. Just download and install it using the default settings. Once WinCDEmu is installed, mounting an ISO image is similar to Windows 8.1, Windows 10, or Windows 11.

Windows 7

  1. Open Windows Explorer by using one of the following:
    • Left-click on the manila folder icon to the Taskbar.
    • or
    • Press the Windows logo key Windows logo key + E at the same time.
  2. Navigate to the ISO image you want to open.
  3. Right-click on it and select Select drive letter and mount on the context menu that appears.
    The Mount option highlighted on the ISO file context menu inside of Windows 7
  4. On the WinCDEmu screen that appears, select the drive letter you want to use for the virtual optical drive and left-click on OK.
    The main screen for WinCDEmu
  5. Using Windows Explorer, navigate to the virtual drive you just mounted. You can now use it as you would with any other physically attached optical drive.
  6. When you finish with the virtual drive, you can remove the drive by right-clicking on it and selecting Eject on the context menu that appears.
    The Eject option highlighted on the ISO file context menu inside of Windows 7

Windows 8.1, Windows 10 and Windows 11

  1. Open File Explorer (name changed in Windows 8.1) by using one of the following:
    • Left-click on the manila folder icon to the Taskbar.
    • or
    • Press the Windows logo key Windows logo key + E at the same time.
  2. Navigate to the ISO image you want to open.
  3. Right-click on it and select Mount on the context menu that appears. Windows 8.1, Windows 10, and Windows 11 automatically assign the next available drive letter.
    The Mount option highlighted on the ISO file context menu inside of Windows 10
  4. Using File Explorer, navigate to the virtual drive you just mounted. You can now use it as you would with any other physically attached optical drive.
  5. When you finish with the virtual drive, you can remove the drive by right-clicking on it and selecting Eject on the context menu that appears.
    The Eject option highlighted on the ISO file context menu inside of Windows 10

How to burn an ISO image file to a disk

The process for burning an ISO image to disk is the same for Windows 7, Windows 8.1, Windows 10, and Windows 11. Just make sure you have the correct blank media for the disk you want to burn.

For example, if your ISO file is under 700 MB's (Megabyte), it will fit on a CD. If it is between 700 MB's (Megabyte) and 4.7 GB's (Gigabyte), then it will fit on a DVD. If it is between 4.7 and 8.5 GB's (Gigabyte), it will fit on a Double Layer DVD. Anything over 8.5 GB's (Gigabyte), and it is going to go on a BD.

For more information on Megabytes and Gigabytes, check out What is a Bit? What is a Byte?.

Windows 7, Windows 8.1, Windows 10, and Windows 11

  1. Open Windows Explorer (Windows 7) or File Explorer (Windows 8.1, Windows 10, and Windows 11) by using one of the following:
    • Left-click on the manila folder icon to the Taskbar.
    • or
    • Press the Windows logo key Windows logo key + E at the same time.
  2. Navigate to the ISO image you want to burn to disk.
  3. Right-click on the ISO files and select Burn disk image on the context menu that appears.
    The Burn disk image option highlighted on the ISO file context menu inside of Windows 10
  4. Select the optical drive you want to use to burn the disk from the pull-down menu on the Windows Disc Image Burner screen. You also have the option to verify the disk after it is created. When you are ready, left-click on the Burn button.
    The main Windows Disc Image Burner screen inside of Windows 10
  5. When the optical drive is finished burning the disk, left-click on the Close button.
    The Windows Disc Image Burner screen verifying the disc has been burned inside of Windows 10

How to create a bootable USB drive from an ISO file

When you want to create a bootable USB drive, you will need a USB flash drive that is empty or that you do not mind if it gets erased. If you are going to use a USB flash drive that has been used before, double-check it to make sure there is nothing on it you may want to keep.

Remember to use a USB drive larger than the ISO file you want to put on it. A good rule of thumb is to use one that the capacity is more than 4GB. I prefer using 8GB or larger.

To create a bootable USB drive will require downloading and installing a separate program. There are several out on the Internet, but here are three (3) of the most popular programs.

AnyBurn

This free software allows you to create, edit, and burn CD, DVD, and BD discs. It also can create bootable USB drives from different types of image files, including ISO files. It is available for 32 and 64-bit versions of Windows, from Windows XP to Windows 11. There is even a portable version that requires no installation.

Windows USB/DVD Download Tool from Microsoft

This free tool is mainly meant for creating bootable Windows 7 USB drives from downloaded installation media. It is recommended to only install it on Windows 7, as the system requirements do not list support for Windows 8.1, Windows 10, or Windows 11.

Rufus - Create bootable USB drives the easy way

The thing about Rufus is it requires no installation, just download it, and it is ready to go. And there are a lot more options, including partition scheme, file system, and cluster size. You also have more boot options, including MS-DOS and FreeDOS.

Understanding long folder and file names in Windows

Did you know that there is a limit to how long a file name can be? Did you know that the character limit also includes the folder name? And what about the Path? Let's take a look at the long folder and file names in Windows.

Understanding long folder and file names in Windows

I recently recovered files from several Windows computers for a client. He asked that I put them onto an external drive for storage. But I ran into a problem, file names that were too long.

Now allot of people think that the maximum length for the name of a File in Windows is 255 characters. But that is not correct. Technically, Folders are also a File but with a unique attribute designating it as a Folder.

And Folder and Sub-Folder names are also included in the full name of the File. So, the File's actual name consists of the Folder and Sub-Folder name(s) as well. All of these names factor into the 255 character limit.

So, when you include the names of the Folder, Sub-Folder(s), and File together, it is called a Path. A Path is a string of Folder, Sub-Folder, File, backslashes, and sometimes a volume name (drive letter).

The Path to a Folder or File on your computer will contain a drive letter (C:\, D:\, etc.) at the beginning. A Path to a network Folder and File will contain just two (2) backslashes (\\) at the beginning. And a Path can be up to 260 characters in length.

For example, let's say you have a file named 'My Text File.txt' in a Sub-Folder of your Documents Folder called 'Simply Text Files'. The complete Path for it would be:

C:\Users\username\Documents\Simply Text Files\My Text File.txt

The name of the File itself is only 16 characters, but with the name of the Folder and Sub-Folders included, it is 59 characters. And the complete Path is 62 characters. And yes, spaces do count as characters.

So, getting a long name error does not necessarily mean the actual name of the File is too long; it just means the length of the names of the Folder, Sub-Folder(s), and File altogether is. The simplest solution is to shrink the Folder or Sub-Folder(s) name(s) and leave the actual File name alone.

Now in my case, I was dealing with a couple of thousand File names that were too long. And I could not determine where all of the Files were on the drives. So, I went looking online for a program that could help me with this issue.

What I found was a neat little program called TLPD (Too Long Path Detector).
Too Long Path Detector folder selection screen
It showed me where all of the long file names were. And lucky for me, they were grouped in Folders and Sub-Folders with reasonably long names.

So, using the output from TLPD,
Too Long Path Detector text file output
I started shortening the Folder and Sub-Folder names. I kept running TLPD until I had all of the Paths down to under 225 characters. It was then I was able to copy all of the Files to an external drive for storage.

How to get to and use the Run dialog box in Windows

Updated October 19, 2021

There may be a time when you need to run a program in Windows that does not have a shortcut to it. Usually, it is a program that is not often used. So here is how to start an application using the Run dialog box.

How to get to and use the Run dialog box in Windows

The Run dialog box is for running programs that you don't necessarily use that often and does not have a shortcut. It may be a system application or a downloaded installation program.

There are two (2) ways to use the Run dialog box. If you know the name of the application you want to start, you can usually type it into the Run dialog box and click OK.

For example, if you have Microsoft Word installed on your computer, you can type Winword (the actual name of Microsoft Word) in the Run dialog box and click OK. Microsoft Word will then start. That is because the program directory is in the Path (it is an environmental variable). The Windows system directory is in the Path by default.

If your program is not in the Path, you will have to click on Browse and manually find the program you want to start. Once you have the name of the program you want to start in the Run dialog box, click on OK.

Now bringing up the Run dialog box is relatively simple. The way you go about getting to it is different in each version of Windows, but there is one keyboard shortcut that works for all versions.

Windows logo key Windows logo key + R

Here are all of the ways to access the Run dialog box in the different versions of Windows.

How to bring up the Run dialog box in Windows 7

The Run dialog box in Windows 7

  1. Left-click on the Start menu.
  2. Navigate to All Programs > Accessories.
  3. Left-click on Run.

Or

  1. Left-click on the Start menu.
  2. Type Run in the search box right above the Taskbar.
  3. Left-click on Run in the search results.

Or

  1. Press the Windows logo key Windows logo key + R.

How to bring up the Run dialog box in Windows 8.1

The Run dialog box in Windows 8.1

  1. Left-click on the Start button.
  2. When the Start screen appears, type Run. It will automatically bring up the Search dialog box with Run in the search field, and the results will appear below it.
  3. Left-click on Run.

Or

  1. Right-click on the Start button to bring up the Power User menu.
  2. Left-click on Run.

Or

  1. Press the Windows logo key Windows logo key + X to bring up the Power User menu
  2. Press the R key.

Or

  1. Press the Windows logo key Windows logo key + R.

How to bring up the Run dialog box in Windows 10

The Run dialog box in Windows 10

  1. Type Run in the Search box (Cortana) on the right side of the Start button.
  2. Left-click on Run in the search results.

Or

  1. Left-click on the Start menu.
  2. Scroll down the list of programs until you come to the Windows System folder.
  3. Left-click on the Windows System folder to expand it.
  4. Left-click on Run.

Or

  1. Right-click on the Start menu to bring up the Power User menu.
  2. Left-click on Run.

Or

  1. Press the Windows logo key Windows logo key + X to bring up the Power User menu
  2. Press the R key.

Or

  1. Press the Windows logo key Windows logo key + R.

How to bring up the Run dialog box in Windows 11

The Run dialog box in Windows 11

  1. Left-click on the magnifying glass to the right of the Start button to bring up the Search dialog box.
  2. Type Run into the Search box and left-click on the app Run.

Or

  1. Left-click on the Start button to bring up the Start menu.
  2. In the upper right-hand corner of the Start menu, left-click on All apps.
  3. Scroll down the list of programs and left-click on Windows Tools.
  4. Left-click on Run.

Or

  1. Right-click on the Start menu to bring up the Power User menu.
  2. Left-click on Run.

Or

  1. Press the Windows logo key Windows logo key + X to bring up the Power User menu
  2. Press the R key.

Or

  1. Press the Windows logo key Windows logo key + R.

Security and your computer

With the recent outbreak of data encrypting malware, keeping your computer secure is a significant issue. There isn't just one thing that you can do to secure your computer, but multiple. So here are few ways to make sure your computer is as secure as possible.

Security and your computer

Operating system security

Is your device up to date?

Keeping your operating system up to date is essential for security. Microsoft does a pretty good job of issuing patches and updates for Windows, especially when they discover a new vulnerability.

But if you are not keeping your OS up to date with patches and updates, you could be making your computer vulnerable to any current or future exploits. And if you are still using an OS like Windows XP or Windows Vista that does not have support from Microsoft anymore, you need to upgrade your OS.

If you have turned off Windows Update, turn it back on. And if Windows Update is not working correctly, here is how to fix it.

Troubleshooting Windows Update problems

Anti-virus security

Is your anti-virus up to date?

A good anti-virus program is essential for security. You can get an anti-virus program with all of the bells and whistles (firewall, identity protection, custom browser, etc.). Or you can get one with just a virus scanner. Either way, you have to have some form of protection.

Now Microsoft includes an anti-virus program inside of Windows (Windows Defender), and it works reasonably well. But there are plenty of other anti-virus programs out there, including a security suite your Internet Service Provider (ISP) may provide.

But if you want to know how they all stack up, go over to the independent IT security institute AV-Test. They test all of the most popular anti-virus programs regularly. They cover multiple platforms (Windows, Mac, and Android).

AV-TEST | Antivirus & Security Software & AntiMalware Reviews

I like using a layered approach to my computer security, using different programs that complement each other.

How to use layered security to protect your computer

Web browser security

Is your web browser up to date?

Having a secure web browser is mandatory in my book. And since web browsers have become targets for online exploits, you need to know your browser is safe and secure.

I like the fact that Google Chrome and Mozilla Firefox check for updates when you start them up. And they also get updated more frequently than Internet Explorer, or Microsoft Edge does.

There are two (2) things I like to do to my browsers to improve their security:

  1. Disable Adobe Flash. Hackers have been exploiting Adobe Flash for years now by getting bogus Flash ads into third-party ad networks.
  2. Anti-virus. I prefer an anti-virus program that integrates into the browser using an extension or add-on.

And since ads also are becoming an issue, I will sometimes recommend using an ad blocker like Adblock Plus. There is a version for almost every browser.

E-mail security

Is your e-mail secure
Is your e-mail secure?

E-mail is currently one of the most popular ways to spread malware. You have to be very careful with what e-mail attachments you open. Knowing how to spot a piece of spam e-mail is essential.

How to spot a piece of spam e-mail

I use the anti-spam program Mailwasher to filter out the junk and spam from my e-mail. I also have configured my anti-virus program to monitor Mailwasher for viruses, even though Mailwasher, by default, renders all mail in text format and cannot open attachments.

But when Mailwasher does download a suspicious attachment, my anti-virus program will scan it and flag it as such. I use the Pro version, but Mailwasher does have a free version that is sponsored by advertising.

Eliminate spam from your inbox with MailWasher

Password security

Are your passwords secure?

Reusing passwords is a big security no-no. It's nice to remember your passwords easily, but it can be a nightmare if someone were able to guess them. That is why you do not want to use the same password over and over again.

If you are like me, coming up with a unique password for every different place you log into can be hard. Luckily there are password generators that can make it easy to create secure passwords. One of my favorites is the Norton Identity Safe Password Generator.

Norton Identity Safe Password Generator

Using the Norton Identity Safe Password Generator, you can create passwords up to 32 characters long that have mixed case letters, numbers, and punctuation with no similar characteristics.

Now that you have generated a secure password, why not test it out. Gibson Research Corporation (GRC) has a bunch of cool security tools on their website, one of them being Password Haystack.

Password Haystack

Password Haystack is a brute force password calculator that will tell you how long it will take to guess any password. Go ahead and enter your chosen password and see how long it can take to hack it. You may be surprised at how little time it can take to crack it.

Free computer diagnostics

Repairing a PC can sometimes be expensive, and that is why we offer free basic in-shop diagnostics. Give one of our professional and experienced technicians a call at (602) 795-1111, and let's see what we can do for you.

Check out our reviews

Geeks In Phoenix LLC, BBB Business Review

Customer service is #1

Here at Geeks in Phoenix, we take pride in providing excellent customer service. We aim to give the highest quality of service  from computer repair, virus removal, and data recovery.

Bring your computer to us and save

Repairing a computer can be time-consuming. That is why we base our in-shop service on the time we work on your computer, not the time it takes for your computer to work! From running memory checking software to scanning for viruses, these are processes that can take some time.

Contact us

If you have any questions, please feel free to give us a call at (602) 795-1111  and talk with one of our Geeks. Or you can send us a message from our contact page contact page , and one of our Geeks will get back to you as soon as possible. Or you can stop by and see us. Here are our hours and location.

Like Geeks in Phoenix on Facebook

Follow Geeks in Phoenix on Twitter

Watch Geeks in Phoenix on YouTube