Have you ever wondered how to create a blog, content management system (CMS), or e-commerce website? You can do just that and more with the Microsoft Web Platform. You can create your own web app using WordPress (blog), DotNetNuke (CMS), or nopCommerce (e-commerce), to name a few. And, best of all, it's all free.
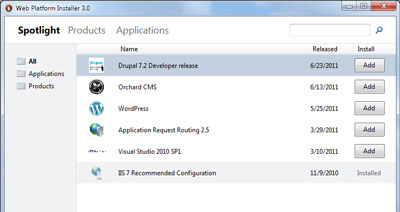
Microsoft Web Platform Installer - Spotlight View
From web server (Internet Information Services), database server (SQL Server Express), programming tools like (Visual Studio Community) and lots of apps to work with, Microsoft Web Platform has it all. And did I mention that they are all free?
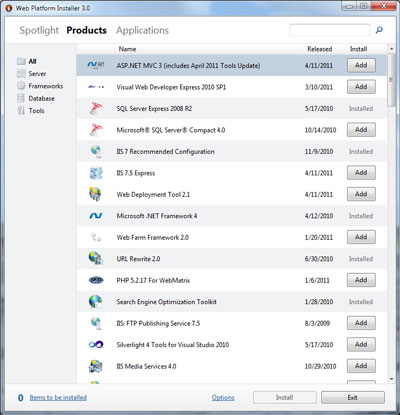
Microsoft Web Platform Installer - Products View
You can use Visual Studio Community to customize any free ASP.NET and PHP web apps available in the Windows Web App Gallery. And if your app needs a database, you can install SQL Server Express. There are also tools for Windows Azure.
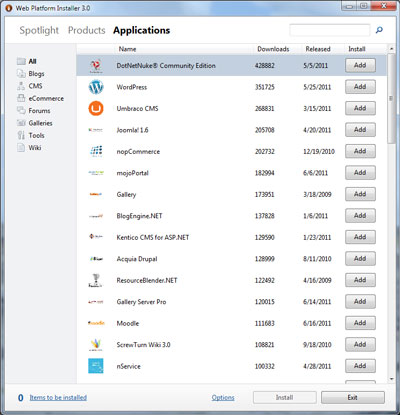
Microsoft Web Platform Installer - Applications View
All of the programs included in the Microsoft Web Platform are installed on your local system. You build and test your web app on the Internet Information Services (IIS) installed on your local system and then upload it to your remote IIS server when you're finished. If you don't know the platform of your web server, you will need to contact your hosting company to find out. The IIS is more commonly referred to as the Windows platform.
Here's a quote about the Microsoft Web Platform Installer and some of the programs available from the Microsoft site:
The Microsoft Web Platform Installer (Web PI) is a free tool that makes getting the latest components of the Microsoft Web Platform, including Internet Information Services (IIS), SQL Server Express, .NET Framework, and Visual Studio Community easy. The Web PI also makes it easy to install and run the most popular free web applications for blogging, content management, and more with the built-in Windows Web Application Gallery.
Web Server
Install the latest version of IIS, including the latest IIS Web extensions like IIS Media Services.
Framework
Install the latest version of the .NET Framework. This includes everything you need to work with ASP.NET.
Database
Install the latest version of SQL Server Express. This includes both the database engine and tools.
Tools
Install the latest version of Visual Studio Community, Our full-featured free web development tool.
Web Apps
Install free popular ASP.NET and PHP web apps such as Umbraco and WordPress. Browse the Windows Web Application Gallery.
Extras
Web PI also includes the latest community version of PHP for Windows.
For more information on the Microsoft Web Platform Installer, check out the following link:
Microsoft Web Platform Installer
a9a31a35-0891-4bc0-a9e3-631a87b3ab5f|0|.0|96d5b379-7e1d-4dac-a6ba-1e50db561b04