If you haven't heard by now, Windows XP has come to the end of its life. After April 8th, 2014, Microsoft will no longer support Windows XP, which means no more security patches or hotfixes. Using Windows XP as a primary operating system is no longer an option. But you can still use your old version of Windows XP and the installed programs on a newer version of Windows using a Virtual Machine (VM).
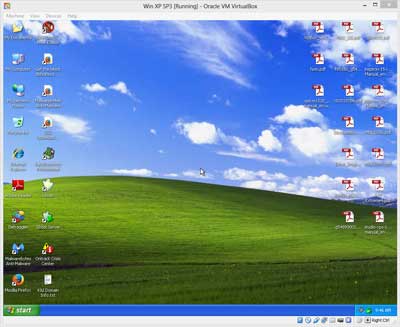
A physical-to-virtual migrated version of Windows XP inside of VirtualBox running on Windows 8
The problem most people are having with going to a new version of Windows is that they have software installed on Windows XP that they cannot install or will not run on a more recent version of Windows. Either the software came pre-loaded, they lost the installation media, or the company went out of business. If you're one of these people, there is hope.
I've written a few times about using VM's to run different operating systems on the same computer. You create a virtual hard drive and install your operating system inside of it. You can also create a virtual hard drive from your physical hard drive. This way, you can upgrade to a newer version of Windows and still access your old Windows XP programs.
Note: With the change of hardware from physical-to-virtual, Windows will need to be re-activated. Physical-to-virtual hard drive migration of a Windows installation is a valid function for customers with full retail copies of Windows XP, Windows Vista, Windows 7, and Windows 8.
To do this, you will need two programs, Microsoft's Windows Sysinternals Disk2vhd and Oracle's VirtualBox. Both programs are free for personal use, and the links to the software are below. The first thing to do is create a virtual hard drive from your existing physical hard drive. Startup Disk2vhd, and you get only a straightforward menu. Select 'Prepare for use in Virtual PC' and 'Use Volume Shadow Copy' and deselect 'Use Vhdx'. Next, select the location for the virtual hard drive file. For the best performance, you should create the virtual hard drive on a different physical drive (network or external).
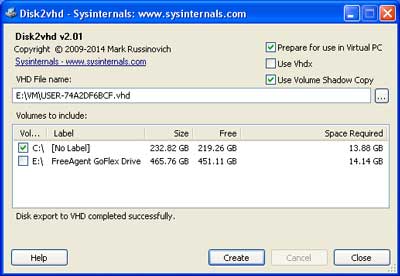
The Disk2vhd main screen with options
Now it's time to install VirtualBox on the new system. Remember also to download and install the VirtualBox Guest Extensions. Once installed, copy over the virtual hard drive you created with Disk2vhd. Next, you create a new VM with settings (operating system, memory, etc.) based on your old computer. You then will be prompted to create a new virtual drive or use an existing one. Browse and select the virtual drive that you created.
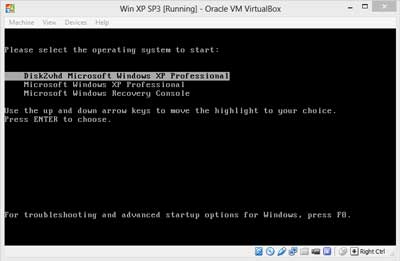
Modified boot menu in physical to virtual migrated version of Windows XP
The first time you start the VM, it will find the new VM hardware and try to install drivers for them. If it fails to find drivers, just go to the 'Devices' tab on the top menu and select 'Insert Guest Additions CD image'. Open Windows Explorer and browse to the virtual drive named VBOXADDITIONS and run VBoxWindowsAdditions. This will install the keyboard, video, and mouse drivers. You will have to tweak the settings to get it run flawlessly. If you're migrating a version of Windows XP, I recommend disabling access to the internet since there are no longer security updates and patches for Windows XP after 4/8/14.
For more information on VirtualBox or Disk2vhd, just follow the links below.
Oracle VM VirtualBox
Sysinternals Disk2vhd
97790a38-506e-4a06-96aa-73106bee2175|0|.0|96d5b379-7e1d-4dac-a6ba-1e50db561b04