Geeks in Phoenix

Geek Blog


How to create a secure environment with Windows Sandbox

In an age where cybersecurity threats are constantly evolving, creating a secure environment to test applications or run risky software is essential. Windows Sandbox provides a lightweight virtual machine that allows you to run untrusted applications in isolation. In this article we will show you how to create a secure environment with Windows Sandbox.

How to create a secure environment with Windows Sandbox

Before diving into the setup process, it's important to understand what Windows Sandbox is. Essentially, it is a temporary, lightweight, and isolated desktop environment that allows you to run software without fear of affecting your primary operating system.

Windows Sandbox is designed for testing, not for running mission-critical apps or for long-term use. The changes made in the Windows Sandbox environment are discarded once the sandbox is closed, ensuring that your primary system remains unaffected.

System requirements

To use Windows Sandbox, ensure your system meets the following prerequisites:

  • Windows version: Professional or Enterprise versions of Windows (10/11). The Home version is not supported.
  • Virtualization support: Your PC needs to have virtualization enabled in the BIOS/UEFI settings. Most modern CPUs support this feature (Intel VT-x or AMD-V).
  • RAM: At least 4 GB of RAM is required, but 8 GB is recommended for performance.
  • CPU: A minimum of two (2) cores is needed, with a 64-bit processor.
  • Disk space: At least 1 GB of free disk space is required.

Enabling Windows Sandbox

To get started, you need to enable Windows Sandbox on your system using the Control Panel:

  1. Open a Run dialog box by pressing the Windows logo key Windows logo key + R, type Control, and then left-click on OK to bring up the Control Panel.
  2. Left-click on either Programs (category view) and then Programs and Features or Programs and Features (large/small icons view).
  3. In the left column, left-click on Turn Windows features on or off.
  4. The Windows Features dialog box will appear. Scroll down the list, place a check mark next to Windows Sandbox,
    Windows Features dialog box with Windows Sandbox selected
    and then left-click OK. Windows will then install the required files for Windows Sandbox.

You may need to restart your computer for the changes to take effect.

Launching Windows Sandbox

Once the installation is complete, you can launch Windows Sandbox:

  1. Left-click on the Start Windows logo key button to bring up the Start menu.
  2. In the upper right-hand corner of the Start menu, left-click on All apps.
  3. Scroll down the list of programs and left-click on Windows Sandbox.

After a brief loading period, you will see a clean Windows desktop, similar to your primary system but in a contained environment.

Customizing Windows Sandbox

While Windows Sandbox operates perfectly out of the box, there are ways to customize it to fit your needs. You can create a configuration file that enables features such as clipboard sharing, folder sharing, and more.

  1. Create a configuration file: Use a simple text editor to create a configuration file with the extension .wsb. Here’s a sample XML configuration file:
    <Configuration>
    <Networking>enable</Networking>
    <Clipboard>enable</Clipboard>
    <MappedFolders>
    <MappedFolder>
    <HostFolder>C:\Users\YourUsername\Folder</HostFolder>
    <SandboxFolder>C:\Users\YourUsername\Desktop\Folder</SandboxFolder>
    <ReadOnly>true</ReadOnly>
    </MappedFolder>
    </MappedFolders>
    </Configuration>
  2. Save the file: Save it with a .wsb extension so you can double-click it to launch the Windows Sandbox with your desired settings.

For more detailed information on configuring Windows Sandbox, please refer to the following article.

Use and configure Windows Sandbox

Using Windows Sandbox securely

  • Transfer Files: You can transfer files to the sandbox by copying them from your primary system. If you have set up folder mappings, this process becomes easier.
  • Testing Applications: Download or install the software you wish to test. Since the environment is isolated, any malware or viruses will not affect your primary OS.
  • Internet Access: Windows Sandbox has internet access by default, allowing you to test various online applications safely.

Closing Windows Sandbox

When you are finished, simply close the Windows Sandbox window. All data, applications, and changes made during the session will be discarded, ensuring your primary operating system remains untarnished.

Benefits of Using Windows Sandbox

  • Isolation: Applications run in a completely isolated environment, preventing them from interacting with the host OS.
  • No permanent changes: All changes made in the Windows Sandbox are temporary and discarded when the sandbox is closed.
  • Easy setup: It’s easy to enable and use without needing complex configurations.
  • Cost-effective: It eliminates the need for third-party virtual machines or additional software.

Limitations

While Windows Sandbox is powerful, it does have some limitations. It does not support running 32-bit applications on 64-bit Windows, and you cannot run multiple instances concurrently. Additionally, it is not intended for long-term usage or permanent installations of applications.

In conclusion, Windows Sandbox is an effective tool for creating a secure environment on Windows. By following the steps outlined, you can safely test applications and explore various software without compromising your primary system’s integrity. This feature exemplifies built-in security measures that make Windows not just a powerful operating system but also a secure one for both personal and professional use.

Running your old version of Windows XP in a Virtual Machine

If you haven't heard by now, Windows XP has come to the end of its life. After April 8th, 2014, Microsoft will no longer support Windows XP, which means no more security patches or hotfixes. Using Windows XP as a primary operating system is no longer an option. But you can still use your old version of Windows XP and the installed programs on a newer version of Windows using a Virtual Machine (VM).

A physical to virtual migrated version of Windows XP inside of VirtualBox running on Windows 8
A physical-to-virtual migrated version of Windows XP inside of VirtualBox running on Windows 8

The problem most people are having with going to a new version of Windows is that they have software installed on Windows XP that they cannot install or will not run on a more recent version of Windows. Either the software came pre-loaded, they lost the installation media, or the company went out of business. If you're one of these people, there is hope.

I've written a few times about using VM's to run different operating systems on the same computer. You create a virtual hard drive and install your operating system inside of it. You can also create a virtual hard drive from your physical hard drive. This way, you can upgrade to a newer version of Windows and still access your old Windows XP programs.

Note: With the change of hardware from physical-to-virtual, Windows will need to be re-activated. Physical-to-virtual hard drive migration of a Windows installation is a valid function for customers with full retail copies of Windows XP, Windows Vista, Windows 7, and Windows 8.

To do this, you will need two programs, Microsoft's Windows Sysinternals Disk2vhd and Oracle's VirtualBox. Both programs are free for personal use, and the links to the software are below. The first thing to do is create a virtual hard drive from your existing physical hard drive. Startup Disk2vhd, and you get only a straightforward menu. Select 'Prepare for use in Virtual PC' and 'Use Volume Shadow Copy' and deselect 'Use Vhdx'. Next, select the location for the virtual hard drive file. For the best performance, you should create the virtual hard drive on a different physical drive (network or external).

The Disk2vhd main screen with options

Now it's time to install VirtualBox on the new system. Remember also to download and install the VirtualBox Guest Extensions. Once installed, copy over the virtual hard drive you created with Disk2vhd. Next, you create a new VM with settings (operating system, memory, etc.) based on your old computer. You then will be prompted to create a new virtual drive or use an existing one. Browse and select the virtual drive that you created.

Modified boot menu in physical to virtual migrated version of Windows XP

The first time you start the VM, it will find the new VM hardware and try to install drivers for them. If it fails to find drivers, just go to the 'Devices' tab on the top menu and select 'Insert Guest Additions CD image'. Open Windows Explorer and browse to the virtual drive named VBOXADDITIONS and run VBoxWindowsAdditions. This will install the keyboard, video, and mouse drivers. You will have to tweak the settings to get it run flawlessly. If you're migrating a version of Windows XP, I recommend disabling access to the internet since there are no longer security updates and patches for Windows XP after 4/8/14.

For more information on VirtualBox or Disk2vhd, just follow the links below.

Oracle VM VirtualBox
Sysinternals Disk2vhd

Try Windows 8 for free with Windows 8 Consumer Preview

Note: the Windows 8 Consumer Preview program expired on 8/1/12 and is no longer available.

You would think that doing computer repair for a living, the last thing I would want to try out is a beta operating system. But I have to admit that I love playing around with new operating systems (been doing it since Windows 95). And now it's time to try out Windows 8. And you can try it out, too, for free, with the Windows 8 Consumer Preview.

Desktop interface inside of the Windows 8 Consumer Preview

The first thing you will notice is that the Start button is gone. It's been replaced by a row of charms that appears when you swipe away from the right side of the screen. And the Start menu from previous versions of Windows is also gone, replaced by the Metro interface. You can access it by clicking on the Start charm on the ride side of the screen or pressing the Windows logo key.

Metro interface inside of the Windows 8 Consumer Preview

The Metro interface inside Windows 8 is more touch screen intensive, incorporating gestures like pinch/stretch and press/hold. But with a little customizing, I made the Metro interface work for me on my desktop computer without a touch screen (I'm a big Windows logo key user). Here's a quote from the Microsoft website:

It's Windows reimagined and reinvented from a solid core of Windows 7 speed and reliability. It's an all-new touch interface. It's a new Windows for new devices. And it's your chance to be one of the first to try it out.

See what's new

Swipe, slide, and zoom
Touch a full-powered PC. It's fast and it's fluid. Take natural, direct, hands-on control.

Apps, front and center
Apps in Windows 8 work together to get things done faster. Get them from the Windows Store.

Your Windows, everywhere
Windows 8 can connect you to your files, photos, people, and settings, wherever you sign in.

Wall-to-wall web
Internet Explorer 10 Consumer Preview brings you immersive web browsing on screens big and small.

The familiar, made better
Still devoted to your mouse and keyboard? Windows 8 makes the tried-and-true feel brand new.

Geek note:
Windows 8 Consumer Preview is a beta version of Windows 8. Fun to play around with but in no way should you use it in a production environment. It is recommended to install it on a virtual machine like VirtualBox or a non-production computer. And remember that some of the features and functions may not work correctly.

Run another operating system on your Windows computer with Oracle VirtualBox

Updated November 6, 2022

Have you ever wanted to try another operating system but did not want to have to erase your drive to do it? Maybe you have an app that will not work on the latest version of Windows? If so, then Oracle VirtualBox may be just what you are looking for.

Three different versions of Windows running in VirtualBoxes
Windows 8.1, Windows 10, and Windows 11 running inside of VirtualBoxes

VirtualBox is a virtualization program that allows you to run an operating system (OS) in a Virtual Machine (VM) environment. VMs emulate the most common hardware found in modern computers, including Trusted Platform Module (TPM) ver. 1.2 and 2 (Windows 11 requires TPM v2).

One of my favorite things is to try out different operating systems, like other versions of Linux, including Android-x86 and Wubuntu. I have used VMs for many years now to do just that and have found VirtualBox to be the one I use the most often.

Another thing I use VMs for is running legacy software on older operating systems. I have several programs that will only run on Windows XP, so I have a dedicated Windows XP VM just for these programs.

And you can configure a VM so it appears as a separate computer on your network. You can even map shared network folders and print to network printers. You can even have multiple monitors too.

A Windows 11 virtual machine using dual monitors
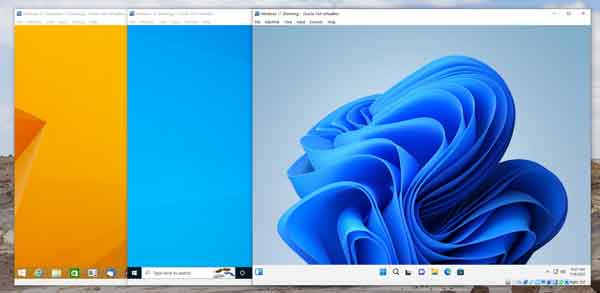
Windows 11 with dual monitors running inside of a VirtualBox

Creating a new VM is relatively simple, give it a name, select the operating system being installed, and the location of the installation media. You will need to know what amount of memory and disk space the operating system you are installing requires.

When it comes to creating a VM for another OS, it is the same as if you were installing the OS on physical hardware. If the OS you are installing requires a product key, like Windows, you will need it. Usually, when it comes to Windows, you can only use retail product keys, not Original Equipment Manufacturer (OEM) product keys.

VirtualBox currently runs on Windows 8.1 through Windows 11, Windows Server 2012 through 2022, macOS 10.15 through 12, Ubuntu 18.04 LTS, 20.04 LTS and 22.04, Debian GNU/Linux 10 (Buster) and 11 (Bullseye), Oracle Linux 7, 8 and 9, CentOS/Red Hat Enterprise Linux 7, 8 and 9, Fedora 35 and 36, Gentoo Linux, SUSE Linux Enterprise Server 12 and 15, openSUSE Leap 15.3 and Oracle Solaris 11.4.

With its flexibility in configuration, multiple monitor support, and support for 64-bit virtual machines (only on 64-bit host operating systems), it's my choice for VM. And did I mention that it's free? For more information on Oracle VirtualBox, follow the link below:

Oracle VirtualBox

Try Windows 8 for free with Windows 8 Developer Preview

By now, you have probability started hearing the buzz about Windows 8. Maybe it's the new interface, Metro, which brings touch screen ease of use and the simple tile look of the Windows 7 phone to the desktop. Or maybe it's the Metro apps, that with a connected Windows Live account, can be downloaded and used on any Windows 8 computer you login to. Or, my favorite, the improved multi-monitor options. But did you know you can try it out right now for free with the Windows 8 Developer Preview?

Login Screen inside of Windows 8Developer Preview
The login screen inside of Windows 8 Developer Preview. You slide the screen upwards to get to the username and password fields.

Windows 8 Metro Interface
The Metro interface inside of Windows 8 Developer Preview. You scroll from left to right to access the different categories of tiles.

Now I have to warn you that the Windows 8 Developer Preview is a pre-beta version of Windows 8. Fun to play around with but in no way should you use it in a production environment. And remember that some of the features and/or functions may not work properly.

Windows 8 Windows Explorer
The new look of Windows Explorer inside of Windows 8 Developer Preview. Windows Explorer now sports a ribbon style toolbar.

You can upgrade an existing version of Windows XP, Windows Vista or Windows 7. But be forewarned that you cannot uninstall this release. You can also create a multi-boot setup, with Windows 8 on a separate partition. I use Oracle's VirtualBox to run experimental operating systems like this. I downloaded to latest version and it already had pre-configured settings for Windows 8.

Here's a quote from the Windows 8 Developer website:

The Windows 8 Developer Preview is a pre-beta version of Windows 8 for developers. These downloads include prerelease software that may change without notice. The software is provided as is, and you bear the risk of using it. It may not be stable, operate correctly or work the way the final version of the software will. It should not be used in a production environment. The features and functionality in the prerelease software may not appear in the final version. Some product features and functionality may require advanced or additional hardware, or installation of other software.

Note: You can't uninstall the Windows 8 Developer Preview. To go back to your previous operating system, you must reinstall it from restore or installation media.

System Requirements

The Windows 8 Developer Preview works great on the same hardware that powers Windows Vista and Windows 7:

  • 1 gigahertz (GHz) or faster 32-bit (x86) or 64-bit (x64) processor
  • 1 gigabyte (GB) RAM (32-bit) or 2 GB RAM (64-bit)
  • 16 GB available hard disk space (32-bit) or 20 GB (64-bit)
  • DirectX 9 graphics device with WDDM 1.0 or higher driver
  • Taking advantage of touch input requires a screen that supports multi-touch
  • To run Metro style Apps, you need a screen resolution of 1024 X 768 or greater

Notes about installing the Windows 8 Developer Preview

A clean install is supported on all builds, but you can upgrade if you are installing a download without the developer tools. You will receive the full set of migration options when setup is launched in Windows. To dual-boot, you must first boot from media and choose an alternative partition.

For more information on the Windows 8 Developer Preview, just follow the links below:

Windows Dev Center

Free computer diagnostics

Repairing a PC can sometimes be expensive, and that is why we offer free basic in-shop diagnostics. Give one of our professional and experienced technicians a call at (602) 795-1111, and let's see what we can do for you.

Check out our reviews

Geeks In Phoenix LLC, BBB Business Review

This business is BBB Accredited

Customer service is #1

Here at Geeks in Phoenix, we take pride in providing excellent customer service. We aim to give the highest quality of service  from computer repair, virus removal, and data recovery.

Bring your computer to us and save

Repairing a computer can be time-consuming. That is why we base our in-shop service on the time we work on your computer, not the time it takes for your computer to work! From running memory-checking software to scanning for viruses, these are processes that can take some time.

Contact us

If you have any questions, please feel free to give us a call at (602) 795-1111  and talk with one of our Geeks. Or you can send us a message from our contact page , and one of our Geeks will get back to you as soon as possible. Or you can stop by and see us. Here are our hours and location.

Like Geeks in Phoenix on Facebook

Follow Geeks in Phoenix on Twitter

Watch Geeks in Phoenix on YouTube