Updated August 20, 2023
Do you want to clean up and optimize your computer but don't know where to start? Maybe you want to clean out all of the temporary Internet files for security purposes. Or clean up all of the temporary files from other applications to free up some space on your hard drive. You can do all of this and more for free with CCleaner.
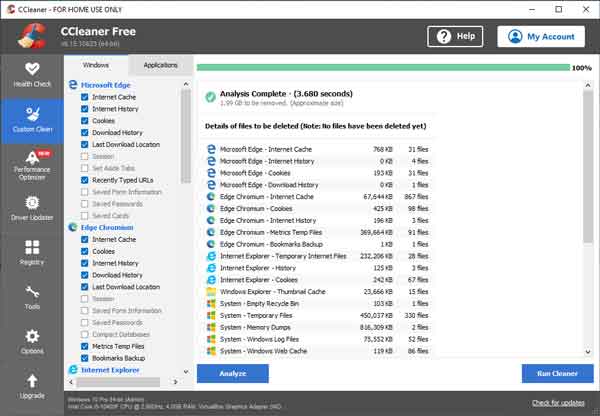
The Custom Clean tab inside of CCleaner
CCleaner from Piriform is a complete system optimization tool for Windows. It cleans out temporary Internet files from most browsers (Edge, Firefox, Chrome, etc.) and cleans out various Windows files (recent documents, temporary files, search autocomplete, etc.). It can also repair multiple areas of the registry.
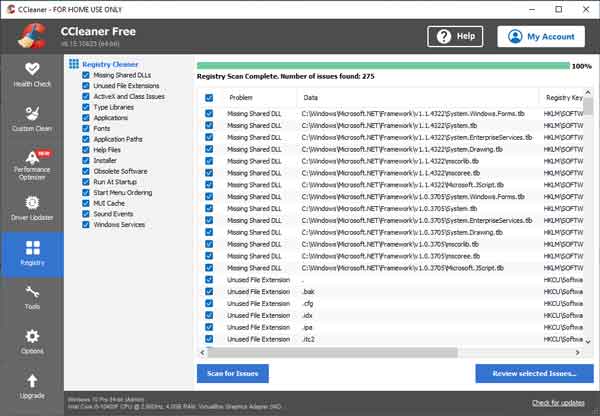
The Registry Cleaner tab inside of CCleaner
CCleaner can also rename, delete, repair, or uninstall programs listed in the Add/Remove Programs section in the Control Panel and the Apps & features section of the Settings app. It can even manage the system restore points. Here's a quote from Piriform's website:
CCleaner is our system optimization, privacy, and cleaning tool. It removes unused files from your system - allowing Windows to run faster and freeing up valuable hard disk space. It also cleans traces of your online activities, such as your Internet history. Additionally it contains a fully featured registry cleaner. But the best part is that it's fast (normally taking less than a second to run) and contains NO Spyware or Adware! Cleans the following:
Microsoft Edge
Cache, history, cookies, download history, form history, saved passwords, recently typed URLs.
Firefox
Cache, history, cookies, download history, form history, saved passwords, recently typed URLs.
Google Chrome
Cache, history, cookies, download history, form history, saved passwords, recently typed URLs.
Opera
Temporary files, history, cookies, super cookies, download history.
Safari
Temporary files, history, cookies, super cookies, form history.
Other Supported Browsers
K-Meleon, Rockmelt, Flock, Google Chrome Canary, Chromium, SeaMonkey, Chrome Plus, SRWare Iron, Pale Moon, Phoenix, Netscape Navigator, Avant and Maxthon.
Windows
Recycle Bin, Recent Documents, Temporary files, Log files, Clipboard, DNS Cache, Error Reporting, Memory Dumps, Jump Lists.
Registry Cleaner
Advanced features to remove unused and old entries, including File Extensions, ActiveX Controls, ClassIDs, ProgIDs, Uninstallers, Shared DLLs, Fonts, Help Files, Application Paths, Icons, Invalid Shortcuts and more...
Third-party applications
Removes temp files and recent file lists (MRUs) from many apps including Windows Media Player, eMule, 7-Zip, Microsoft Office, Nero, Adobe Acrobat, WinRAR, WinAce, WinZip and many more...
100% Spyware FREE
This software does NOT contain any Spyware, Adware or Viruses.
CCleaner is available in three editions: Free (no support), Professional / Professional Plus, and CCleaner Cloud (business). For more information on CCleaner, follow the links below:
Speed up your PC with CCleaner
CCleaner Cloud for business
49e8b430-f8e2-4512-a503-2c8a2c2c575b|1|5.0|96d5b379-7e1d-4dac-a6ba-1e50db561b04