Are you looking to boost your productivity on Windows 11? With its sleek design and improved functionality, Windows 11 offers a variety of features and tools that can help you work more efficiently. In this article, we'll explore some tips and tricks to help you get the most out of your Windows 11 experience while improving your productivity.
Start menu: The Start menu is Windows 11's central hub, and customizing it can help you access your most-used apps and files quickly. You can rearrange, resize, and pin tiles to the Start menu to create a personalized layout that suits your workflow. This can save you time and improve your efficiency by reducing the time spent searching for apps and files.
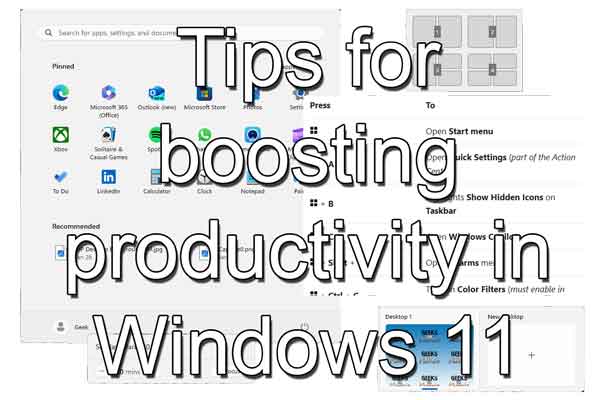
How to personalize the Start menu in Windows 11
Virtual desktops: One of the most useful features of Windows 11 is the ability to create and manage virtual desktops. This feature allows you to create multiple desktops for different tasks and switch between them easily. For example, you can have one desktop for work-related tasks and another for personal use.
This feature can help you stay focused and organized, reducing distractions and boosting productivity. Additionally, you can set a unique background for each desktop to quickly identify your current desktop.
How to create multiple desktops in Windows 11
- Left-click on the Task view icon
 on the Taskbar and select New desktop
- Open the programs you want to use on that desktop
- Left-click on the Task view icon again to switch between desktops
How to set the background for a desktop
- Right-click on the desktop you want to change and select Choose background
- Choose an image from the recent images or left-click on Browse photos to select an image
Keyboard shortcuts: Keyboard shortcuts are a quick and easy way to perform tasks in Windows 11 without having to navigate through menus and options. Learning a few essential keyboard shortcuts can save you time and boost your productivity. For example, press the Windows logo key  + D to minimize all windows and go to the desktop, or press the Windows logo key + E to open File Explorer.
Windows logo key shortcuts for Windows 11
My favorite left-hand Windows keyboard shortcuts
You can create keyboard shortcuts for items on your Desktop.
Everything you wanted to know about Windows shortcuts
You can also create custom keyboard shortcuts using the Keyboard Manager app inside the free Microsoft PowerToys.
Free Microsoft PowerToys for Windows 10 and Windows 11
Focus assist: Focus assist is a feature that blocks notifications and alerts while you're working on a task, reducing distractions and helping you stay focused. You can customize Focus assist settings to allow specific notifications or set it to turn on automatically during specific times or when you're presenting. This can help improve your productivity by reducing interruptions and allowing you to focus on the task at hand.
When you enable Focus assist, a timer will appear on the screen, the do not disturb button will turn on, apps in the Taskbar will not flash to get your attention, and badge notifications in the Taskbar will be turned off. There are several ways to start Focus assist in Windows 11.
How to start Focus assist from the Notiification center
- Left-click on the Notification icon
 (bell) on the right end of the Taskbar
- Adjust the length of time if you like, and then left-click on the Focus button.
How to start Focus assist from Settings
- Left-click on the Start button to bring up the Start menu.
- In the list of pinned apps on the Start menu, left-click on Settings.
- Left-click on the System category in the left-hand column.
- Scroll down the right-hand column and left-click on Focus.
How to start Focus assist from the Clock app
- Left-click on the Start button
 to bring up the Start menu.
- In the upper right-hand corner of the Start menu, left-click on All apps.
- Scroll down the list of programs and left-click on Clock.
Snap layouts and Snap groups: Windows 11 includes a new feature called Snap layouts and Snap groups that makes it easier to organize and manage multiple windows on your screen. Snap layouts allow you to quickly arrange your windows in predefined layouts, while Snap groups let you save and restore groups of windows for specific tasks. This can help you work more efficiently by reducing the time spent resizing and rearranging windows.
How to open Snap layouts
To open the Snap layout box, select the open program window and do either:
- Press the Windows logo key + Z
or
- Hover your mouse cursor over the Minimize or Maximize button
When you Snap every space with selected windows, this then becomes a Snap group.
Taskbar: The Taskbar in Windows 11 is more customizable than ever. It lets you pin your most-used apps and files for quick access and show only the apps you need, reducing clutter and improving productivity.
You can also easily add an existing shortcut to the Taskbar by right-clicking on almost any shortcut on the Start menu or Desktop and selecting Pin to taskbar. Additionally, you can use the Taskbar to access the Start menu, search, and virtual desktops, making it a central hub for your workflow.
Widgets: Windows 11 includes a new Widgets feature that provides quick access to news, weather, and other information. You can customize the Widgets to show only the information you need, making them useful tools for staying up-to-date on the latest news and events. This can help improve your productivity by reducing the time spent searching for information.
In conclusion, there are many ways to improve productivity on Windows 11. By using virtual desktops, customizing your Start menu, using keyboard shortcuts, enabling Focus assist, using Snap layouts and Snap groups, utilizing the Taskbar, and using the Widgets feature, you can work more efficiently and get more done in less time. By implementing these tips and tricks, you'll be well on your way to becoming a Windows 11 power user.
15bfc70f-d9d5-478c-b596-ce2b50708495|1|5.0|96d5b379-7e1d-4dac-a6ba-1e50db561b04