Are you having problems with a username and password not working in your favorite browser? Or maybe the credentials for a network resource. Here is how to edit or remove autofill passwords in Windows and your favorite browser.
Nothing is more frustrating than having your browser or Windows autofill a form with the wrong password. And since passwords are hidden, you are lucky if there is a preview button to check it before trying to use it. And if it is a password used by Windows, you may not even get prompted for a password.
And you know what is worst? A company website that uses multiple servers, and each has credentials that are saved. For example, say GIP runs a bank and we have five (5) servers that handle the website traffic.
Now the servers are networked, so when a user goes to the website, the server they get to is entirely random. One day it might be server1, the next day, server5. But the credentials (username/password) are the same for all servers since they are networked.
But your browser and Windows see things differently. They know each server as a separate website and will save usernames and passwords for each server. So as you check the autofill passwords, you may find multiple servers for a domain (server1.example.com, server2.example.com, etc.).
So in this article, I will show you how to edit or remove saved autofill passwords in Google Chrome, Microsoft Edge, Mozilla Firefox, and Windows. Each browser and Windows saves different types of information with their autofill functions.
Note: Edit autofill properties at your own risk. Remember that once any autofill data has been changed, there is no way of getting it back.
Before proceeding, you may need two (2) pieces of information, your current username and password / PIN, for logging on to your computer. Some browsers will require you to input your computer credentials before allowing you to edit the autofill passwords. Let's start with the browsers.
Edit or remove autofill passwords in Google Chrome
- Open Google Chrome and left-click on the three (3) vertical dots in the upper right-hand corner.
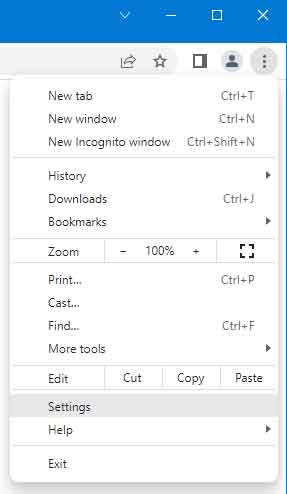
- From the menu that appears, left-click on Settings.
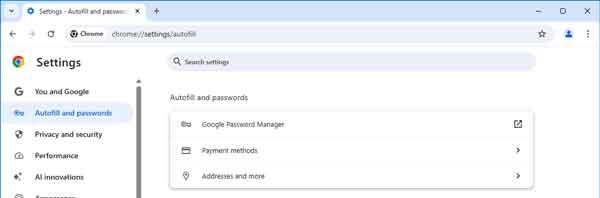
- On the Settings page, left-click on the Autofill category in the left-hand column.
The Autofill page is divided into Passwords, Payment methods, and Addresses. You can add, edit or remove any or all autofill data stored inside Chrome. If you left-click on Passwords, you will find all of the autofill passwords that have been saved.
It is here that you can configure Chrome to offer to save passwords and automatically sign in to a website or app. If autofill has saved any passwords, they will be listed below, and left-clicking on the Show password button (which looks like an eye) will reveal that password. Depending on your computer's security, you may be prompted for your username and password/PIN.
You will find the More actions button to the right of the Show password button (three vertical dots). If you left-click on it, a context menu appears with the following options; Copy password, Edit password, and Remove.
Edit or remove autofill passwords in Microsoft Edge
- Open Microsoft Edge and left-click on the three (3) horizontal dots in the upper right-hand corner.
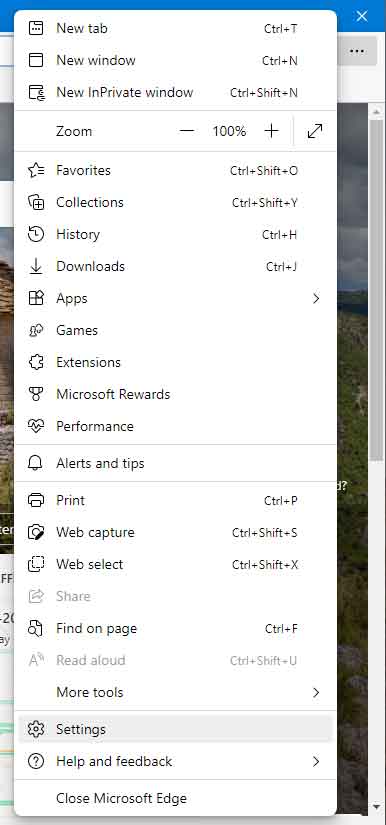
- From the menu that appears, left-click on Settings.
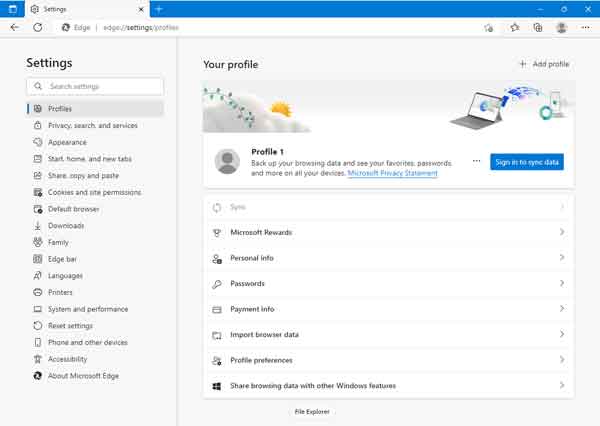
- On the Settings page, left-click on the Profiles category in the left-hand column.
In the right-hand column, there are several sections, but the only ones that contain autofill data are Personal info (name, address, custom fields, etc.), Passwords, and Payment info. Left-click on the Passwords section, and you will find all autofill passwords that have been saved.
It is here that you can configure Edge to offer to save passwords and automatically sign in to a website or app. If autofill has saved any passwords, they will be listed below, and left-clicking on the Show password button (which looks like an eye) will reveal that password. Depending on your computer's security, you may be prompted for your username and password/PIN.
You will find the More actions button to the right of the Show password button (three horizontal dots). If you left-click on it, a context menu appears with the following options; Change, Copy password, Edit, Delete and Ignore health.
Edit or remove autofill passwords in Mozilla Firefox
- Open Firefox and left-click on the three horizontal bars in the upper-right hand corner.
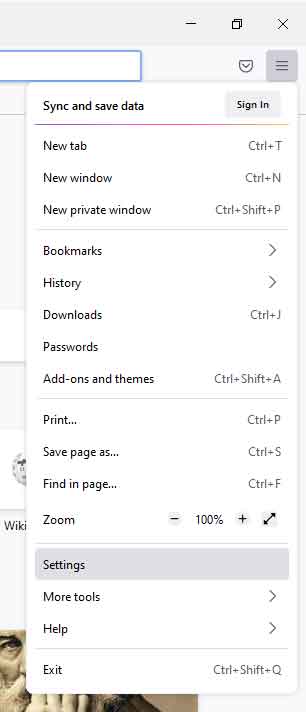
- From the menu that appears, left-click on Settings.
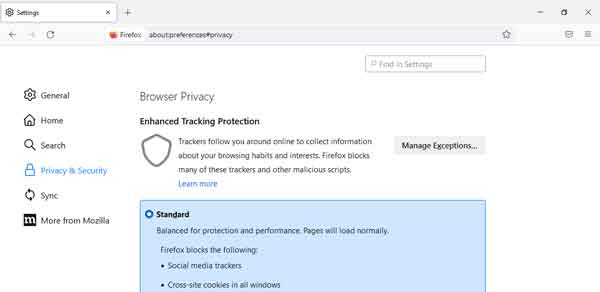
- From the Settings page, left-click on the Privacy & Security category.
Scroll down the right-hand column, and you will find two (2) sections; Logins and Passwords and Forms and Autofill. Logins and Passwords contain, you guessed it, user credentials. And Forms and Autofill include addresses and credit cards.
Under Logins and Passwords, you will find a button labeled Saved Logins. Left-click on it, and you will find a list in the left-hand column of all the autofill logins that Firefox has saved. Highlight a login in the left-hand column, and the details appear in the right-hand column.
Along the top of the login details are two (2) options; Edit and Remove. Below you will find the username and password. To the right of the password is a view button (which looks like an eye).
Edit or remove autofill passwords in Windows 10 or Windows 11
To edit saved autofill credentials in Windows 10 or Windows 11, you will need to use Credential Manager. It is pretty well hidden, and that is for a reason, as it contains all of your Windows and web credentials. So what are your Windows credentials? Let me explain.
Let's say you have two (2) computers on the same network and set up shared folders. When you set up the network share, Windows prompts you for the username and password for a user of that computer.
If you choose to have Windows save the network credentials, guess where it will get stored, the Credential Manager. This is also where login credentials are stored for accessing FTP sites with File Explorer.
Credential Manager is located in the Control Panel under User Accounts but can be quickly accessed by performing a search.
- Left-click on the magnifying glass to the right of the Start
 button to bring up the Search dialog box.
- In the Search dialog box, type Credential Manager.
- Left-click on Credential Manager (Control Panel) in the search results.
Or you can access Credential Manager from the Control Panel.
How to get to the Control Panel in Windows 10
How to get to the Control Panel in Windows 11
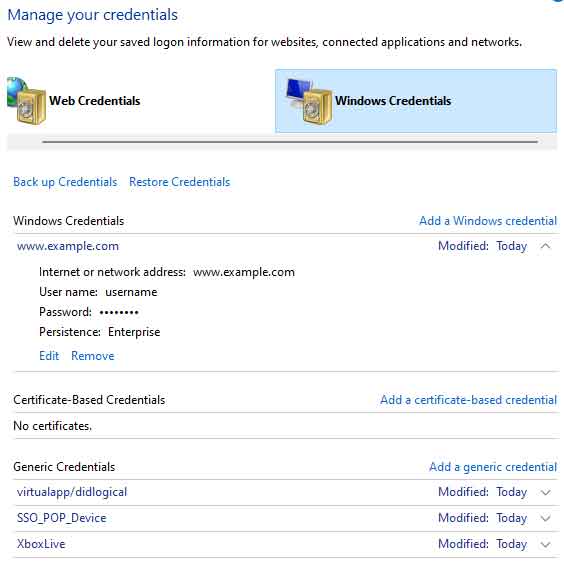
Once the Credential Manager is open, you will find two (2) types of data that are stored: Web Credentials and Windows Credentials. Before proceeding, it is recommended that you create a backup of your Windows credentials using the Back up Credentials link on that page. Remember that there will be some entries you do not recognize, so only edit credentials you are having problems with.