Do you like to right-click on a file or folder to show the context menu? Have you noticed that Windows 11 only displays a condensed context menu? Here is how to enable the complete context menu in Windows 11.
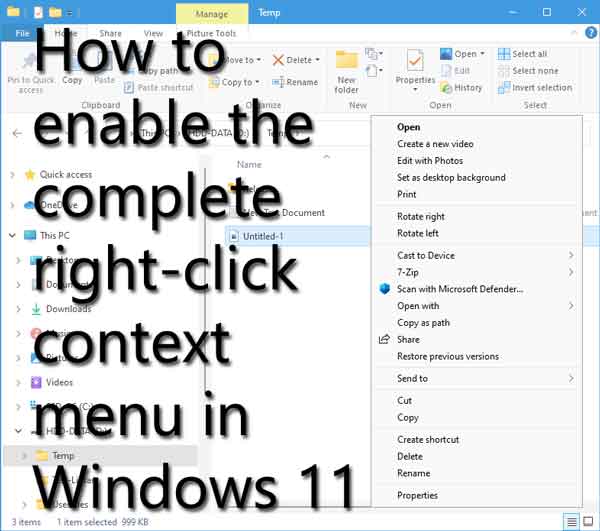
One of the most time-saving features in Windows 11 has to be the context menu that appears when you right-click on a file or folder. It usually displays all of the actions that can be performed, like open with or send to, and application-specific actions.
But Windows 11, by default, only shows a condensed context menu. The only way to get all the available actions to appear in the context menu is to select Show more options. But there is a way to enable the complete view of the context menu, but it does require editing the registry.
Note: Editing the registry incorrectly can cause your computer to run erratically or not even boot. It is highly recommended to backup your computer's registry before editing it. Creating a Restore Point will backup the current state of your computer, including the registry. If you do not feel comfortable editing the registry, please get in touch with a local computer technician for assistance.
How to backup and restore the registry in Windows 10 and Windows 11
How to enable the full right-click context menu inside of File Explorer
- Backup the registry (see the above article).
- Open the Registry Editor.
- Left-click on the Start button
 to bring up the Start menu.
- In the upper right-hand corner of the Start menu, left-click on All apps.
- Scroll down the list of programs and left-click on Windows Tools.
- Left-click on Registry Editor. If you're prompted for an administrator password or confirmation, type the password or provide confirmation.
- Navigate to the following registry key.
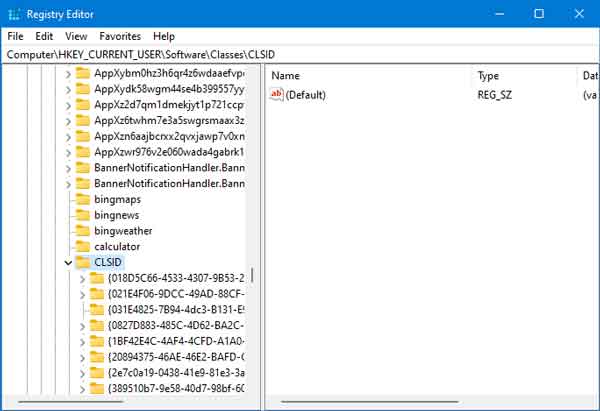
HKEY_CURRENT_USER\Software\Classes\CLSID
- Right-click on CLSID and select New > Key.
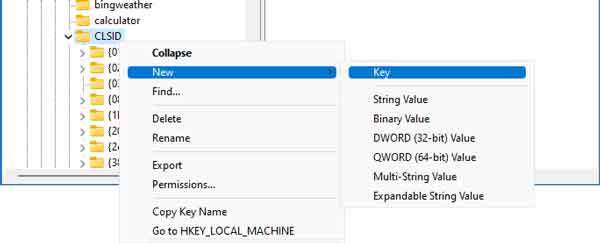
- Type or paste the following code in the name field, then press Enter.
{86CA1AA0-34AA-4E8B-A509-50C905BAE2A2}
- Right-click on {86CA1AA0-34AA-4E8B-A509-50C905BAE2A2} and select New > Key.
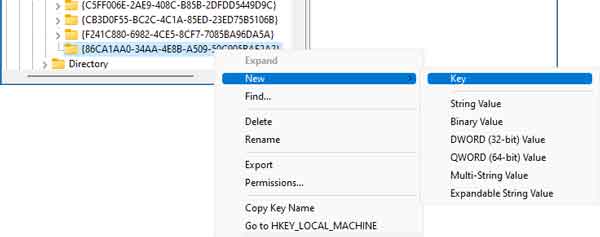
- Type or paste the following name in the name field, then press Enter.
InprocServer32
- In the right-hand column, you will find the default value listed under Data is (value not set).
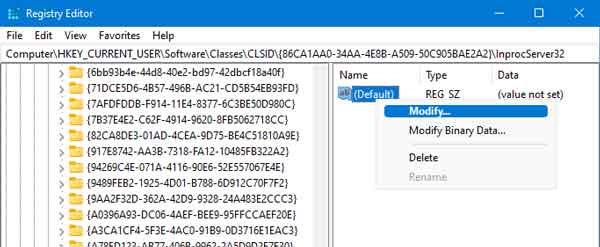
Right-click on the default value and select Modify.
- The Edit String dialog box will appear. Leave the Value data field blank and left-click on OK.
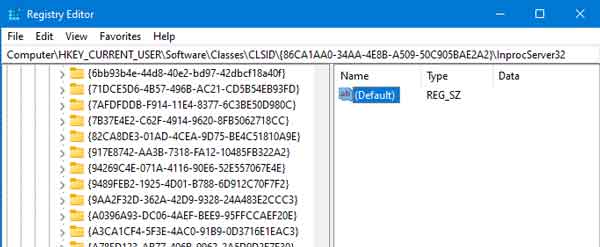
The default value for InprocServer32 should now be blank. Restart your Windows 11 computer for the registry changes to take effect.
d3f37367-886c-492e-b584-0c076ab1f5c7|1|5.0|96d5b379-7e1d-4dac-a6ba-1e50db561b04