Updated March 18, 2024
There may be a time when your desktop computer does not start. There could be a few reasons why it does not start. The first thing that comes to mind is a failed power supply. Here's how to test your desktop power supply.

Living in Phoenix, we have one thing that takes a toll on a desktop computer. No, it is not the heat; it is the dust. Since our environment here is so dry, we get a lot of dust.
How to clean the dust out of your computer
And since dust conducts electricity, power supplies tend to fail. Even if you routinely clean your desktop computer, it only has a life span of 3 to 5 years. So, if you press the power button, your desktop computer does not start, and there are no lights that light up, you may have a failed power supply. Now, if you do not feel comfortable working around electricity or inside your desktop computer, please contact a local computer technician.
How to test your desktop computer power supply
- Disconnect the power cord that comes from the outlet to the power supply.
- After you have disconnected the power cord, open up the case and touch any metal part of the power supply or case to discharge any remaining energy.
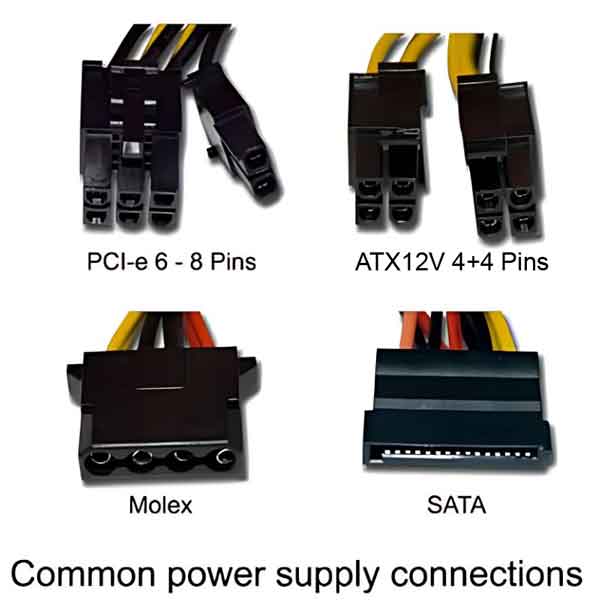
- Make a note or take pictures of the connections that lead from the power supply to the devices. Once you have documented all of the power leads, then remove all of the connectors (SATA, Molex, PCI-e, ATX, ATX12V, etc.) that lead to all of the different devices and motherboard.
- Create a jumper from a piece of thin gauge wire or paper clip.
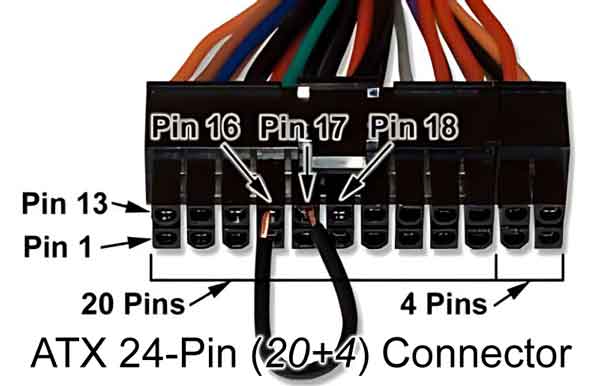
- Using the jumper you created,

connect Pin 16 to either Pin 17 or Pin 18 on the ATX 24-PIN (20+4) connector.
- Make sure the power supply is turned on and then plug the power cord back into the jack on the back of the power supply. If the power supply fan starts to run, the power supply has an output voltage and is in good condition. If the power supply fan does not spin, it is time to replace it.
If your power supply has failed, make a note of what type and how many connectors your existing power supply has.

Also, check the stated output of your existing power supply from the label on the side.
I also recommend that you use a tape measure or ruler to measure the dimensions of the power supply, (Width x Height x Depth) as you will want to get as close as possible to these for the replacement power supply.
dcb0a600-01ce-4d6c-b5ba-5c0c11fbce1b|0|.0|96d5b379-7e1d-4dac-a6ba-1e50db561b04