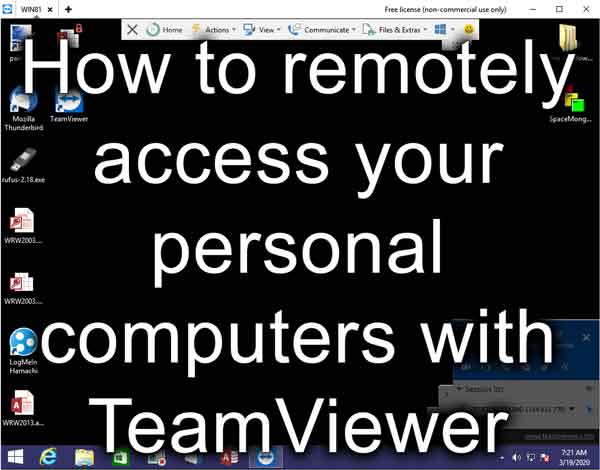
Do you have two personal computers and would like to remotely access one from the other? Looking for an effortless way to do it? You can do just that for free with the personal version of TeamViewer.
Remotely accessing a computer is pretty commonplace nowadays. It used to be pretty technically involved to set up remote connections between two computers. But with software like TeamViewer, setting up remote access between computers is pretty straightforward.
So what would be the main reason for using remote access software? First, it would be to access the software installed on another computer. Second, it would be to use that software to access files on that computer or the network it is on. It comes down to being able to work on your computer without having to be sitting in front of it.
We here at Geeks in Phoenix have been using commercial, pay-per-seat remote access software for years now. In researching this article, I wanted to find remote access software that could be used for personal use for free.
I have worked with TeamViewer over the years, as some of our customers use it regularly. For personal use, the free version works quite well. Sure, it doesn't have all of the bells and whistles of the paid version, like remote printing or tech support, but for remote access and file sharing, it works well.
Setting up TeamViewer on two computers for personal use is pretty simple. The installation process involves installing the software on both systems and creating a TeamViewer account that links the computers together.
The first thing you do is download and install the TeamViewer software on one of the two computers you want to link together. During the installation, you will come to a screen that asks you how you would like to set up TeamViewer.

When prompted for the type of installation, I recommend using the default setup. When you get prompted for how you want to use TeamViewer, select Personal / Non-commercial use since you are just using it to connect two of your personal computers.
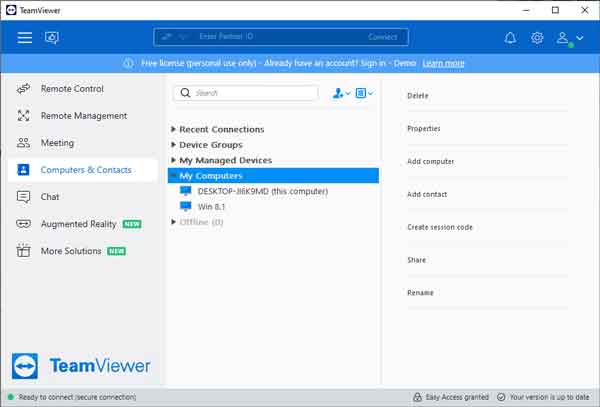
Once the installation is done on the first computer, the TeamViewer program will appear. In the left-hand column, you will see a menu with several categories: Remote Control, Remote Management, Meeting, Computer & Contacts, Chat, and Augmented Reality.
The Remote Control category should be highlighted, and in the center column, you will find a section labeled Unattended Access.
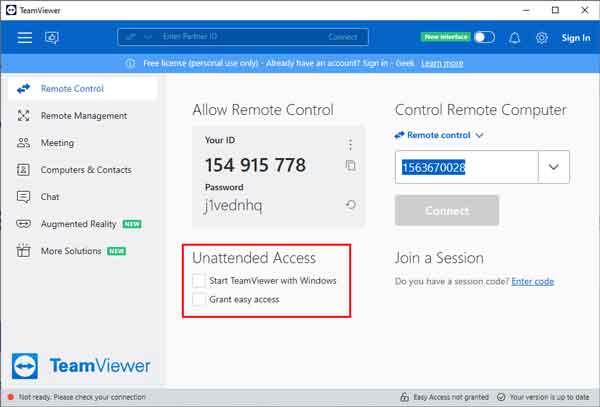
Select Start TeamViewer with Windows and Grant easy access.
When you select Grant easy access, the Assign to account form will pop-up asking you for an e-mail address and password.
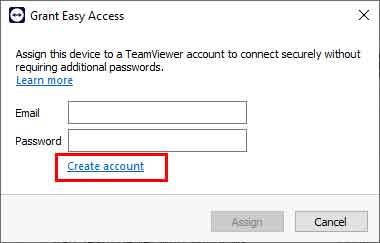
This is where you are going to create a TeamViewer account.
Click on Create Account, and then the Create TeamViewer account form will appear.
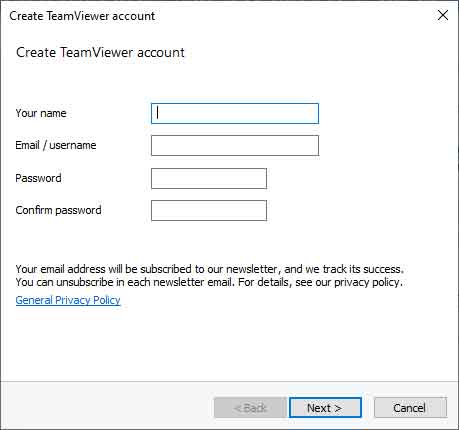
Just fill in the required information and go through the steps to verify your e-mail address.
You now have a TeamViewer account. Go back to the TeamViewer screen and make sure that Grant easy access is selected under Remote Control. If it is not, then select it and put in your TeamViewer account details.
Now download and install TeamViewer on your second computer. Use the same options you used for the installation on your first computer. When the installation is complete, the TeamViewer's main screen will appear.
Just like with the first computer you installed TeamViewer on, the Remote Control category should be highlighted. Under Unattended access, select Start TeamViewer with Windows and Grant easy access. When the Assign to account form appears, just type in your e-mail address and password associated with your TeamViewer account.
Once you have both of your computers linked to your TeamViewer account, you should see both of them listed under the Computers & Contacts category on both computers.
You can double-click on the name of the computer you want to access remotely, and a separate screen for that computer will appear. For more options, you can also right-click on the computer name
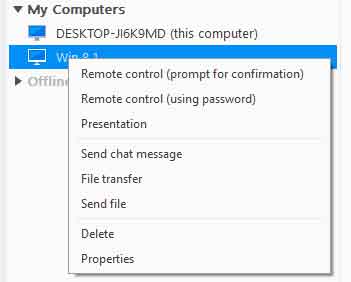
and a context menu will appear with all of the options available. For more information on TeamViewer, just click on the link to their website below.
TeamViewer
d28b2a78-b142-4f2d-8ddb-6a2d4f58ff00|0|.0|96d5b379-7e1d-4dac-a6ba-1e50db561b04