When it comes to Windows 11, keeping your drives error-free is essential to the performance of your computer. Hard or slow to open files or apps could signify that the drive needs to be checked for errors. Here is how to check your drive for errors in Windows 11.

Now disk errors are not uncommon in Windows. In fact, the original name of MS-DOS (Microsoft Disk Operating System) was QDOS (Quick and Dirty Operating System).
There are two (2) different ways to check a drive for errors: Standard and Advanced. The Standard way is far easier to run, but the Advanced way is more comprehensive.
Standard drive error checking in Windows 11

To perform a Standard drive check, you will need to access the properties of that drive. To do this, you will need to open File Explorer.
- Open File Explorer using one of the following:
- Left-click on the File Explorer icon (manilla folder) on the Taskbar.
- Press the Windows logo key
 + E at the same time.
- Use the Power User menu by right-clicking on the Start
 button and selecting File Explorer.
- In the left-side column, left-click on This PC.
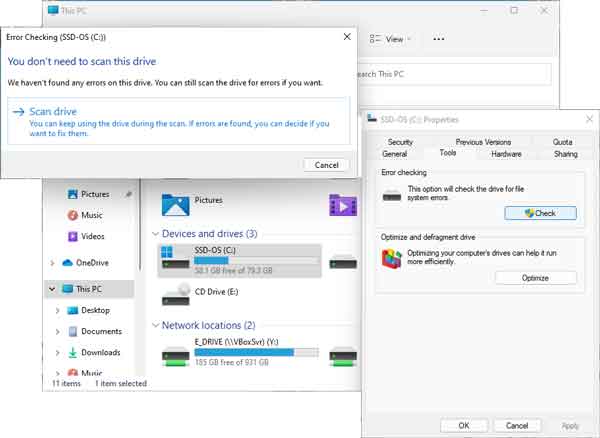
- In the right-side column, right-click on the drive you want to check and select Properties.
- Left-click on the Tools tab.
- Under Error checking, left-click on Check.
- Left-click on Scan drive.
Advanced drive error-checking in Windows 11

To perform Advanced error checking, you will need to run command-line syntax(s) and parameter(s) in an Administrative Command Prompt. The link below opens in a new window.
How to open a Command Prompt with Administrator privileges in Windows 11
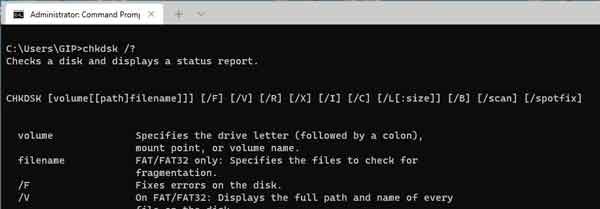
The name of the program you want to run is CHKDSK (short for check disk). There are multiple syntaxes and parameters you can use with CHKDSK. The complete list is below.
Keep in mind that if to want to run CHKDSK on the drive with Windows on it, the error check may need to be scheduled for the next boot. But CHKDSK will prompt you if that is the case. The two command lines I use on a regularly are
CHKDSK (drive letter): /F CHKDSK (drive letter): /R
CHKDSK [volume[[path]filename]]] [/F] [/V] [/R] [/X] [/I] [/C] [/L[:size]] [/B] [/scan] [/spotfix]
| volume |
Specifies the drive letter (followed by a colon), mount point, or volume name. |
| filename |
FAT/FAT32 only: Specifies the files to check for fragmentation. |
| /F |
Fixes errors on the disk. |
| /V |
On FAT/FAT32: Displays the full path and name of every file on the disk. On NTFS: Displays cleanup messages, if any. |
| /R |
Locates bad sectors and recovers readable information (implies /F, when /scan not specified). |
| /L:size |
NTFS only: Changes the log file size to the specified number of kilobytes. If a size is not specified, it displays the current size. |
| /X |
Forces the volume to dismount first if necessary. All opened handles to the volume would then be invalid (implies /F). |
| /I |
NTFS only: Performs a less vigorous check of index entries. |
| /C |
NTFS only: Skips checking of cycles within the folder structure. |
| /B |
NTFS only: Re-evaluates bad clusters on the volume (implies /R). |
| /scan |
NTFS only: Runs an online scan on the volume. |
| /forceofflinefix |
NTFS only: (Must be used with "/scan") Bypass all online repair; all defects found are queued for offline repair (i.e. "chkdsk /spotfix"). |
| /perf |
NTFS only: (Must be used with "/scan") Uses more system resources to complete a scan as fast as possible. This may have a negative performance impact on other tasks running on the system. |
| /spotfix |
NTFS only: Runs spot-fixing on the volume. |
| /sdcleanup |
NTFS only: Garbage collects unneeded security descriptor data (implies /F). |
| /offlinescanandfix |
Runs an offline scan and fix on the volume. |
| /freeorphanedchains |
FAT/FAT32/exFAT only: Frees any orphaned cluster chains instead of recovering their contents. |
| /markclean |
FAT/FAT32/exFAT only: Marks the volume clean if no corruption was detected, even if /F was not specified. |
c84c6c3b-d7d1-4af3-a408-76451d30b593|2|5.0|96d5b379-7e1d-4dac-a6ba-1e50db561b04