There may come a time when you want to share some files with someone on your private network. Maybe a document, spreadsheet, or a picture of your favorite pet. Here's how to share a folder across your private network in Windows 10.
Note: Do not set up a shared folder if your computer is a laptop, and you use public WiFi Internet access at coffee shops, airports, etc.! The risk of being hacked and having the security of your laptop compromised is too high. These instructions are only for computers that are attached to private networks.
It may seem like a fairly easy thing to do to share a folder, but it can quickly become a problem. So what I am going to do is to go the steps of sharing a folder on a private network in Windows 10. Then we'll look at some of the things that may cause a problem. Let's get started.
The first thing we need to do is open File Explorer. There are several different ways to do this. You can:
- Left-click on the File Explorer icon on the Taskbar (manilla folder).
- Type File Explorer in the Cortana search box and left-click on File Explorer in the search results.
- Right-click on the Start button and left-click on File Explorer from the Power User menu.
- Press the Windows logo key
 + E.
+ E.
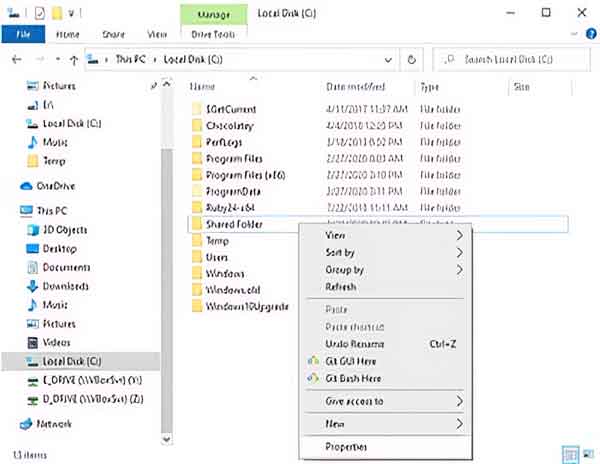
Once you have File Explorer open, you need to find the folder you want to share. Navigate to This PC in the left-hand column, then to the local disk drive (usually C:\), then to the folder you want to share.
Keep in mind that you cannot share a complete drive (like C:\), only folders on it. You also cannot share mapped network folders either. You can only share folders located on your computer. For this demonstration, I am going to use a folder named Shared Folder.
I have located Shared Folder on my Local Disk C:\ drive, and I'm going to right-click on it and select Properties.
I'm going to left-click on the Sharing tab
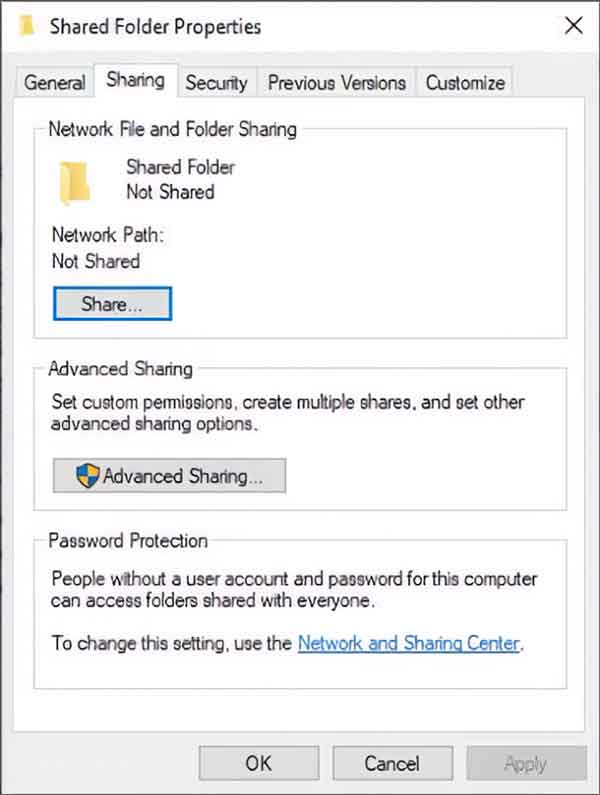
and left-click on the Share button.
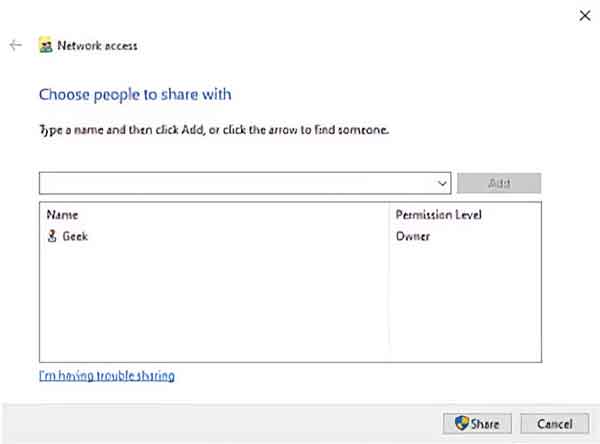
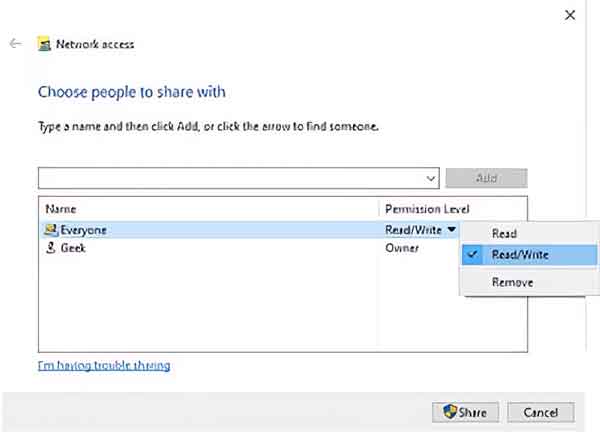
This brings up a Network access dialog box.
Your username should already be there with Owner permissions. You can keep just your username in the permissions box, but anyone trying to access that folder will need to have your username and password get into it. And if you don't use a password to log into your computer (local account), then you'll have to create a new user on your computer.
But if you just want to share the files and aren't worried about anybody seeing them, you can just let Everyone have access. By giving Everyone access, you don't have to have a password to get into the folder. But you will have to choose if you want Everyone to have Read or Read/Write permissions.
Either way, left-click on the pull-down menu and select either Everyone or Create a new user. If you decide to create a new user, the User Account dialog box appears. Left-click on Manage another account. On the next dialog box that appears, select Add a new user in PC settings. Then left-click on the plus (+) sign next to Add someone else to this PC and fill out the forms that follow.
Once you have another username in the Network access dialog box and have chosen the permission level,
left-click on the Share button in the lower right-hand corner. Then you will get a confirmation that the folder is now shared. Left-click on the Done button in the lower right-hand corner.
You are ready to go. You can either close the folder properties dialog box or add more sharing options like multiple share names or custom permissions using the Advanced Sharing button. But for basic folder sharing, you are all set.
Now let's find out if we can see the shared folder on your private network. You will need the name of your computer for this next step. Right-click on the Start menu and left-click on System on the Power User menu. Make a note of the device name in the right-hand column.
Next, go to another computer that is on the same private network and bring up File Explorer using the steps outlined earlier in this article. This time, instead of expanding the This PC folder in the left side column, we want to go down and left-click on the Network folder.
If you get a warning across the top of the File Explorer that says Network discovery is not turned on, left-click on it to activate it. Sometimes Windows 10 will mistakenly classify a private network as public. If you get a warning that the network you are on is not a private network, select the Make this network private.
The name of your computer should now show up under the Computer category of Network. If it does, double left-click on it, and you should now see the folder you shared and all of the files inside of it.
If you don't see your computer listed under Network, there are a couple of things you might want to check on your computer. The first thing to look for is a third-party firewall, like Norton or McAfee, that might be blocking access.
If you granted Everyone access to your shared folder, you can turn off password protected sharing under advanced sharing settings. Just right-click on the Start menu and left-click on Network Connections on the Power User menu. In the right-hand column left-click on Network and Sharing Center. On the screen that appears, left-click on Change advanced sharing settings.
Under All Networks find Password protected sharing and select Turn off password protected sharing. Go back to the other computer and try to access the shared folder on your computer under Networks. You should be able to view and open all of the files inside of it.
2017007e-31b7-4349-a758-b372432b21a2|3|4.3|96d5b379-7e1d-4dac-a6ba-1e50db561b04