You can use the Error-checking tool to check for errors and bad sectors on your hard disk.
- Open My Computer, and then select the local disk you want to check.
- On the File menu, click Properties.
- On the Tools tab, under Error-checking, click Check Now.
- Under Check disk options, select the Scan for and attempt recovery of bad sectors checkbox.
Notes
- To open My Computer, double-click the My Computer icon on the desktop.
- All files must be closed for this process to run. If the volume is currently in use, a message box will appear, prompting you to indicate whether or not you want to reschedule the disk checking for the next time you restart your system. Then, the next time you restart your system, disk checking will run. Your volume will not be available to perform other tasks while this process is running.
- If your volume is formatted as NTFS, Windows automatically logs all file transactions, replaces bad clusters, and stores copies of crucial information for all NTFS volume files.
b5d72974-072f-419f-a418-45885e8ad4c1|0|.0|96d5b379-7e1d-4dac-a6ba-1e50db561b04
I finally got around to installing the Beta release of Windows 7. Did the first install into a VM (virtual machine) to get a feel for the new OS. I installed a copy of Sun xVM VirtualBox, version 2.2.2, which has predefined settings for a Windows 7 environment. I then loaded the Windows 7 image file as a DVD drive and got the install going. The install went smoothly, and the interface looked quite a bit like Windows Vista.
I will work with the VM installation while I assemble a non-production test system. I'll keep you updated on my adventures.
2980b042-78db-436e-a2ec-f71abb077860|0|.0|96d5b379-7e1d-4dac-a6ba-1e50db561b04
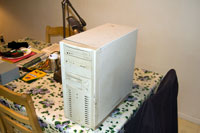
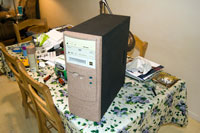
Here are the before and after pictures of the finished case for the upgrading your computer cheaply article.
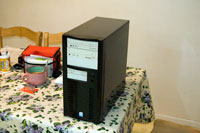
The face and body are RUST-OLEUM's 'Satin Black' Universal All-Surface Paint. I then applied a couple of coats of RUST-OLEUM's Crystal Clear Enamel.
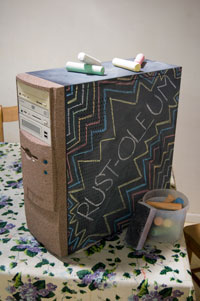
Side note: I contacted RUST-OLEUM to let them know about my daughter's faux stone and chalkboard case. They thought it was cool and hoped they might be able to add it to their web site. Here's the image we sent them.
679bc1d7-97ee-42c6-af43-b9b96a348a3a|0|.0|96d5b379-7e1d-4dac-a6ba-1e50db561b04
Here are the pictures of my daughter's finished customized computer case.
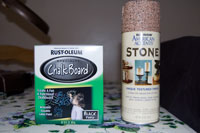
The face is RUST-OLEUM's American Accents 'Sierra' Stone textured finish. The top and sides are RUST-OLEUM's Chalkboard specialty paint.
Pretty sweet, Brittany! Can't wait to see how you decorate it with chalk.
a5781646-4ae4-402e-abeb-3505db8d0a48|0|.0|96d5b379-7e1d-4dac-a6ba-1e50db561b04
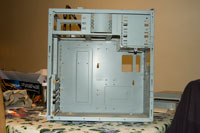
I started by taking the side panels and top off. It was at this point I decided to go excessive. Since most computer peripherals come with black finishes, I decided to change the case's color to black (this is where Home Depot comes into the picture). So I took off the face of the case and gently removed all of the buttons and lights.
I then proceeded to install the motherboard, processor/fan assembly, and memory. Next came the expansion card (wi-fi) and onboard connections. Note: Since I have some spare parts, I did install back panel connections for one serial port, one printer port, and four USB ports (for a total of eight on the back). These did not come with the motherboard. Then came the power supply and the drives.
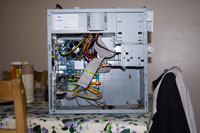
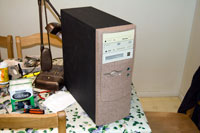
Here is a photo of the finished system, less the face and sides. I did add two more items into this $164.98 machine. Anybody who knows me knows I'm not particularly eager run onboard video cards. It uses a part of your system memory, which can be detrimental to a system's performance with a small amount of RAM. Say you have a system with 512 MB of RAM, and you have to have 128 MB for your video card. You have now cut your available system memory by 25%. Also, the memory on internal (opposed to onboard) video cards is faster. So I added a Microstar NX-8400GS with 512 MB for $43 and an Antec 80mm Tri-Cool case fan for $5.
So here's what I ended up with:
Intel Celeron 430 1.8 GHz with 4 GB's of DDR2 memory running with an FSB speed of 800 MHz, Microstar video card with an NVidia GeForce 8000 Series GPU with 512 of GDDR2 with a Western Digital 320 GB SATA Hard Drive.
Total for the whole system, $213.97, excluding labor. I will post a picture of the finished case when it's done.
Side note: My younger daughter decided she wanted to change her case too. This one is cool! Faux stone and chalkboard! Stop back by and see how this turns out.
c0d99b2a-5550-4790-9f91-359ce0a95408|0|.0|96d5b379-7e1d-4dac-a6ba-1e50db561b04