Having a Standard user account in Windows is great for security, as it prevents malicious software from installing. But what happens if you need to install software and do not have administrative privileges? Here is how to enable the local administrator account in Windows without logging in.

I recently had a customer with a somewhat unique problem; she needed to install software on her computer, but her user profile was only a Standard user. She shared the computer with her husband; his account was an Administrator user, and he used a Microsoft account for logging in.
But unfortunately, her husband passed away, and she proceeded to take care of her husband's affairs. In the process, she disconnected his cell phone and deleted his e-mail address. It was not until she needed to install some software on her computer did she realize she did not have administrator privileges.
The easiest thing to do would be to perform a clean installation of Windows. But since there was tax software that she could not reinstall, wiping the drive and reinstalling Windows was the last option.
And since all forms of recovering her husband's Microsoft account were gone, the only thing to do was enable the hidden local administrator account and change her account from Standard to Administrator. Since her account was only a Standard user, using a NET command line was impossible, so this would take a little more work.
Note: The following procedures require Windows installation media, editing the registry, and the BitLocker decryption key (if your drive is encrypted). Editing the Registry incorrectly can cause your computer to have errors and possibly not booting. If you do not feel comfortable editing the registry, please get in touch with a local computer technician for assistance.
The first step is to create the installation media, which will require a USB drive 8GB or larger. You will need administrative privileges to make the media, so you may need to create the media on another Windows system with a user with administrator privileges.
Create Windows 11 installation media
Create Windows 10 installation media
The second step is to check if the drive in your computer is BitLocker encrypted. The easiest way to find out if any of your drives are encrypted is by checking their properties in File Explorer.
- Open File Explorer using one of the following:
- Left-click on the File Explorer icon (manilla folder) on the Taskbar.
- Press the Windows logo key
 + E at the same time.
- Use the Power User menu by right-clicking on the Start button and selecting File Explorer.
- In the left-side column, left-click on This PC.
- In the right-side column, check the icons for the drives. Drives that are encrypted should have a little padlock in the icon.
If your drive is BitLocker encrypted, use the following link to log in to your Microsoft account and find your recovery key. If another person set up your computer, they might have the recovery key inside their Microsoft account. Once you get the BitLocker recovery key, print it out or write it down for future use.
Locate my BitLocker recovery key
Next, you will need to boot up your computer using the installation media. The easiest way to do this is to use the Advanced Boot Options. Make sure you have the Windows installation media connected to your computer before proceeding so that it will appear as a bootable device listed in the Advanced Boot Options.
How to get to Windows 11 Advanced Boot Options
How to get to Windows 10 Advanced Boot Options
Once you get to the Advanced Boot Options, select Use a device and choose the media you created earlier. Your computer will restart and boot from the installation media.
- When the Windows Setup dialog box appears, left-click on Next.
- On the following dialog box, left-click on Repair this computer. At this point, you may be prompted for a decryption key. Input it in the space provided and continue.
- On the Choose an option page, left-click on Troubleshoot.
- On the Advanced options page, left-click on Command Prompt.
- In the Command Prompt, type regedit and press Enter.

- In the Registry Editor, highlight HKEY_LOCAL_MACHINE in the left-hand column.
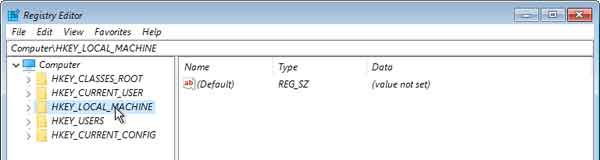
- With HKEY_LOCAL_MACHINE highlighted, pull down the File menu and left-click on Load Hive ....
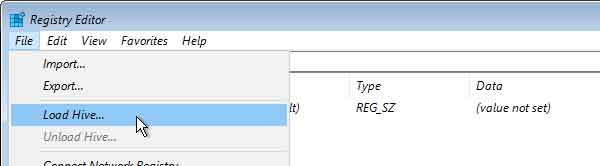
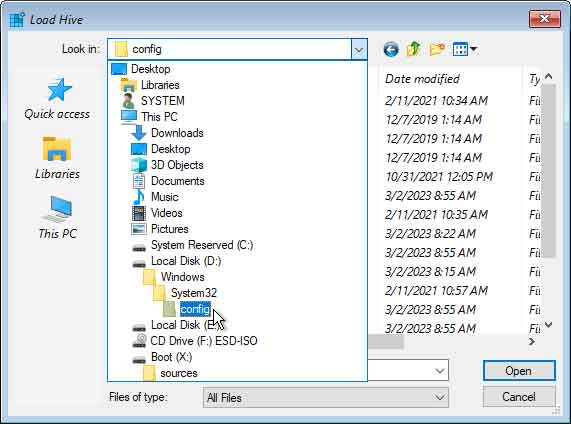
- Locate the local drive that has Windows installed on it, then navigate to the Windows>System32>config folder.
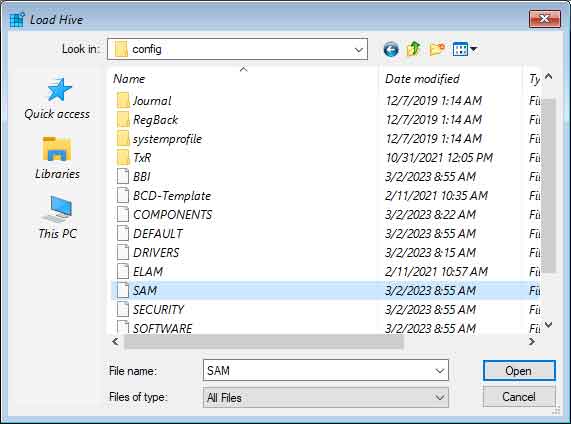
- Left-click on the file named SAM (Security Account Manager) and select Open.
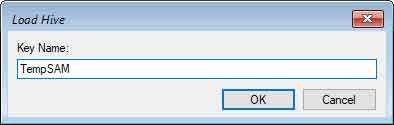
- When prompted for a Key Name, give it a unique name (we used TempSAM) and select OK.
- Expand the registry hive you just attached, and navigate to:
Computer\HKEY_LOCAL_MACHINE\WhateverYouNamedYourHive\SAM\Domains\Account\Users\000001F4
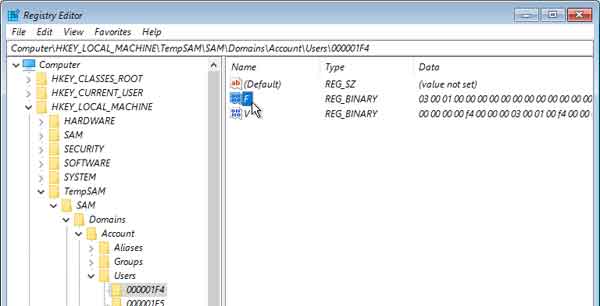
- Double-click on the F binary value to edit it.
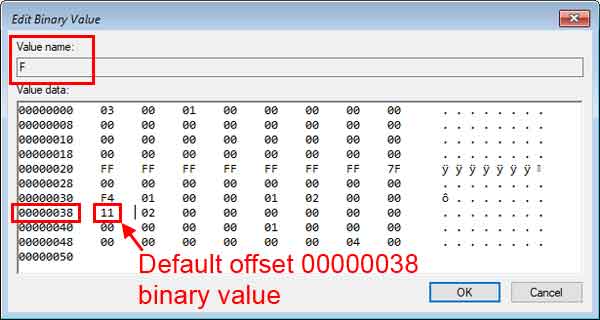
- In the Edit Binary Value dialog box that appears, change the value at 00000038 from 11 to 10, then select OK.
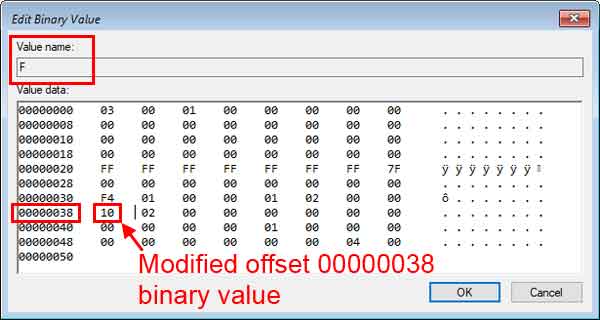
- Close the Registry Editor and restart your computer.
The local administrator account should now appear as a logon option and has no password by default.
038503aa-0032-42d0-8bb3-27af0665fc68|1|5.0|96d5b379-7e1d-4dac-a6ba-1e50db561b04