Does your computer go to sleep too fast? Do you want to change what the power button does on your laptop? If so, here is how to manage the power settings inside Windows 10 and Windows 11.

Did you know that Windows has different default power schemes for laptop and desktop computers?

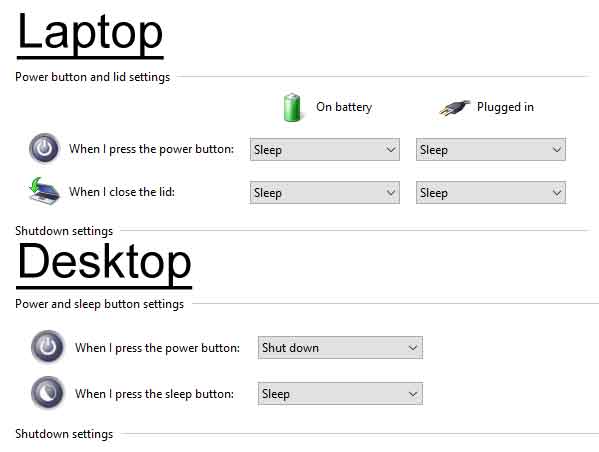
Only a few people do. If fact, if you own a laptop running Windows 10 or 11, pressing the power button, by default, does not turn it off but puts it to sleep,
But you can change all of that with a few simple mouse clicks. You can make it so that your display never turns off and your system never goes to sleep. And, of course, you can tweak the power settings for wifi adapters, USB devices, and batteries (laptops).
Now there are two (2) places in Windows 10 and Windows 11 you can change power settings: the Settings app and the Control Panel. The Power and sleep category inside the Settings app is basic but straightforward. But the Power Options in the Control Panel have more advanced features.
How to get to Power and sleep in the Settings app
Windows 11 only
- Left-clicking on the Start button
 to bring up the Start menu.
- In the list of pinned apps on the Start menu, left-click on Settings.
- In the right-hand column, left-click on Power.
- In the Power category, left-click on Screen and sleep.
Windows 10 only
- Left-click on the Start
 menu and select Settings (the gear icon).
- Left-click on System.
- In the left column, left-click on Power and sleep.
Windows 10 or 11
- Right-click on the Start button
 to bring up the Power User menu.
- In the list of programs that appear, left-click on Power options.
- Windows 11 only: Left-click on Screen and sleep.
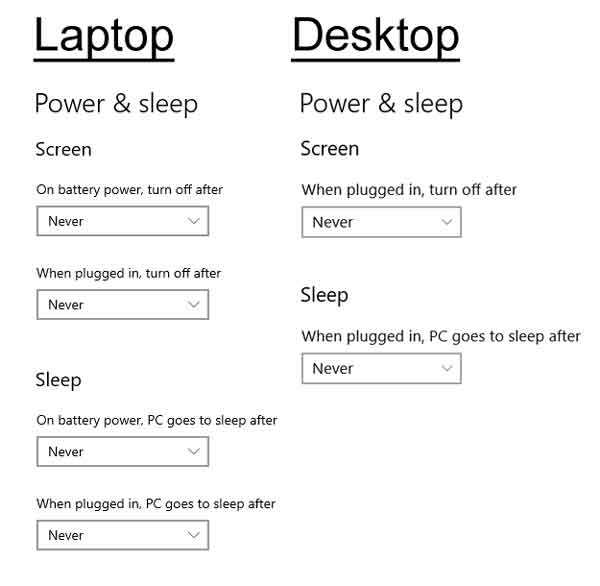
When you get there, you will find only two (2) settings (two (2) sets on laptop computers (plugged in & battery)) that can be changed: When the screen turns off and when the computer goes to sleep.

Relatively simple and straight to the point. But if you want more options, including changing what happens when you press the power button or closing the lid of your laptop, you will need to use the Power Options inside the Control Panel.
How to get to the Power Options inside the Control Panel
Windows 11
- Left-click on the Start
 button to bring up the Start menu.
- In the upper right-hand corner of the Start menu, left-click on All apps.
- Scroll down the list of programs and left-click on Windows Tools.
- Double left-click on Control Panel.
Windows 10
- Left-click on the Start
 button to bring up the Start menu.
- Scroll down the list of programs until you get to Windows System, and then left-click on it to expand it.
- Left-click on Control Panel.
By default, the Control Panel opens up in the category view but can be changed to large or small icons. There is a pull-down menu in the top-right corner labeled View by: that allows you to change the view.
- If viewing the Control Panel by Category, left-click on Hardware and Sound, then Power Options.
- If viewing by Large/Small Icons, left-click Power Options.
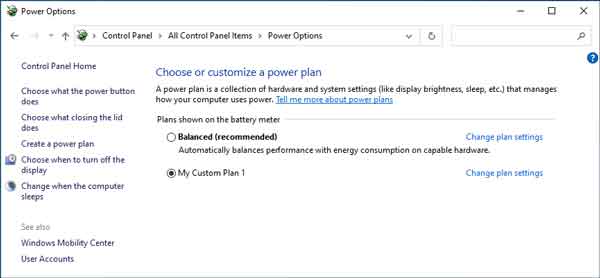
Once you have the Power Options open, you will find several options in the left-hand column:

- Choose what the power button does
- Choose what closing the lid does (laptops only)
- Create a power plan
- Choose when to turn off the display
- Change when the computer sleeps
If you click on Choose what the power button does or Choose what closing the lid does (laptops only), you will bring up the System Settings. If you click on Create a power plan, you can create a power plan that suits your computing style. And if you click on either Choose when to turn off the display or Change when the computer sleeps, it allows you to edit the current power plan.
Now, if you really want to manage the power of your computer, create a power plan. Once you have made your custom power plan, you can edit the advanced options by selecting Change plan settings, then Change advanced power settings. This will bring up every possible power setting available for the components inside your computer, from hard disk and USB settings to display and multimedia.
06a6d403-d464-4d0f-8f9f-46f9f5317706|2|5.0|96d5b379-7e1d-4dac-a6ba-1e50db561b04