Are you having some problems with your computer and wish you could reinstall Windows 11 without losing your files and apps? Maybe you want to upgrade to the latest version of Windows 11, and Windows Update is not offering it. Here is how to perform a repair upgrade installation of Windows 11.
There is one thing every Windows user fears, and that is reinstalling Windows. The fear of losing your files and installed programs will deter most people until the problem becomes too bad to ignore.
But with Windows 11, you can do a repair upgrade reasonably easily. So what is a repair upgrade? It is reinstalling Windows 11 using the same version (repair) or a newer version (repair/upgrade). It is often called an in-place repair or upgrade.
Now I have repaired several Windows computers using this method, which works most of the time. I remember one laptop with issues with being unable to right-click using the touchpad or mouse, and an in-place repair installation fixed the problem.
We first need to download the latest version of Windows 11 from Microsoft (see the link below). We will be downloading an ISO file that we will use to reinstall Windows 11. An ISO file is the format for optical disks (CD, DVD, BD).
Download Windows 11
When you reach the Windows 11 download page, scroll down until you find Download Windows 11 Disk Image (ISO). You can also create an ISO file using the Create Windows 11 Installation Media, which involves a few more steps.
Once you have the ISO file downloaded, you will need to make it a virtual DVD drive. Locate the ISO file in File Explorer and right-click on it.
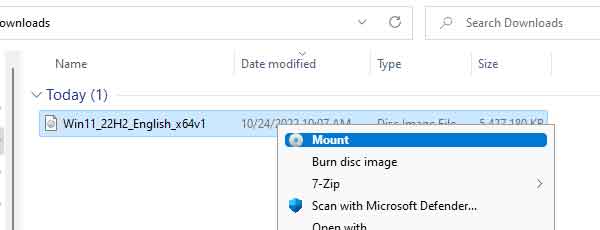
From the context menu that appears, select Mount. If you receive a security warning, left-click on Open. It will now appear as a DVD drive inside File Explorer.
Click on the DVD drive to display the contents. In the list of files and folders, you will find a program named Setup.
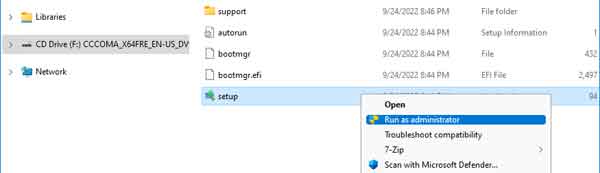
To ensure we are running the install with the correct privileges, right-click on Setup and select Run as administrator from the context menu that appears. This will start the repair upgrade installation.
The first window that appears is the Windows 11 Setup screen. Usually, you would click on the Next button and proceed with the installation.
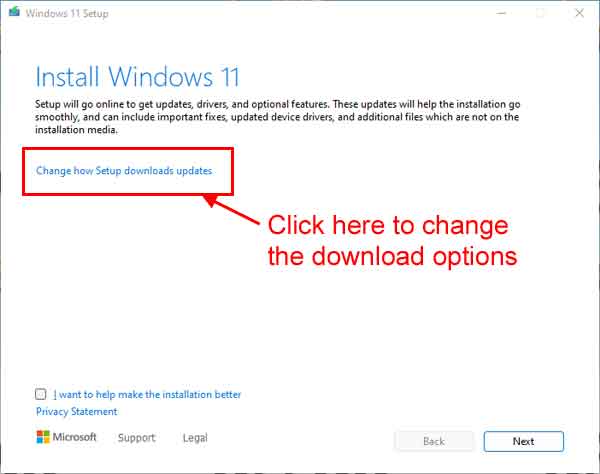
But if you are performing a repair installation, you may want to change whether or not to download updates, drivers, and features at this time by clicking on the Change how Setup downloads updates link.
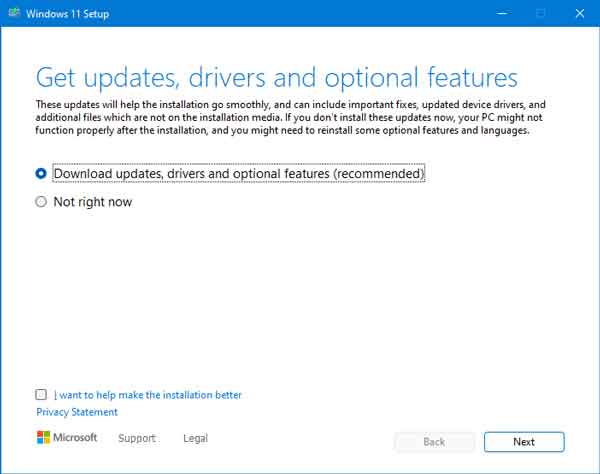
I have found that delaying downloads until after the installation is complete works best for repairing Windows.
Next, you will get the EULA (End User License Agreement), click on Accept and continue. On the next screen, you can change if you keep your files and apps or remove them.
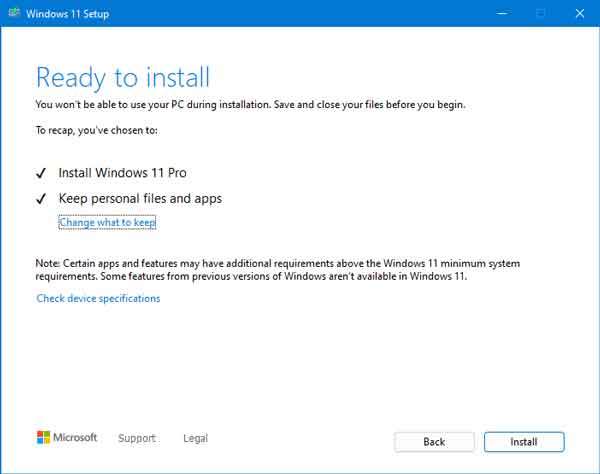
By default, both files and apps are saved. When you are ready to start the installation, click on Install.
Once the repair upgrade starts, it can take some time to finish.
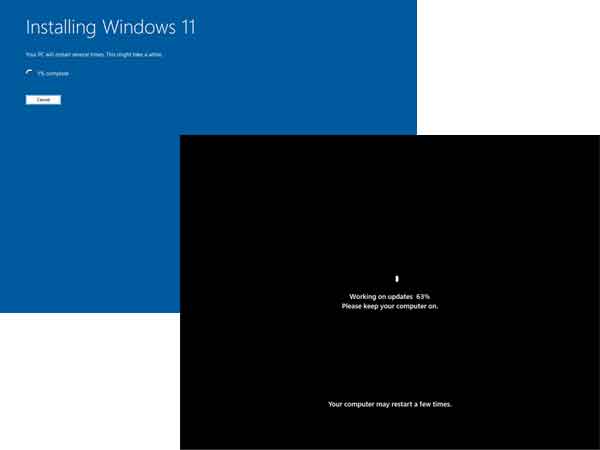
Grab something to drink and find something to do. Your computer will restart several times during the installation.
5be97ddc-502d-48a4-954a-21310196fa95|1|5.0|96d5b379-7e1d-4dac-a6ba-1e50db561b04