Updated March 9, 2023
The Clipboard is one of the most widely used features inside Windows. It used to be just for copying a small amount of text, but not anymore. Let's look at all the Clipboard features inside Windows.
In the early days of computing, users could store small amounts of data in the computer's RAM (Random Access Memory), which was called the Paste Buffer. You could only save one piece of data at a time, and every time you copied a new piece of data, the last piece was erased.
But over the decades, the Paste Buffer, now known as the Clipboard, has evolved into a valuable and essential tool for productivity. The Clipboard in Windows 10 and Windows 11 can hold multiple pieces of text and images. And how you access the Clipboard has changed over the years.
Before you can take advantage of the full capability of the Windows Clipboard, you have to do a couple of things. The first thing you need to do is to make sure that the Clipboard history feature is turned on.
With Clipboard history turned on, you can view and paste all of the different items you have copied to the Clipboard. You will need to go to Windows Settings to make sure that this feature is activated.
How to get to the Clipboard section of the Windows 11 Settings app
- Open the Windows Settings app by either:
- Left-click on the Start button to bring up the Start menu. In the upper right-hand corner of the Start menu, left-click on All apps. Scroll down the list of programs and left-click on Settings.
- Right-click on the Start button to bring up the Power User menu. On the Power User menu, left-click on Settings.
- Press the Windows logo key
 + I.
+ I.
- Left-click on the System category in the left-hand column.
- Scroll down the right-hand column and left-click on the Clipboard category.
How to get to the Clipboard section of the Windows 10 Settings app
- Open the Windows Settings app by either:
- Left-click on the Start button, which will bring up the Start menu. On the Start menu left-click on the gear icon (Settings).
- Right-click on the Start button, which will bring up the Power User menu. On the Power User menu, left-click on Settings.
- Press the Windows logo key
 + I.
+ I.
- Left-click on the System category.
- Scroll down the left-hand column and left-click on the Clipboard category.
Once you are in the Clipboard section, make sure that the Clipboard history is turned on.
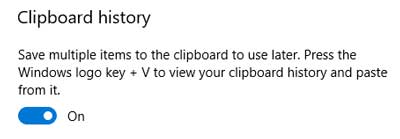
You can also clear all of the items on the Clipboard from here.
Now copying text to the Clipboard has always been pretty straightforward, but there may be times you want to copy images to it. The second thing to do is to make sure you have all the programs you can use to capture images.
The first screen capture program built into Windows is the Snipping Tool, and it has been in Windows since Windows 7, and it works well for capturing anything on-screen (if you can see it, you can capture it).
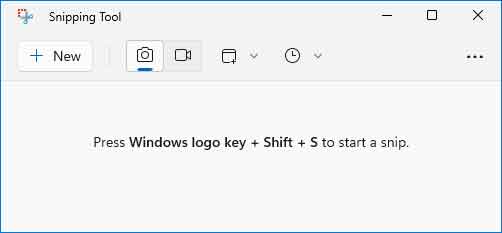
And it automatically copies whatever you snip to the Clipboard. But it does prompt you to save your snip to a file when you close it.
And the second built-in app for capturing screen snips is the Snipping Bar.

Microsoft included it in Windows 10 Version 1809, and few people know about it. That's because you have to use a combination of three (3) keys on the keyboard to bring it up (Windows logo key  + Shift + S).
The downside of the Snipping Bar is that it only captures one snip at a time. Every time you want to capture a screen snip, you have to press the Windows logo key  + Shift + S keys. The Snipping Tool will capture as many snips as you like until you close it.
We are now all set to start copying items to the Clipboard. Remember that you can paste text from the Clipboard into almost any program, but you can only paste images into programs that can display images.
For example, you can paste text from the Clipboard into Notepad but not images. But can paste both text and images from the Clipboard into Paint or Wordpad.
There are several different ways to copy and paste from the Clipboard. Here are a few of the most common ways to do it.
Ways to copy text to the Clipboard
Highlight the text you want to copy and then:
- Press Ctrl + C on the keyboard
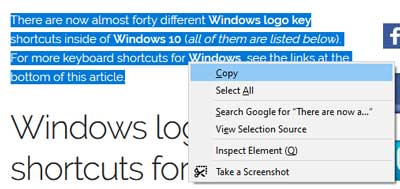
- Right-click on the highlighted text and select Copy from the context menu
Ways to copy graphics to the Clipboard
Highlight the image you want to copy and then:
- Press Ctrl + C on the keyboard
If you can not highlight the image then:
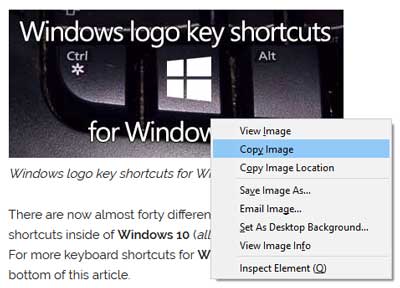
- Right-click on it and select Copy.
- Use the Snipping Tool or the Snipping Bar to capture a snip of it.
Ways to paste from the Clipboard
Select where you want to place the graphic or text in the program of your choice then:
- To paste the last item copied to the Clipboard, press Ctrl + V on the keyboard.
- To select an item on the Clipboard, press the Windows logo key
 + V to display the Clipboard history.
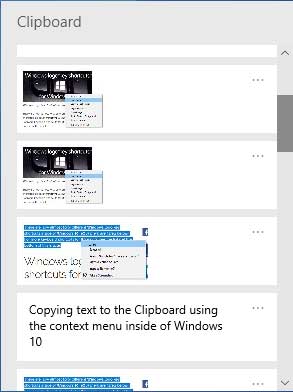
Then use your mouse or keyboard arrows to scroll through the clips. When you find the one you want to use, left-click on it (mouse) or press enter (keyboard).
For more information on the keyboard shortcuts discussed in this article, follow the links below.
Windows logo key shortcuts for Windows 11
Windows logo key shortcuts for Windows 10
General keyboard shortcuts
Check out the following video for examples of copying to and pasting from the Clipboard inside Windows 10.
de6bb991-3ef1-4cfe-831c-5bcea7d4f536|1|5.0|96d5b379-7e1d-4dac-a6ba-1e50db561b04