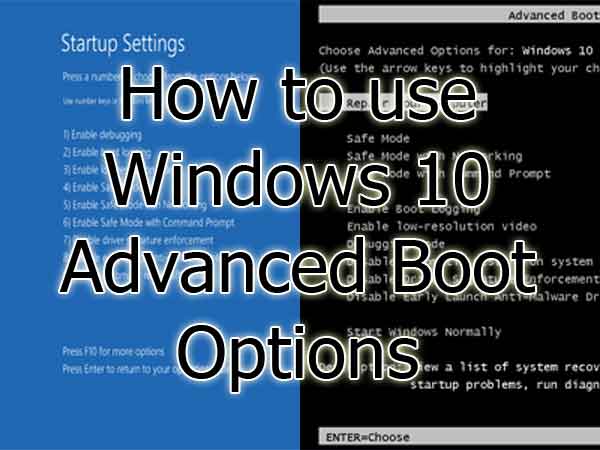
Since I do computer repair for a living, there are times when I need to boot a Windows 10 system up into Safe Mode. But with newer computers utilizing UEFI (Unified Extensible Firmware Interface) and fast/safe boot features, this can be not easy. So here is how to use the Windows 10 Advanced Boot Options.
In previous versions of Windows, getting to the advanced boot options was pretty easy. All you had to do was press the F8 key at startup. But with Windows 10, getting the advanced boot options is a little different. You can bring up the advanced boot options just one time or set it up permanently. Both require the system to be able to boot up into Windows 10 first.
Enable Window 10 Advanced Boot Options screen one-time
You can bring up the one-time Windows 10 boot options, either logged on or off. Since I repair computers for a living, I prefer not to log in under any user's profile. That way, I don't have to deal with any of the programs that may load when a user signs in. There are two (2) ways (logged in and logged out) of getting to the Windows 10 one-time boot options.
When you are logged in to Windows 10:
- Left-click on the Start
 button.
- Left-click on Settings (the gear icon).
- Left-click on Update & Security.
- In the left column, left-click on Recovery.

- Under Advanced startup, left-click on Restart now. The computer will log you off and bring up the Choose an option screen.
When you are logged out of Windows 10:
- At the login screen, left-click on the Power button in the lower right-hand corner to bring up the different options.

- Hold down the Shift key on the keyboard and right-click on Restart. This will bring up the Choose an option screen.
When you get to the Choose an option screen:
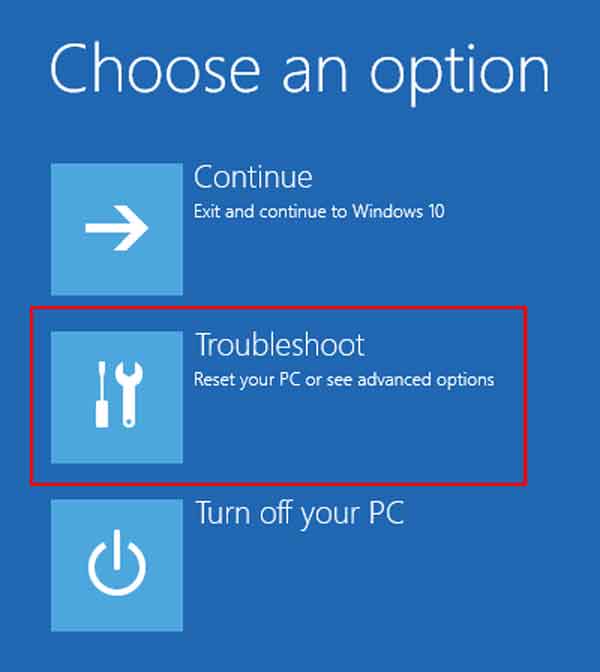
- Left-click on Troubleshoot.
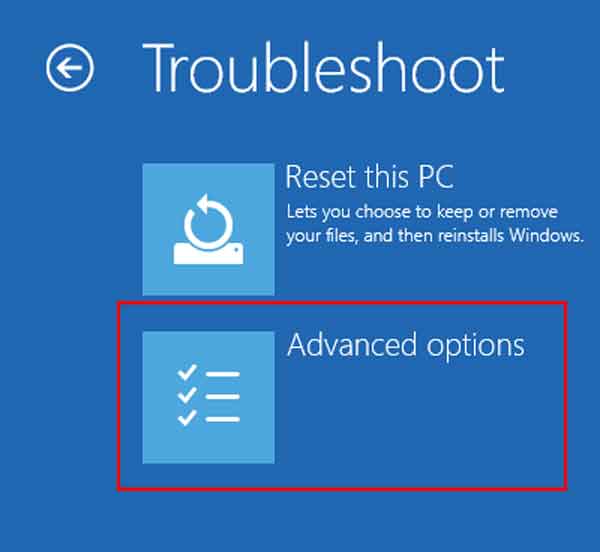
- Left-click on Advanced options.
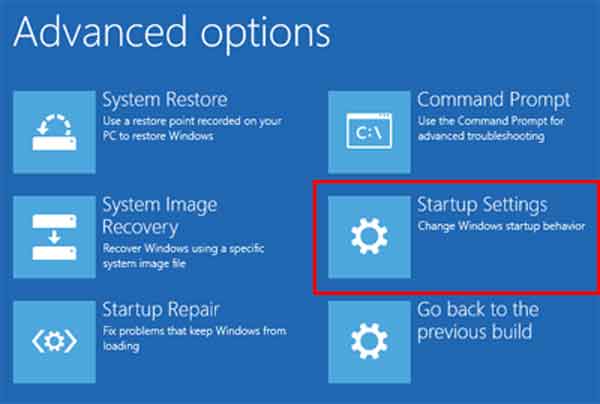
- Left-click on Startup Settings.
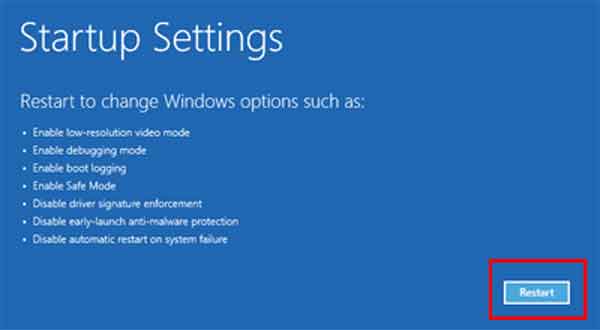
- Left-click on the Restart button.
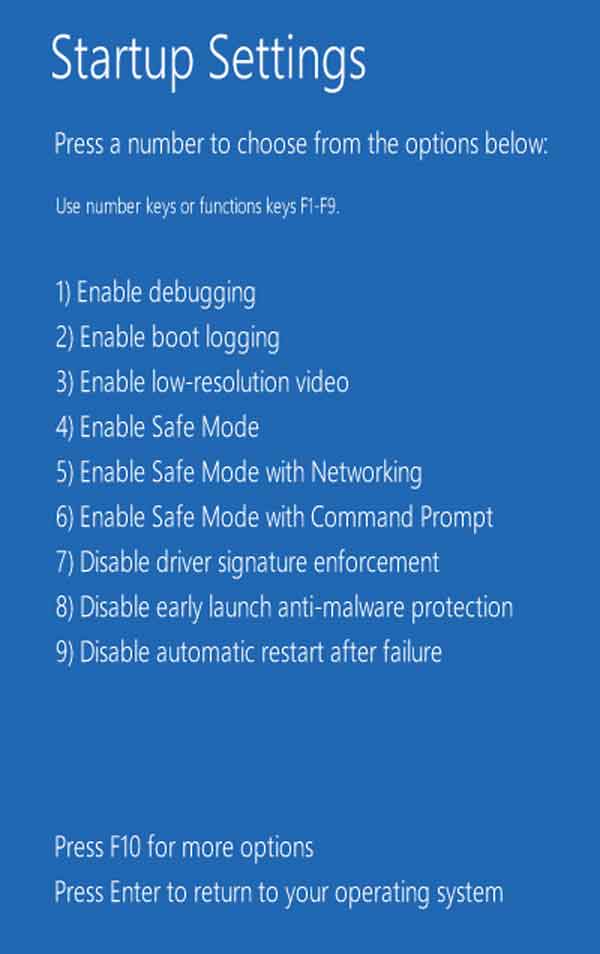
- When the Startup Settings page appears, select the number that coincides with the function you would like to perform.
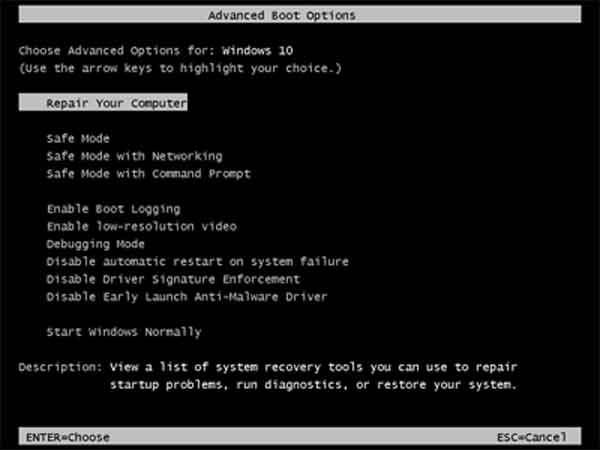
Enable Window 10 Advanced Boot Options screen permanently
This option should be used very carefully. Not only do you have to edit the boot configuration of your Windows 10 computer, but once permanently enabled, you will have to select a boot option you want to use every time your computer starts or restarts. There is no timer for this screen as there was in previous versions of Windows. To edit the boot configuration, you will need to use an administrative command prompt.
How to open a Command Prompt with Administrator privileges in Windows 10
The first thing we have to do is turn on the Windows 10 Advanced Boot Options. Type or cut and paste the following code into an administrative command prompt:
bcdedit /set {globalsettings} advancedoptions true
To turn off the Windows 10 Advanced Boot Options, type or cut and paste the following code into an administrative command prompt:
bcdedit /set {globalsettings} advancedoptions false
You can also change the default boot manager used with the advanced boot options. The default is the Windows 10 standard version, but you can change it to the legacy version if you like the old DOS look.
To change to the legacy boot manager used in previous Windows versions, like Windows 7, you can type or cut and paste the following code into an administrative command prompt:
bcdedit /set {default} bootmenupolicy legacy
To restore the boot menu to the default, type or cut/paste the following code into an administrative command prompt.
bcdedit /set {default} bootmenupolicy standard
c20732aa-8725-4d65-aabd-5fa093b63def|1|5.0|96d5b379-7e1d-4dac-a6ba-1e50db561b04