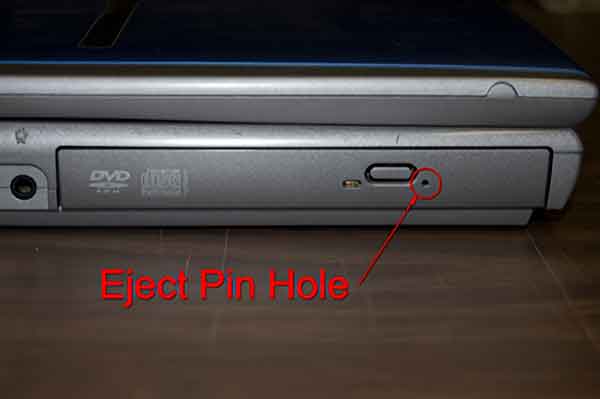
This article shows how to use the Eject Pin Hole to manually eject the tray on your computer's CD / DVD drive. There will be times when you need to open the tray on your computers CD / DVD drive when the system is powered off.
- You need to boot your computer using the CD / DVD drive
- You need to retrieve a disk without starting up the computer
Caution: Turn off power to the system before manually ejecting a disk.
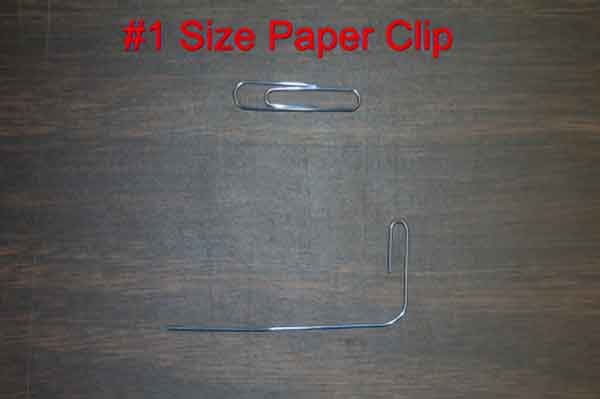
All CD / DVD drives have an Eject Pin Hole. The only thing we need is a paper clip to use it (I am using a #1 size for this article).

All we have to do is bend it at the first curve 180 degrees (straitening it out). Then take the second curve and bend it 90 degrees. Now we need to locate the Eject Pin Hole.

Desktop CD / DVD drives:
Gently insert the modified paper clip into the Eject Pin Hole until you feel it make contact with the gear underneath the tray. Firmly pressing inward, you will notice the tray to start to move out. Press inward until you have enough room to get your finger under the tray and then pull it out the rest of the way. If you can only get a small portion of the tray out, you can use the other end of the paper clip to gently pry open the tray enough to get your finger under it. Once done, gently push back the tray to the closed position. It will close firmly when the system is powered up.

Laptop - Notebook CD / DVD drives:
The trays on laptops/notebooks are spring-loaded, so all that is needed is to release the locking mechanism. You do not have to insert the paper clip as far as with a desktop CD / DVD drive, as you are not connecting to the gearing under the tray. Gently insert the paper clip into the Eject Pin Hole. Once you feel it make contact, gently push in, and the tray will eject immediately. Once done, gently push the tray back inward until it locks back into place.
3363434a-9d7e-4e1d-9409-226ec7567e18|2|5.0|96d5b379-7e1d-4dac-a6ba-1e50db561b04