Have you ever had to squint to see something on your computer screen? Maybe you couldn't recognize all of the characters in an online 'captcha'. If so, Windows 8 includes a great tool just for this called Magnifier. Magnifier is a useful tool that enlarges part—or all—of your screen so you can see the words and images better. It comes with a few different settings, so you can use it the way that suits you best.
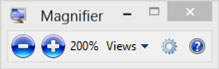
Windows 8 Magnifier main screen
Using Magnifier
You can open and close Magnifier quickly, so it's handy when you need it, and it's out of your way when you don't.
To open Magnifier
- Swipe in from the right edge of the screen, and then tap Search. (If you're using a mouse, point to the upper-right corner of the screen, move the mouse pointer down, and then click Search.)
- Enter Magnifier in the search box, tap or click Apps, and then tap or click Magnifier.
Magnifier will open in Full-screen view unless you change the settings.
To close Magnifier
To exit Magnifier quickly, press the Windows logo key  + Esc. You can also tap or click the magnifying glass icon and then tap or click the Close button on the Magnifier toolbar.
Notes:
- If you want to have Magnifier always at your fingertips, you can pin it to the Start screen or taskbar.
- Some people want to change the clarity or size of the words and images on the screen. If this is what you want to do, you can use the app to zoom in on a page or change your screen resolution.
Changing Magnifier views
You can use Magnifier in a few ways, depending on how you like to work: Full-screen, lens, and docked. Try them all to find out which one you prefer.
Full-screen
In this view, your entire screen is magnified. You probably won’t be able to see the whole screen at the same time when it’s magnified, but as you move around the screen, you can see everything. If you have a touchscreen, Magnifier will display white borders around the edge of your screen. Drag your finger or mouse along the borders to move around the screen.
Lens
In this view, when you move around the screen, it’s like moving a magnifying glass around.
Docked
Docked view works on the Windows desktop. In this view, a magnifier is docked to portion of your screen. As you move around the screen, parts of the screen appear magnified in the docking area, even though the main part of the screen is unchanged.
Customizing Magnifier
You can change the way Magnifier works. For example, you can use the zoom buttons (+ and -) to change how much Magnifier enlarges your screen. Pressing Windows Windows logo key + Plus and Windows Windows logo key + Minus on your keyboard is another quick way to zoom in and out. You can also open the Magnifier options button to change Magnifier.
Note:
You can set Magnifier to follow your mouse, the insertion point, or the keyboard. Follow the instructions below to customize Magnifier.
- Swipe in from the right edge of the screen, and then tap Search. (If you're using a mouse, point to the upper-right corner of the screen, move the mouse pointer down, and then click Search.)
- Enter Magnifier in the search box, tap or click Apps, and then tap or click Magnifier.
- Go to the Windows Desktop and click the Magnifying glass icon.
- Click the Options button Magnifier options button.
- Do one or more of the following:
- Use the slider to choose a zoom increment. The percentage you choose here will be the increment by which Magnifier enlarges the screen when you press the zoom in button zoom in button.
- Select the Turn on color inversion check box to reverse colors on the screen. Sometimes reversing colors makes text easier to read.
- Select a check box to choose how Magnifier focuses. Depending on your settings, Magnifier can follow your mouse, the insertion point, or the keyboard.
Note:
When you open Magnifier, the Magnifier toolbar appears briefly. It quickly gets out of your way, but you can display it again by clicking the magnifying glass icon on your screen or the Magnifier icon on the taskbar.
8425996b-8c7f-4f72-9c11-35545f1b6af4|0|.0|96d5b379-7e1d-4dac-a6ba-1e50db561b04