Are you looking for an easy way to synchronize your files to another computer on your network? Or maybe you want to sync to an external drive or the cloud. If so, then take a look at Allway Sync by Botkind.
For years now, I have been using synchronization programs to make an exact copy of my files on network drives and external devices. Over ten years ago, Microsoft released a straightforward file synchronization program called SyncToy.
But Microsoft dropped support for SyncToy a few years ago, and eventually, it stopped working correctly. That is when I started looking for another synchronization application and found Allway Sync.
Windows 10 does have a built-in file sync program called File History, but it is pretty basic. With File History, you can sync to a network folder or external drive, but not to the cloud.
On the other hand, Allway Sync can sync to a local or network folder, FTP / SFTP server, Google Drive, Dropbox, OneDrive, and several different cloud storage types. You can even sync to a single archive file.

The user interface inside of Allway Sync
The user interface is simple to use and easy to understand. The sync options are quite extensive and include data compression and encryption. You can set up multiple sync jobs and customize each job to meet your needs.
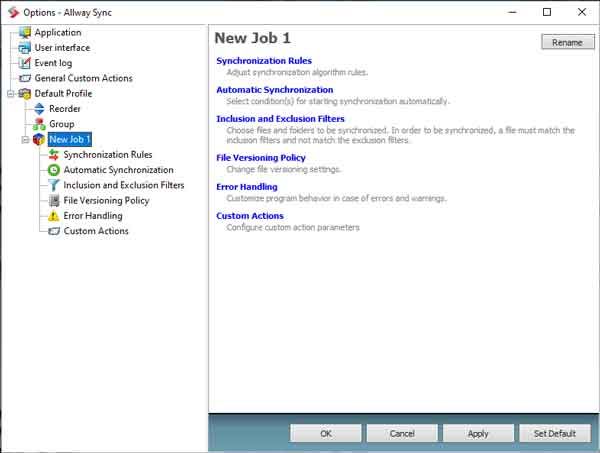
The sync job options menu inside of Allway Sync
The options for sync jobs include synchronization rules, automatic synchronization, inclusion and exclusion filters, file versioning, error handling, and custom actions.
I have several clients that use synchronization software for backing up files. The primary reason is that files can be recovered quickly, as they do not have to be decrypted. Just copy the file you want to be recovered back to the original folder.
Allway Sync is free for personal use, with a limit of 40,000 files per 30 day period. But for unlimited file synchronization, purchasing a Pro license is recommended. FYI - A pro license is not that expensive (under $30).
There are a couple of different editions of Allway Sync, a desktop edition for installing on desktops, laptops, and servers. There is also an edition, Allway Sync 'n' Go, a portable version for installing on external drives.
Allway Sync comes in 32-bit and 64-bit versions compatible with Windows 10, Windows 8.1, Windows 7, Windows Server 2008, Windows Server 2012, Windows Server 2016, and Windows Server 2019. They even have versions that will run on Windows 2000 and Windows XP.
For more information on Allway Sync by Botkind, click on the link below.
Allway Sync by Botkind
c391c9ab-0ca3-4861-a6fb-52e9cc798e0f|0|.0|96d5b379-7e1d-4dac-a6ba-1e50db561b04