Geeks in Phoenix

Geek Blog


My digital toolbox 4

Being a computer technician, I used all sorts of different software during my day. One day I might be removing viruses and malware, the next day, I might be replacing a failed hard drive. So the software I use is always changing, so here is another installment of my digital toolbox.

My digital toolbox 4

Windows 10 media (USB and DVD versions)

Screenshot of Windows 10 media boot menu

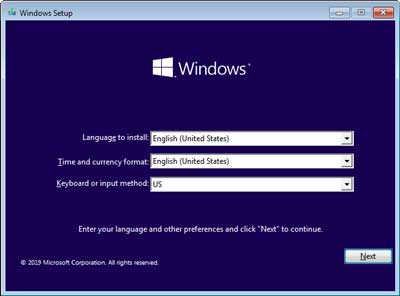
One of the best things Microsoft did when it comes to Windows 10 is to make the installation media readily available. With the installation media, you can do all sorts of repairs and maintenance to Windows 10.

You can, of course, install or reinstall Windows 10. You can also perform an in-place upgrade from Windows 7, Windows 8.1, or even Windows 10 itself. And since the drives are bootable, you can even use the Windows 10 installation media to repair Windows 10.

Now I have in my digital toolbox several USB and DVD versions of the Windows 10 media. The Windows 10 USB drives have both 32-bit and 64-bit versions on them. I have separate DVDs for 32-bit and 64-bit versions of Windows 10.

Believe it or not, but I have the ISO file of every version of Windows 10 that has been released (32-bit and 64-bit). You never know when they might come in handy.

Since the installation media is bootable, I mainly use it for repairing Windows 10. You can access the same recovery tools on the install media as you have when Windows 10 fails to boot correctly.

Here are a few links to articles that illustrate how you can use the Windows 10 media. I have included a link to the Windows 10 Media Creation Tool too.

How to repair Windows 10 by doing an in-place upgrade

How to get a free Windows 10 upgrade for Windows 7 and Windows 8.1

How to perform a clean Windows 10 installation

The Windows 10 feature you hope you never have to use

Windows 10 Media Creation Tool

Space Sniffer

Screenshot of Space Sniffer

There are times when I need to see how the space on a drive is allocated. It is one thing to know the size of a folder or file in numbers, but seeing them graphically represented as blocks is quite different. This is where Space Sniffer comes in handy.

Space Sniffer displays the contents of a drive as blocks in a treemap. The larger the block, the larger folder or file. You can quickly find data that is taking up large amounts of space on a drive.

Now the cool thing about Space Sniffer is that it requires no installation. You can run directly from a USB drive. Just insert the USB drive and start it up.

Case in point; I once had a business that all of the workstations were getting low disk space messages. I ran Space Sniffer from a USB drive on a couple of the workstations and quickly found the problem. It turned out that the network anti-virus client was not deleting previous versions of virus definitions as it was supposed to be doing.

I also like to use Space Sniffer to quickly find Outlook databases, as it has a couple of different locations it stores its files. Microsoft Outlook is notorious for creating large files.

See what your drive contains with Space Sniffer

Synchronized browser data

Screenshot of Firefox sync settings

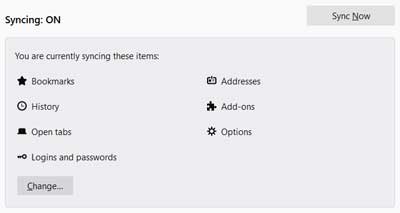
One of handy features of browsers nowadays is the ability to synchronize data (passwords, favorites, extensions, etc.). All of the major browsers have this feature, including Google Chrome, Mozilla Firefox, and Microsoft Edge.

Each browser has a different way of setting up synchronization; Chrome uses a Gmail account, Firefox uses a Firefox account, and Edge uses a Microsoft account.

But no matter what browser you use, you get the same content (passwords, favorites, options, etc.) across all platforms. Be it either Windows Mac, Linux, Android, or iOS. If it is on one device, it is on all devices.

Since I do a lot of research for service calls at my office, I like to save bookmarks in my desktop version of Firefox. Then when I get on-site, I can open those bookmarks in my smartphone version of Firefox.

One of my favorite things is opening a tab on my desktop Firefox from the Firefox in my workshop. That way, I can locate parts for customer's computers in the workshop and then order them in my office.

Any way you look at it, having browser data synchronized between devices is a real asset that should not be overlooked. If you are not syncing your browser data, I recommend you give it a try.

See what your drive contains with Space Sniffer

Got a video or music library and want to see how large it is? Maybe you downloaded a huge file and cannot remember where it is? If so, Space Sniffer may be what you need.

See what your drive contains with Space Sniffer

Windows built-in File Explorer works excellent when it comes to accessing files or folders. But when it comes to finding large files and folders, it can be cumbersome. It is times like this that Space Sniffer comes in handy.

Space Sniffer is a graphic visualization tool that uses blocks in a treemap to display the contains of a drive. The larger the square, the more space it is taking up.

Now, if you are running low on disk space, Space Sniffer is just what you are looking for. Space Sniffer, with its block treemap, can show you precisely what is taking up space on your drive.

I have used graphic visualization tools for years now. They are the fastest way to find a space hog on an internal/external hard drive or USB flash drive.

One of my favorite stories is when I used a graphic visualization tool to find a space hog on a network. It turned out to be a network anti-virus client that wasn't deleting old virus definitions and affected about 75% of the network computers.

Getting started with Space Sniffer could not be any easier. Just download the ZIP file and extract it to a folder of your choice. That is it; no installation required. It works great on a USB drive!

When you start Space Sniffer, you get prompted to choose a drive or path you want to view. Once you have selected one, click Start and Space Sniffer performs a full scan. The scan can take a minute or two on massive drives.

When the treemap appears, you can hover your cursor over a file or folder to get more information. And to zoom into a folder, all you have to do is double-click on it.

The main screen inside of Space Sniffer

The first time you run Space Sniffer, it opens with default settings, which can be overwhelming to many users. But if you go into the configuration menu (Edit > Configure), you can customize the display to your liking.

For example, you can change the colors used for files and folders, the look of the boxes (drop shadow, halo, etc.) and the zoom animation. You can also change the font and element size.

The configuration screen inside of Space Sniffer

There are a couple of configuration settings I highly recommend you activate. To ensure you see everything in a drive or path, make sure the Show free space on new views and Show unknown space on new views are selected.

And when you finish configuring Space Sniffer, it writes your preferences to a configuration file. That way, it will appear the same way from now on. Or until you erase the config file.

Another cool feature is that you can export the current view in Space Sniffer to a text file. This feature is also customizable, with several built-in configurations.

Space Sniffer is freeware, but donations to the project are always welcome. Just use the link on the toolbar or the Help pull-down menu. For more information on Space Sniffer, follow the link below.

SpaceSniffer, find lost disk space the easy way

Free computer diagnostics

Repairing a PC can sometimes be expensive, and that is why we offer free basic in-shop diagnostics. Give one of our professional and experienced technicians a call at (602) 795-1111, and let's see what we can do for you.

Check out our reviews

Geeks In Phoenix LLC, BBB Business Review

Customer service is #1

Here at Geeks in Phoenix, we take pride in providing excellent customer service. We aim to give the highest quality of service  from computer repair, virus removal, and data recovery.

Bring your computer to us and save

Repairing a computer can be time-consuming. That is why we base our in-shop service on the time we work on your computer, not the time it takes for your computer to work! From running memory checking software to scanning for viruses, these are processes that can take some time.

Contact us

If you have any questions, please feel free to give us a call at (602) 795-1111  and talk with one of our Geeks. Or you can send us a message from our contact page contact page , and one of our Geeks will get back to you as soon as possible. Or you can stop by and see us. Here are our hours and location.

Like Geeks in Phoenix on Facebook

Follow Geeks in Phoenix on Twitter

Watch Geeks in Phoenix on YouTube