Geeks in Phoenix

Geek Blog


How to change the brightness in Windows 11

Adjusting the screen brightness can significantly enhance your computer experience. Not only does it help with readability, but it can also reduce eye strain and improve battery life on laptops. Let's take a look at how to change the brightness of your screen inside of Windows 11.

How to change the brightness in Windows 11

With Windows 11, Microsoft has introduced a more streamlined and user-friendly interface to help you easily change the brightness settings of your display. In this article, we'll explore various methods for adjusting screen brightness in Windows 11, providing step-by-step instructions to help you find the best option for your needs.

Using the Quick Settings Menu

One of the simplest ways to adjust your screen brightness in Windows 11 is through the Quick Settings menu. This menu allows you to quickly change various settings, including brightness.

Using the Quick Settings Menu to change the brightness in Windows 11

  1. Left-click on the network, battery, or volume icon located in the system tray at the bottom-right corner of the taskbar. This will open the Quick Settings menu.
  2. You'll see a brightness slider in the center of the Quick Settings panel. Drag the slider to the left to decrease the brightness or to the right to increase it. As you move the slider, you'll notice your screen brightness adjusting in real-time.
  3. Once you're satisfied with the brightness level, you can click anywhere outside the Quick Settings menu to close it.

Using the Settings app

If you prefer a more detailed approach or need to change additional display settings, using the Settings app is a great option.

Using the Settings app to change the brightness in Windows 11

  1. Left-click on the Start Windows logo key button to bring up the Start menu.
  2. In the list of pinned apps on the Start menu, left-click on Settings.
  3. In the left-hand column, left-click on System.
  4. In the right-hand column, left-click on Display.
  5. Under the Brightness and color section, you'll see a brightness slider. Drag the slider to the left to decrease brightness or to the right to increase it. You may also see an option for Night light, which helps reduce blue light emissions in the evenings. If your device supports automatic brightness adjustment, you can enable this feature here. This setting allows your screen brightness to adjust automatically based on ambient lighting conditions.

Using keyboard shortcuts

Many laptops and some desktop keyboards come with dedicated brightness keys. These keys are often marked with a sun icon and can provide a quick way to adjust your screen's brightness.

Using keyboard shortcuts to change the brightness in Windows 11

  1. On the top row of your laptop keyboard, you'll typically find brightness keys on the Function keys (F1 to F12). Look for a key with a sun icon or a brightness symbol.
  2. To adjust brightness, you may need to hold down the Fn key (located next to the Windows logo Windows logo key key) while pressing the brightness Function key. The exact combination may vary depending on your laptop's manufacturer.
  3. Press the brightness-up key to increase brightness or the brightness-down key to decrease it.

Using a Graphics app

If you have a dedicated graphics card, you may also adjust brightness through the graphics app provided by your graphics card manufacturer (e.g., Intel, NVIDIA, AMD).

Using a Graphics app to change the brightness in Windows 11

  1. Right-click on your Desktop and select your graphics app (e.g., NVIDIA Control Panel, AMD Radeon Software, or Intel Graphics Command Center). You may need to select Show more options to find the link to the graphics app.
  2. Within the graphics app, navigate to the display settings section.
  3. Look for brightness or color settings. You can often find advanced options for adjusting brightness, contrast, and other display settings.

Changing the brightness of your screen in Windows 11 is a straightforward process that can be accomplished through several different methods, including the Quick Settings menu, the Settings app, keyboard shortcuts, and the graphics app. Each method offers its own advantages, allowing you to choose the most convenient option based on your preferences and hardware.

Maintaining an appropriate screen brightness not only enhances your viewing experience but also prolongs your device's battery life and reduces eye strain. By following the steps outlined above, you'll ensure a comfortable and visually appealing computing experience.

My first look at Windows 11

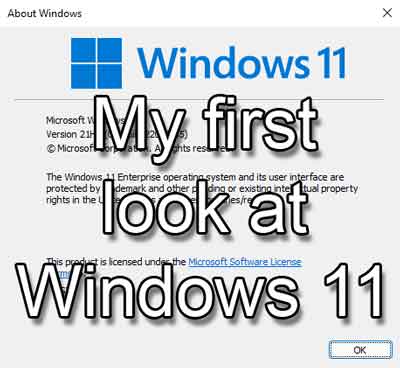
Microsoft recently announced that they are releasing a successor to Windows 10, aptly named Windows 11. So join me as I take a look at Windows 11.

My first look at Windows 11

When Microsoft announced the next version of Windows, I went looking for a beta or technical preview of Windows 11. I soon found out that the only way to get a version of Windows 11 is through their Insider Program.

Well, it just so happens that I had created a Virtual Machine (VM) a couple of years ago for the Windows 10 Insider Program. I started it, and sure enough, Windows informed me that I need to download a new build of Windows.

I went through the upgrade process, and when all was said and done, I had Windows 11 Insider Preview running inside a VM. So let's take a look at Windows 11.

Note: This build of Windows 11 that I am using for this article is just a beta, so the look and the way it operates may and probably will change before the final release of Windows 11.

Login Screen

The Windows 11 Logon Screen

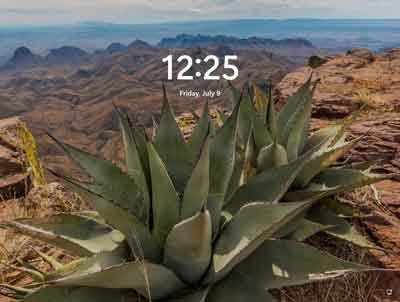
Not much different here from Windows 10. The default font has changed, but other than that, it looks and feels like Windows 10.

Taskbar

The Windows 11 Taskbar

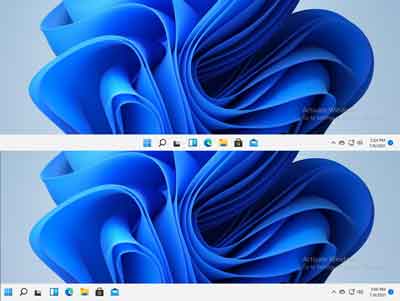
The first thing you will notice when the Desktop appears is that the Start button and pinned programs are centered in the Taskbar. Is this by default, and can it be easily changed back to left-justified.

Start Menu

The Windows 11 Start Menu

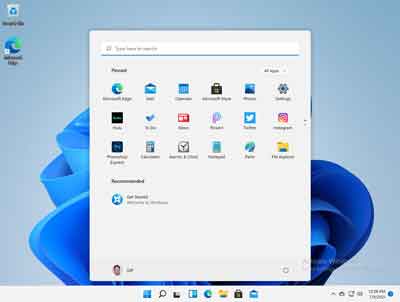
The Start Menu has gotten a makeover, with a new cleaner looking layout. All the same features are available, but they are arranged completely different.

Power User menu

The Windows 11 Power Users menu

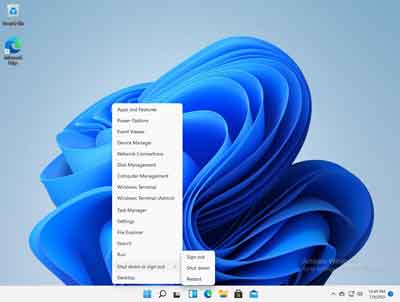
It is still there, The only component of Windows 8.1 to still be inside of Windows. Don't remember Windows 8.1? That is one version of Windows I would love to forget.

Settings

The Windows 11 Settings app

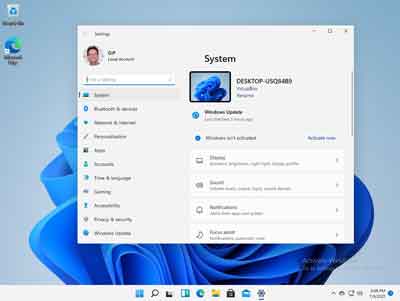
As with the Start Menu, the Settings app has also received a makeover, getting broken into two (2) columns. The categories are now listed in the left-side column, and sub-categories are listed in the right-hand column.

Control Panel

The Windows 11 Control Panel

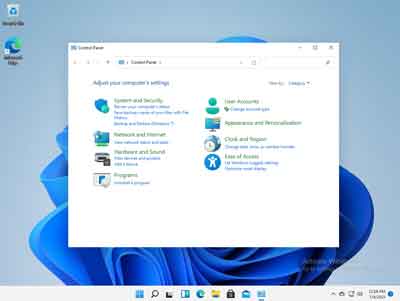
Microsoft has been trying to eliminate the Control Panel for a while now, but it still exists in the preview build I am running. Who knows if it will make it to the final build of Windows 11.

File Explorer

The Windows 11 File Explorer

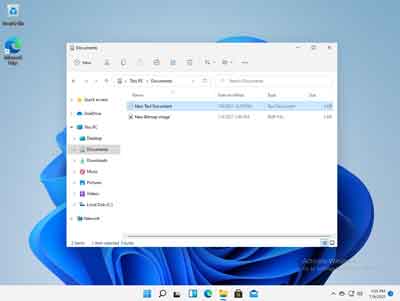
File Explorer has gotten a small makeover too. The Ribbon appears to be gone, and a simple toolbar with the most commons functions has taken its place. We will have to wait until the final build to see if the Ribbon is truly gone.

The overall look and feel of Windows 11 is smoother than Windows 10. With rounded corners on dialog boxes and newer icons, Windows 11 looks like an excellent successor to Windows 10.

But of course, we will have to wait and see how the final build of Windows 11 looks and feels. For a more in-depth look at this version of Windows 11, check out the video below.

Free computer diagnostics

Repairing a PC can sometimes be expensive, and that is why we offer free basic in-shop diagnostics. Give one of our professional and experienced technicians a call at (602) 795-1111, and let's see what we can do for you.

Check out our reviews

Geeks In Phoenix LLC, BBB Business Review

This business is BBB Accredited

Customer service is #1

Here at Geeks in Phoenix, we take pride in providing excellent customer service. We aim to give the highest quality of service  from computer repair, virus removal, and data recovery.

Bring your computer to us and save

Repairing a computer can be time-consuming. That is why we base our in-shop service on the time we work on your computer, not the time it takes for your computer to work! From running memory-checking software to scanning for viruses, these are processes that can take some time.

Contact us

If you have any questions, please feel free to give us a call at (602) 795-1111  and talk with one of our Geeks. Or you can send us a message from our contact page , and one of our Geeks will get back to you as soon as possible. Or you can stop by and see us. Here are our hours and location.

Like Geeks in Phoenix on Facebook

Follow Geeks in Phoenix on Twitter

Watch Geeks in Phoenix on YouTube