Geeks in Phoenix

Geek Blog


How to clean up an old joystick or game controller

Do you have an old PC joystick or game controller you haven't used in a long time? Did the buttons or the gamepad start to stick? Here's how to clean up old PC joysticks and game controllers.

If you're like me, you hate to get rid of anything that still works. So when I wrote the DosBox and Internet Archive articles, I started to think about the old game controllers I have. There is nothing wrong with them, just a little dirt and grime.

And how much fun would it be to play the original DOS version of Doom with an original Gravis Gamepad Pro from the mid-'90s? Gravis made a couple of variations of the gamepad with a couple of different connectors (USB and joystick port). I had both types but only have the USB version now.

After a little research, I found I could use a Gravis Gamepad Pro, as long as it had a USB connection. Microsoft still includes support for the Gravis Gamepad Pro inside of Windows 10.

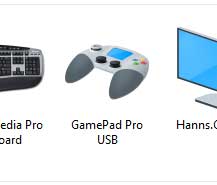
The Gravis Gamepad Pro icon inside of Windows 10 Devices and Printers

And to top it off, DosBox does support USB game controllers, so I am almost ready to start playing games with my gamepad. But first, I need to clean it up, as some of the buttons have gotten sticky.

Now when you start talking about disassembling and reassembling any piece of electronics, always remember to never work on anything that is plugged in (energized). Always disconnect the device from any connection and de-energize it before working on it. Never work on a device that is connected and energized!

The following procedures are the same for almost any computer device, except for Hard Disk Drives (HDD). HDD's have to be disassembled/reassembled in an environment free of contaminants, like a cleanroom.

Now before I start tearing down my gamepad, I will need some necessary tools. First and foremost is a digital camera or smartphone w/ camera and a notepad. Remember the old saying 'A picture is worth a thousand words'? The same holds here. With no service manual or online instructions, I'll be tearing down the gamepad blind. The photos and notes will be my guide for reassembly.

The teardown will be simple, and I'll only need a Philips head screwdriver (Ph.1), a couple of brushes, some cleaning solution, paper towels, and some compressed air. Tweezers or needle-nose pliers may also come in handy but are not required.

The first thing I'll do is take photos of the top, bottom, and sides of the gamepad. That way, I have a record of how the wholly assembled gamepad should look. Next, I'll start removing the screws on the bottom and checking to see if all of them are the same size. If any are different, I'll note it and place them separate from the rest.

Screw hole locations on bottom of Gravis Gamepad Pro
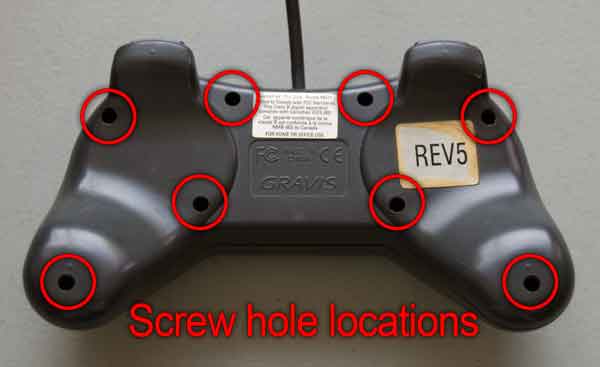
Screw hole locations on the bottom of Gravis Gamepad Pro

Once I have all of the screws out of the bottom, I can carefully separate the top and bottom of the gamepad chassis. I can see there are two (2) screws that hold the main circuit board in place. After I remove the two (2) screws, I carefully remove the main circuit board from the chassis. Remember to take photos of everything you do!

Main circuit board screw locations inside of the Gravis Gamepad Pro
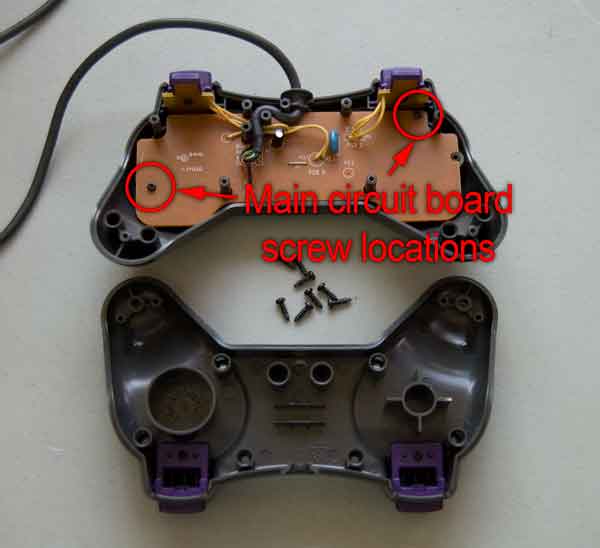
Central circuit board screw locations inside of the Gravis Gamepad Pro

Now I can access all of the buttons and the rubber castle switch tops. I first inspect the heads of castle switches for any damage. They have no physical damage and appear to be pretty clean. Since they are almost twenty (20) years, I've decided they don't need cleaning.

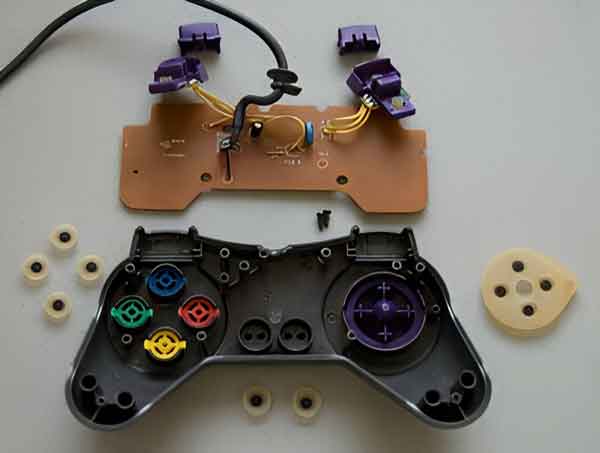
The Gravis Gamepad Pro completely disassembled

Now on to the buttons. As I remove them, I can see some gunk built-up around the sides of the buttons and the adjacent holes in the chassis. Quick cleaning of the button and frame will take care of this and should fix the sticky button problem.

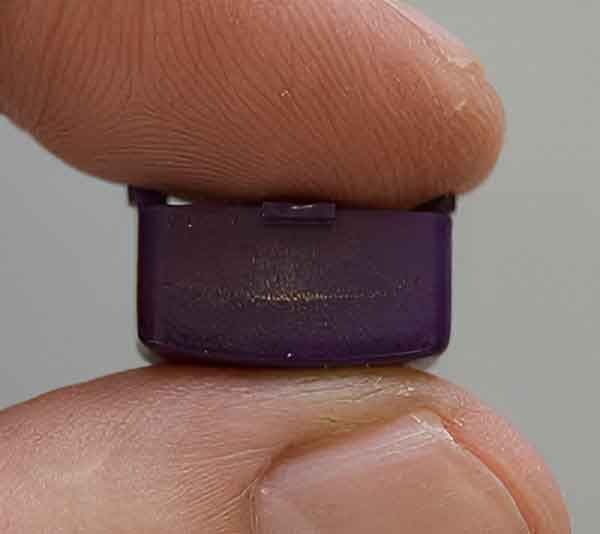
A gunked up button from a Gravis Gamepad Pro

When it comes to drying all of the parts off, I usually use paper towels to get the majority of moisture off and then use some compressed air to get any moisture out from the cracks and crevices.

Once all of the parts are clean and dry, refer to your photos and notes to reassemble. Remember not to overtighten any screw or nut; you can always make a second pass around and snug up any screws and nuts that need it.

Type using a pointing device or joystick with On-screen Keyboard in Windows XP

On-Screen Keyboard is a utility that displays a virtual keyboard on the screen and allows users with mobility impairments to type data using a pointing device or joystick. On-Screen Keyboard is intended to provide a minimum level of functionality for users with mobility impairments.

On-Screen Keyboard has three typing modes you can use to type data:

  • In clicking mode, you click the on-screen keys to type text.
  • In scanning mode, On-Screen Keyboard continually scans the keyboard and highlights areas where you can type keyboard characters by pressing a hot key or using a switch-input device.
  • In hovering mode, you use a mouse or joystick to point to a key for a predefined period of time, and the selected character is typed automatically.

In On-Screen Keyboard you can also:

  • View an enhanced keyboard that includes the numeric keypad, or a standard keyboard that does not include the numeric keypad.
  • Display the keyboard with the keys in the standard layout, or in a block layout in which the keys are arranged in rectangular blocks. Block layout is especially useful in scanning mode.
  • Display the U.S. standard keyboard (101 keys), the universal keyboard (102 keys), or a keyboard (106 keys) with additional Japanese language characters.
  • Use Click Sound to add an audible click when you select a key.
  • Use Always on Top to keep your keyboard displayed on your screen when you switch programs or windows.

The accessibility tools that ship with Windows are intended to provide a minimum functionality level for users with special needs. Most users with disabilities will need utility programs with more advanced functionality for daily use.

  • To open On-Screen Keyboard, click Start, point to All Programs, point to Accessories, point to Accessibility, and then click On-Screen Keyboard.
  • The program in which you want to type characters must be active while you are using On-Screen Keyboard.
  • Utility Manager enables users to check an Accessibility program's status and start or stop an Accessibility program. Users with administrator-level access can designate to have the program start when Utility Manager starts. Users can also start Accessibility programs before logging on to the computer by pressing the Windows logo key (Windows logo key) + U at the Welcome to Windows dialog box that appears when Windows starts.
  • The accessibility tools that ship with Windows are intended to provide a minimum functionality level for users with special needs. Most users with disabilities will need utility programs with more advanced functionality for daily use. For information about accessibility products and aids for Windows operating systems, see the accessibility page (go to http://www.microsoft.com/ and search for "accessibility") on the Microsoft Web site.

Free computer diagnostics

Repairing a PC can sometimes be expensive, and that is why we offer free basic in-shop diagnostics. Give one of our professional and experienced technicians a call at (602) 795-1111, and let's see what we can do for you.

Check out our reviews

Geeks In Phoenix LLC, BBB Business Review

Customer service is #1

Here at Geeks in Phoenix, we take pride in providing excellent customer service. We aim to give the highest quality of service  from computer repair, virus removal, and data recovery.

Bring your computer to us and save

Repairing a computer can be time-consuming. That is why we base our in-shop service on the time we work on your computer, not the time it takes for your computer to work! From running memory checking software to scanning for viruses, these are processes that can take some time.

Contact us

If you have any questions, please feel free to give us a call at (602) 795-1111  and talk with one of our Geeks. Or you can send us a message from our contact page contact page , and one of our Geeks will get back to you as soon as possible. Or you can stop by and see us. Here are our hours and location.

Like Geeks in Phoenix on Facebook

Follow Geeks in Phoenix on Twitter

Watch Geeks in Phoenix on YouTube