Being organized is a necessity when you are an IT consultant. You have to know where things are, so when you need them, you can find them. The same is true for the Windows 8 Start screen. If you can't find it, you can't use it. So here's how to organize the Start screen in Windows 8.
Here's a video on how to organize the tiles on the Windows 8 Start screen. The complete instructions are below.
How to pin tiles to the Start screen in Windows 8

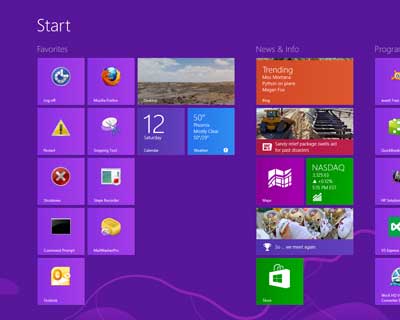
Windows 8 Start screen with tiles and groups organized
Using a mouse
- Go to the Start screen.
- Right-click the Start screen background to bring up the app commands.
- Select All apps.
- Scroll to and right-click the app tile you want to pin to the Start screen.
- On the app command bar at the bottom of the screen, left-click Pin to Start.
Using a keyboard
- Go to the Start screen.
- Press the Windows logo key
 + Z to open the app commands.
- Press Enter to select All apps.
- Use the arrow keys to navigate to the app tile you want to pin to the Start screen.
- Press the Application key
 to bring up the app commands.
- On the app command bar at the bottom of the screen, use the arrow keys to navigate to Pin to Start and press Enter.
Using touch
- Go to the Start screen.
- Swipe up from the bottom of the Start menu to bring up the app commands.
- Select All apps.
- Scroll to the app tile you want to pin to the Start screen and press and hold it to bring up the app commands.
- On the app command bar at the bottom of the screen, tap Pin to Start.
How to unpin tiles from the Start screen in Windows 8
Using a mouse
- Go to the Start screen.
- Scroll to and right-click the app tile you want to unpin from the Start screen.
- On the app command bar at the bottom of the screen, left-click Unpin from Start.
Using a keyboard
- Go to the Start screen.
- Use the arrow keys to navigate to the app tile you want to unpin from the Start screen.
- Press the Application key
 to bring up the app commands.
- On the app command bar at the bottom of the screen, use the arrow keys to navigate to Unpin from Start and press Enter.
Using touch
- Go to the Start screen.
- Scroll to the app tile you want to unpin from the Start screen and press and hold it to bring up the app commands.
- On the app command bar at the bottom of the screen, tap Unpin from Start.
Moving tiles on the start screen in Windows 8
Using a mouse
- Go to the Start screen.
- Click and hold the left mouse button on the tile you want to move and drag it to the location you want.
Using touch
- Go to the Start screen.
- Press and hold the tile you want to move and drag it to the location you want.
Move groups on the start screen in Windows 8

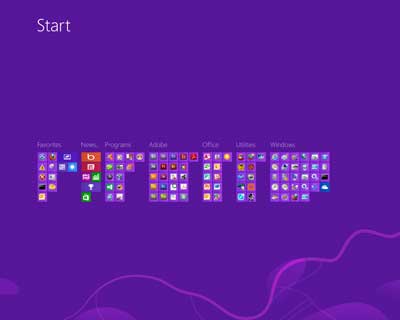
Windows 8 Start screen zoomed out with tiles and groups organized
Using a mouse/keyboard
- Go to the Start screen.
- Hold down the Control key (CTRL) on the keyboard while using the mouse wheel and zoom out to view all of the Start screen groups.
- Press and hold the left mouse button on the group you want to move and drag it to the location you want.
Using touch
- Go to the Start screen.
- Pinch two fingers on the screen and zoom out to view all of the Start screen groups.
- Press the group you want to move and drag it to the location you want.
Rename groups on the start screen in Windows 8
Using a mouse/keyboard
- Go to the Start screen.
- Hold down the Control key (CTRL) on the keyboard while using the mouse wheel and zoom out to view all of the Start screen groups.
- Right-click on the group you want to rename and select Name group from the app command bar.
Using touch
- Go to the Start screen.
- Pinch two fingers on the screen and zoom out to view all of the Start screen groups.
- Press and hold the group you want to rename and select Name group from the app command bar.
Other related articles:
How to create a shortcut on the Desktop and Start menu in Windows 8
How to create log-off restart and shutdown shortcuts on the Start screen in Windows 8
bbe30632-ceec-4e57-922a-2170ddb51af4|0|.0|96d5b379-7e1d-4dac-a6ba-1e50db561b04