I wanted to install Windows 8 on one of my production systems but didn't want to perform an upgrade to my existing version of Windows 7. I have had dual-boot systems in the past, so why not try it with Windows 7 and Windows 8. And to have some fun with it, I decided to use my Netbook.
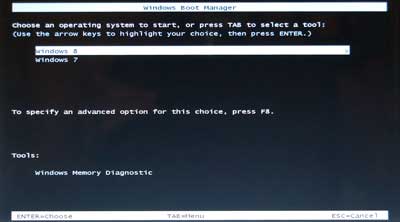
Windows 7 / Windows 8 boot manager screen
I was surprised as to how easy it was. All that is required is an existing Windows 7 installation, Windows 8 installation media, and enough free space on your hard drive. I didn't even have to edit the boot loader; Windows 8 did it automatically. Here's how I did it.
Rename the existing Windows 7 partition/volume
Once your system is dual-booting, you will need to identify which partition has what operating system. Renaming the existing partition now will make things easier later (see image below).
- Open My Computer and right-click on the C: drive and select Rename. Give it a name that indicates which operating system is installed on it, something like Win7 or Windows 7.
Create a system image of your existing hard drive
The next thing to do is create a system image, just in case you need to recover your system back to its original state.
- Click the Start button, then click on Control Panel. Inside the Control Panel, click on System and Security, then click on Backup and Restore
or
- Click the Start button. In the search box, type Backup, and then, in the list of results, click on Backup and Restore
In the left pane, click Create a system image, and then follow the wizard's steps. If you're prompted for an administrator password or confirmation, type the password or provide confirmation.
Shrink the existing Windows 7 volume
You will need some free space on your hard drive to install Windows 8. Windows 7 makes shrinking the existing partition easy. If you are logged in as an administrator, you can repartition your hard disk using the Shrink feature in Disk Management. You shrink the existing partition to create unallocated disk space, from which you make a new partition during the installation of Windows 8.
- Click the Start button, then click on Computer, which will bring up Windows Explorer. Inside of Windows Explorer, right-click on Computer, then click on Manage
or
- Click the Start button. In the search box, type Management, and then, in the list of results, click on Computer Management.
If you're prompted for an administrator password or confirmation, type the password or provide confirmation.
- In the left pane, under Storage, click Disk Management.
- Right-click the volume you want to shrink, and then click Shrink Volume. Follow the instructions.
install windows 8 on the free space
Insert the Windows 8 installation media (DVD or USB drive) and reboot your system. If your system does not automatically boot up on the Windows 8 media, you may have to modify the boot options in the system's BIOS.
Once the installation starts, you will be prompted to do an Upgrade or Custom installation. Select Custom, and then you will be asked which partition you would like to install Windows 8 on. Select the unnamed, unallocated disk space you just created and let the installation complete.
I have built quite a few dual-boot systems in the past and used a third party boot editor to finish the setup. Not this time. Windows 8 modified the existing boot loader.
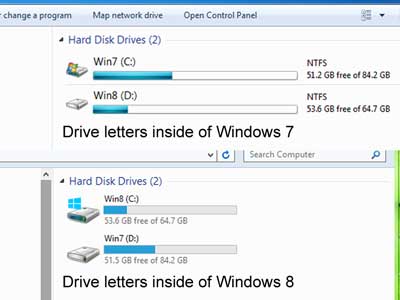
The reversed drive letters on a Windows 7 / Windows 8 dual-boot system
Once the installation is complete, open up Windows Explorer using the instructions above. You will notice that the drive letters associated with the partitions have changed. The partition you renamed earlier is not the C: drive anymore under Windows 8. Both Windows 7 and Windows 8, when in operation, will make their active partition the C: drive. Rename the unnamed Windows 8 partition Win8 or Windows 8, and you're set.
a7b50859-8d0b-49bb-8cbc-b9e8f5fa9a2f|0|.0|96d5b379-7e1d-4dac-a6ba-1e50db561b04