Geeks in Phoenix

Geek Blog


My Geek Notes 1

Welcome to My Geek Notes, where I explore Windows 11 features that can help you feel more confident and in control of your computing experience. As a computer tech, I've been uncovering tools that boost productivity and make your daily tasks easier and more enjoyable.

My Geek Notes 1

Whether you're aiming to streamline your workflows or want to feel more accomplished in your tasks, Windows 11 offers tools that can help. Join me as I share tips and tricks to help you get the most out of your Windows 11 experience and feel more efficient every day!

Use your mouse wheel to adjust volume

One of the simplest yet most useful features of Windows 11 is the ability to adjust volume from the taskbar quickly. Hovering your cursor over the speaker icon and scrolling the mouse wheel instantly changes the volume, which is especially helpful during media playback or video calls and helps you stay focused on your tasks without navigating menus.

This feature is especially beneficial during video conferences or while consuming media since it provides immediate access to volume control. The quick adjustment means you can focus on your work rather than getting bogged down by cumbersome settings.

To adjust the volume with the mouse scroll wheel:

Adjusting Windows 11 volume using a mouse wheel

Place your cursor over the speaker icon next to the clock on the right side of the Taskbar and scroll the wheel up or down to increase or decrease the volume.

Clipboard History

Windows 11's enhanced Clipboard feature lets you access recently copied items with a simple keyboard shortcut, saving time when working with multiple snippets. This makes pasting and reusing content faster, especially when editing documents or transferring data between apps, boosting your efficiency.

This time-saving feature is handy when working on documents that require extensive text modifications or when transferring data between multiple applications. The ability to store numerous items on the clipboard means less time spent navigating back and forth when referencing previous excerpts, boosting overall efficiency.

To access the Clipboard History:

Clipboard History inside Windows 11

Press the Windows logo key Windows logo key + V.

Snap Layouts

Multitasking is vital in today’s fast-paced work, and Windows 11's Snap Layouts make organizing open applications easier. Hovering over the maximize button reveals layout options that let you arrange windows side by side or in grids, helping you manage multiple tasks more efficiently.

For example, you can choose to have two windows side by side or create a grid of four applications in your desktop environment. This intuitive approach to window management allows users to monitor emails while drafting reports or maintain focus on a video call while researching online. With Snap Layouts, juggling multiple tasks becomes effortless.

To access Snap Layouts:

Snap Layouts inside of Windows 11

You can either hover your cursor over the maximize button on any program or press the Windows logo key Windows logo key + Z.

Quick Settings panel

The Quick Settings panel is designed to help you feel better prepared and more confident in managing your device. By clicking the network, volume, or battery icons, you can quickly access essential settings, helping you stay in control of your workspace effortlessly.

The consolidated menu means you can tweak common settings with just two clicks, eliminating the need to delve deep into the settings menu. Coupled with its customizable options, Quick Settings empowers users to tailor their workspace according to their preferences, thus creating a more personalized and efficient working environment.

To access the Quick Settings panel:

Quick Settings panel inside Windows 11

Press the Windows logo key Windows logo key + A.

System-wide spell checking

For anyone who frequently composes emails or documents, the new system-wide spell-checking feature in Windows 11 is a powerful tool. Even if the application you’re using doesn’t have built-in spell check capabilities, Windows 11 can automatically highlight spelling errors across most text fields.

This ensures that your communications are polished and professional, regardless of the platform or software you are utilizing. As a productivity booster, this feature minimizes the risk of making simple spelling errors that could detract from the quality of your work. It allows you to focus on your message rather than getting distracted by typos, enhancing the flow and clarity of your written communication.

To access the spell-checking capabilities:

Spell-checking settings inside Windows 11

  1. Left-click on the Start Windows logo key button to bring up the Start menu.
  2. In the list of pinned apps on the Start menu, left-click on Settings (gear icon).
  3. In the left-hand column, left-click on Time & language.
  4. In the right-hand column, left-click on Typing.

Here you can enable highlighting and autocorrecting misspelled words. You can also enable text suggestions when you are using a physical keyboard. Helpful if you write a lot in browsers or chat apps.

As we wrap up this edition of My Geek Notes, it's clear that the little features can make a big difference in our daily computing experience. By mastering functionalities like adjusting volume with your mouse wheel, harnessing the power of Clipboard History, utilizing Snap Layouts for multitasking, accessing Quick Settings for efficiency, and enabling system-wide spell checking for flawless writing, you can enhance productivity and simplify your workflow. We hope these tips empower you to navigate your tech environment with greater ease and confidence. Stay tuned for more insights in our next installments, where we'll continue to explore the tools and tricks that make technology work for you.

How to use all of the Clipboard features in Windows 10 and Windows 11

Updated March 9, 2023

The Clipboard is one of the most widely used features inside Windows. It used to be just for copying a small amount of text, but not anymore. Let's look at all the Clipboard features inside Windows.

How to use all of the Clipboard features in Windows

In the early days of computing, users could store small amounts of data in the computer's RAM (Random Access Memory), which was called the Paste Buffer. You could only save one piece of data at a time, and every time you copied a new piece of data, the last piece was erased.

But over the decades, the Paste Buffer, now known as the Clipboard, has evolved into a valuable and essential tool for productivity. The Clipboard in Windows 10 and Windows 11 can hold multiple pieces of text and images. And how you access the Clipboard has changed over the years.

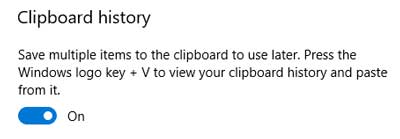
Before you can take advantage of the full capability of the Windows Clipboard, you have to do a couple of things. The first thing you need to do is to make sure that the Clipboard history feature is turned on.

With Clipboard history turned on, you can view and paste all of the different items you have copied to the Clipboard. You will need to go to Windows Settings to make sure that this feature is activated.

How to get to the Clipboard section of the Windows 11 Settings app

  1. Open the Windows Settings app by either:
    • Left-click on the Start button to bring up the Start menu. In the upper right-hand corner of the Start menu, left-click on All apps. Scroll down the list of programs and left-click on Settings.
    • Right-click on the Start button to bring up the Power User menu. On the Power User menu, left-click on Settings.
    • Press the Windows logo key Windows logo key + I.
  2. Left-click on the System category in the left-hand column.
  3. Scroll down the right-hand column and left-click on the Clipboard category.

How to get to the Clipboard section of the Windows 10 Settings app

  1. Open the Windows Settings app by either:
    • Left-click on the Start button, which will bring up the Start menu. On the Start menu left-click on the gear icon (Settings).
    • Right-click on the Start button, which will bring up the Power User menu. On the Power User menu, left-click on Settings.
    • Press the Windows logo key Windows logo key + I.
  2. Left-click on the System category.
  3. Scroll down the left-hand column and left-click on the Clipboard category.

Once you are in the Clipboard section, make sure that the Clipboard history is turned on.
The Clipboard history switch inside of Windows 10 Settings
You can also clear all of the items on the Clipboard from here.

Now copying text to the Clipboard has always been pretty straightforward, but there may be times you want to copy images to it. The second thing to do is to make sure you have all the programs you can use to capture images.

The first screen capture program built into Windows is the Snipping Tool, and it has been in Windows since Windows 7, and it works well for capturing anything on-screen (if you can see it, you can capture it).
The Snipping Tool inside of Windows
And it automatically copies whatever you snip to the Clipboard. But it does prompt you to save your snip to a file when you close it.

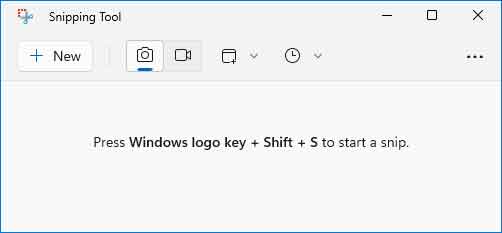
And the second built-in app for capturing screen snips is the Snipping Bar.
The Snipping Bar inside of Windows
Microsoft included it in Windows 10 Version 1809, and few people know about it. That's because you have to use a combination of three (3) keys on the keyboard to bring it up (Windows logo key Windows logo key + Shift + S).

The downside of the Snipping Bar is that it only captures one snip at a time. Every time you want to capture a screen snip, you have to press the Windows logo key Windows logo key + Shift + S keys. The Snipping Tool will capture as many snips as you like until you close it.

We are now all set to start copying items to the Clipboard. Remember that you can paste text from the Clipboard into almost any program, but you can only paste images into programs that can display images.

For example, you can paste text from the Clipboard into Notepad but not images. But can paste both text and images from the Clipboard into Paint or Wordpad.

There are several different ways to copy and paste from the Clipboard. Here are a few of the most common ways to do it.

Ways to copy text to the Clipboard

Highlight the text you want to copy and then:

  • Press Ctrl + C on the keyboard
    Copying text to the Clipboard using the context menu inside of Windows 10
  • Right-click on the highlighted text and select Copy from the context menu

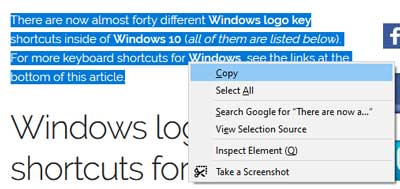
Ways to copy graphics to the Clipboard

Highlight the image you want to copy and then:

  • Press Ctrl + C on the keyboard

If you can not highlight the image then:

Copying an image to the Clipboard using the context menu inside of Windows 10

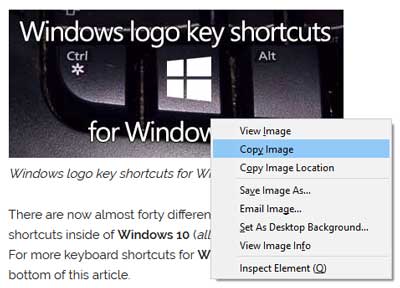
  • Right-click on it and select Copy.
  • Use the Snipping Tool or the Snipping Bar to capture a snip of it.

Ways to paste from the Clipboard

Select where you want to place the graphic or text in the program of your choice then:

  • To paste the last item copied to the Clipboard, press Ctrl + V on the keyboard.
  • To select an item on the Clipboard, press the Windows logo key Windows logo key + V to display the Clipboard history.
    Pasting an item from the Clipboard using Clipboard history in Windows 10
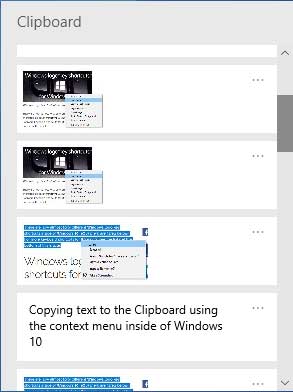
    Then use your mouse or keyboard arrows to scroll through the clips. When you find the one you want to use, left-click on it (mouse) or press enter (keyboard).

For more information on the keyboard shortcuts discussed in this article, follow the links below.

Windows logo key shortcuts for Windows 11

Windows logo key shortcuts for Windows 10

General keyboard shortcuts

Check out the following video for examples of copying to and pasting from the Clipboard inside Windows 10.

Free computer diagnostics

Repairing a PC can sometimes be expensive, and that is why we offer free basic in-shop diagnostics. Give one of our professional and experienced technicians a call at (602) 795-1111, and let's see what we can do for you.

Check out our reviews

Geeks In Phoenix LLC, BBB Business Review

This business is BBB Accredited

Customer service is #1

Here at Geeks in Phoenix, we take pride in providing excellent customer service. We aim to give the highest quality of service  from computer repair, virus removal, and data recovery.

Bring your computer to us and save

Repairing a computer can be time-consuming. That is why we base our in-shop service on the time we work on your computer, not the time it takes for your computer to work! From running memory-checking software to scanning for viruses, these are processes that can take some time.

Contact us

If you have any questions, please feel free to give us a call at (602) 795-1111  and talk with one of our Geeks. Or you can send us a message from our contact page , and one of our Geeks will get back to you as soon as possible. Or you can stop by and see us. Here are our hours and location.

Like Geeks in Phoenix on Facebook

Follow Geeks in Phoenix on Twitter

Watch Geeks in Phoenix on YouTube