Geeks in Phoenix

Geek Blog


Locating and installing missing storage drivers for a clean Windows install

Have you ever encountered a situation where you are trying to install Windows on your computer, but the installation process does not find any available drives to install the operating system? This can be a frustrating experience, but there are several steps you can take to find a driver and complete the installation process. In this article, we will show you how to locate and install missing storage drivers when performing a clean install of Windows.

Locating and installing missing storage drivers for clean Windows install

If you're installing Windows for the first time (clean), and there are no drives listed to install Windows on, don't worry. This issue is common and can be resolved with a few simple steps. The problem is that Windows does not have a generic driver in its installation media for your storage controller.

This was common in the '90s when you had to load the storage controller driver(s) from a floppy disk by pressing F6 when prompted for a drive to install. That is why they are called F6 drivers. In fact, some of the hardware manufacturers still use the F6 folder name in their storage driver packaging.

Now, when it comes to requiring third-party storage controller drivers to install Windows, it usually occurs with RAID (Redundant Array of Inexpensive Disks) storage controllers. But recently, I have also had to use manufacturer drivers for the SATA (Serial AT Attachment) storage controllers used with 11th-generation Intel processors.

Identify the missing storage drivers: This will require having the manufacturer name and model number of your motherboard or controller card. Please make a note of this information, as it will help you locate the missing drivers in the next step.

Download the missing storage drivers: Once you have identified the missing storage drivers, the next step is to download them. You can download the drivers from the manufacturer's website. Some driver downloads are self-extracting install programs, so just download the driver package.

When you download the drivers, make sure you download the correct drivers for your operating system and system architecture (32-bit or 64-bit). Once you have the driver package downloaded, use an archive program like 7-Zip to extract the storage driver package to a separate folder manually.

Copy the drivers to a USB drive: Next, you must copy the downloaded drivers to a USB drive. Make sure the USB drive is formatted in FAT32 or NTFS format and has enough free space to accommodate the drivers. Create a new folder on the USB drive and name it something like Windows Drivers. Then, copy the downloaded drivers to this folder.

Install the missing storage drivers: Now that you have the missing storage drivers on a USB drive, you can install them during the Windows installation process. Here's how:

  1. Boot your computer from your Windows installation media and proceed through the installation process.
  2. When you reach the Where do you want to install Windows screen, and no drives are shown, insert the USB drive with the storage drivers and click Browse to locate the drivers.
  3. Navigate to the folder on the USB drive where you saved the drivers and select the appropriate driver file.
  4. Click OK to install the driver.

Once the driver is installed, you can proceed with the Windows installation without any further issues.

In conclusion, locating and installing missing storage drivers during a Windows installation from a USB drive is a relatively simple process. By following the steps outlined in this article, you can resolve the issue and proceed with the installation smoothly.

Five free Windows 10 utilities that do not require installation

Some of my favorite programs for performing computer diagnostics are the kind that you just download and run. These applications are simple to use and can be deleted when I am finished with them. So here are some of my favorite portable programs for Windows 10.

Five free Windows 10 utilities that do not require installation

Since I repair computers for a living, I use many different programs during my typical workday. Most of them I can store on USB drives for quick access.

But there are some programs that I like to download before I use them, as they are portable applications and do not require installation. Since they do not get installed, the only way to get the latest updated version is by downloading them.

Some of these programs have time stamps on them and will expire after a certain amount of time. So downloading them when I need them makes the most sense. The hardest thing about downloading them is remembering where you saved them.

All of the applications mentioned in this are article can run on any version of Windows currently supported by Microsoft. And the best thing of all is that they all are free to use.

CPU-Z
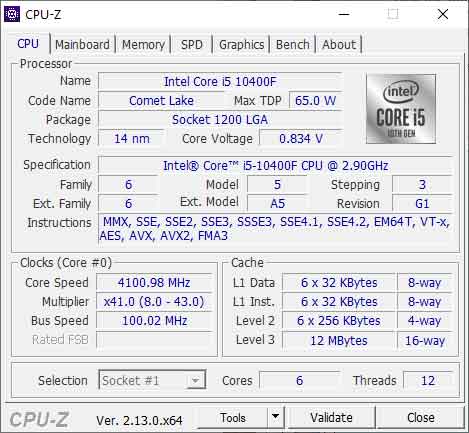
Portable program - CPU-Z

This is a convenient utility that displays the details of the installed processor, motherboard, memory, and graphics card in any given computer. This way, you do not have to disassemble a computer to determine what components it has installed.

CPU-Z comes in handy when you are looking to add or upgrade your computer's memory modules. I use it when a customer wants to upgrade the installed memory, as it displays the exact part number of all of the installed memory modules.

There are portable (ZIP) and installable (EXE) versions of CPU-Z and versions customized for particular motherboard vendors. If you are going to use CPU-Z to measure system performance between different BIOS settings, the installed version may be the best bet.

But if you are only going to run it a couple of times, then the stand-alone version will work quite well. All you have to do is extract the files inside of the ZIP archive, and you are ready to go.

For more information on CPU-Z, just follow the link below.

CPU-Z

Advanced IP Scanner
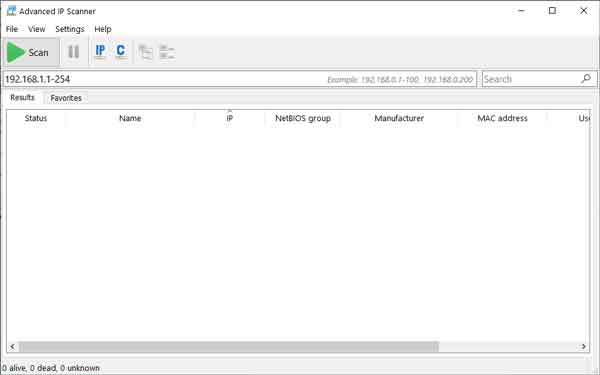
Portable program - Advanced IP Scanner

Have you ever added a new device to your network and then could not find it? That is where Advanced IP Scanner comes in handy. It can scan your network and find network devices, shared folders, and shared printers. You can even use it to access other network computers remotely.

Advanced IP Scanner can be installed or run as a stand-alone program. When you download the program, it comes as an EXE file. When executing it, you have the option of installing it or just running it.

If you are only going to use it a couple of times, then the stand-alone version will work. If you are going to use it regularly, you may want to perform a complete installation.

For more information on the Advanced IP Scanner, follow the link below.

Advanced IP Scanner

Adwcleaner
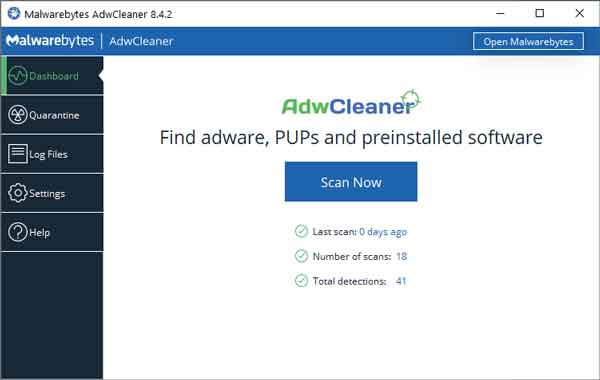
Portable program - Adwcleaner

This is by far my favorite tool for cleaning up Internet browsers. Just download and run Adwcleaner to remove adware and PUPs (Probably Unwanted Program) from your favorite browser.

Unlike the rest of the programs in this article, when Adwcleaner downloads its latest database, it also checks for a new version of itself. It will download an updated version but does not remove the previous version. It has to be removed manually.

Besides cleaning up browsers, it will also clean up and reset the TCP/IP network stack back to the default settings. And if you only need to run it a couple of times, it can delete itself and all of its quarantine files.

For more information on Adwcleaner, follow the link below.

Adwcleaner

Microsoft Safety Scanner
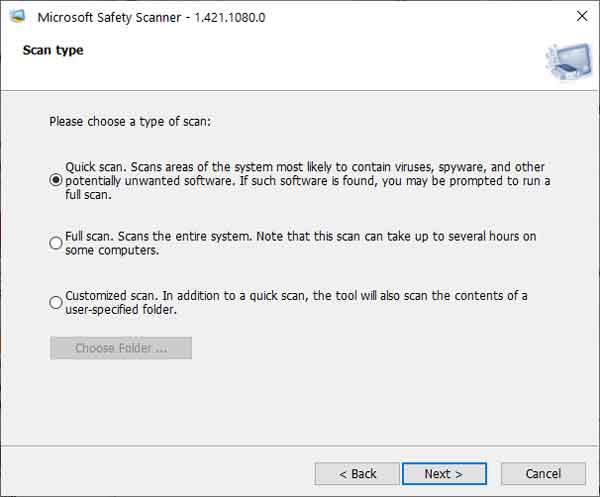
Portable program - Microsoft Safety Scanner

When it comes to scanning for viruses and malware, Microsoft's Safety Scanner is a powerful utility. Even though the user interface is kind of sparse, the true power is built into it.

Since this program is updated on a pretty regular basis, you will defiantly want to download it when you are ready to perform a scan. Keep in mind that this program is date stamped and will run only for ten (10) days after it was downloaded.

There are only a couple of choices regarding the types of scans it will perform; Quick, Full, or Customized. Be warned that if you choose a full scan, it can take hours or even days to complete, depending on how much data your drive(s) contains.

Remember that the Microsoft Safety Scanner is for manually scanning for malware and viruses and does not replace the need for a full-time anti-virus program.

For more information on Microsoft's Safety Scanner, follow the link below.

Microsoft Safety Scanner

Sysinternals Suite
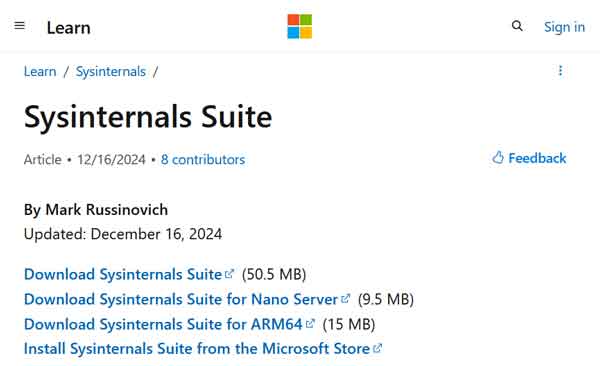
Portable program - Sysinternals Suite

With over seventy utilities, Microsoft's Sysinternals Suite has the most extensive set of diagnostics tools. Sysinternals have been around for more than two decades and have become a staple in computer technicians' toolbox.

Every single program in the suite is a stand-alone program and does not require installation. You can download the complete suite of utilities in a single ZIP file or a single utility separately; it is your choice.

Now you have to remember that the Sysinternals Suite does not automatically update any of its programs. But there are script files out there that can download updated files.

There is also the Sysinternals Live service that allows you to run the tools directly from the web. That way, you will always have the latest and greatest version of any of the utilities.

For more information on Microsoft's Sysinternals Suite, follow the link below.

Sysinternals Suite

What file system should you use for your external drive?

With the three top operating systems, it is hard to know exactly what file system your operating system will work with. One file system may be fully compatible (read and write) with your OS, while another may not be compatible at all. So here is a list of the various file systems and what operating systems they work with.

What file system should you use for your external drive?

Windows operating system

  • FAT (File Allocation Table) (FAT12, FAT16, FAT32) - FAT was initially developed for floppy disks and was soon adapted to hard drives and other devices. With the limited file size (4GB for FAT32) and limited volume size (32TB for FAT32), and the ever-increasing size of drives, FAT is now used only for smaller USB drives.
  • exFAT (Extensible File Allocation Table) - exFAT was designed as a replacement for FAT and optimized for USB flash drives and SD cards.
  • NTFS (NT File System) - Microsoft introduced NTFS in Windows NT 3.1, and is now the default file system for Windows.
  • ReFS (Resilient File System) - ReFS was created to overcome some of the problems NTFS had with data storage. It appeared in Windows Server 2012, and support for it has been removed from Windows 10.

MAC operating system

  • HFS (Hierarchical File System) - HFS was the original file system for the Mac OS. Over the years, support for HFS has been cut back to read-only in newer Mac OS versions. Starting with Mac OS 10.15, support for HFS was removed.
  • HFS+ (Hierarchical File System Extended) - HFS+ was the replacement for the HFS file system as it supported larger file sizes. HFS+ is still supported in the Mac OS but is no longer the default file system.
  • APFS (Apple File System) - APFS is now the default file system for Mac OS, iOS, and iPadOS.

Linux operating system

  • EXT (Extended File System) - EXT was the first file system designed specifically for Linux. EXT had a file system limit of 2GB and was soon replaced.
  • EXT2 (Second Extended File System) - EXT2 replaced EXT as the default file system for Linux in the mid-'90s. Many versions of Linux still use EXT2 for the file system for USB flash drives.
  • EXT3 (Third Extended File System) - EXT3 replaced EXT2 as the default file system for Linux in the early '00s. One of the main advantages of EXT3 is its compatibility (forward and backward) with EXT2.
  • EXT4 (Fourth Extended File System) - EXT4 replaced EXT3 as the default file system for Linux in the late '00s. There are several advantages to EXT4, including larger volume and file sizes and backward compatibility with EXT2 and EXT3.

Compatibly Index

File System Operating System
FAT Windows (1) Linux (1) Mac OS (1)
exFAT Windows (1) Linux (3) Mac OS (1)
NTFS Windows (1) Linux (3) Mac OS (2)
ReFS Windows (3) Linux (3) Mac OS (3)
HFS Windows (3) Linux (3) Mac OS (3)
HFS+ Windows (3) Linux (3) Mac OS (1)
APFS Windows (3) Linux (3) Mac OS (1)
EXT Windows (3) Linux (3) Mac OS (3)
EXT2 Windows (3) Linux (1) Mac OS (3)
EXT3 Windows (3) Linux (1) Mac OS (3)
EXT4 Windows (3) Linux (1) Mac OS (3)
1. Full read and write compatibility by default.
2. Read only compatibility by default.
3. No compatibility by default.

Note: There is third-party software that can give full read and write access to file systems that are not compatible with an operating system by default.

Conclusion

So if you are looking for a file system for your external drive compatible with Windows, Linux, and Mac OS, look no further than FAT32. It has survived the test of time and is the only file system that can be used without additional software on all three operating systems.

Creating panoramic images with Image Composite Editor 2

One of the things I like to do when I go on vacation is taking panoramic photos. Since my camera doesn't take panoramic photos, I have to use software to stitch images together. One of the best image stitchers I have found yet is Image Composite Editor 2 from Microsoft Research Computational Photography Group.

Image Composite Editor 2

Image Composite Editor (ICE) can take photos taken from a single location that overlap and create stunning panoramic images from them. Using techniques from the field of computer vision, ICE scans the images for similarities to each other and then estimates the vantage point for each photo. ICE can even create panoramic images from videos too.

Sample ICE 2 panoramic image without auto complete
Sample ICE 2 panoramic image without autocomplete
Sample ICE 2 panoramic image with auto complete
Sample ICE 2 panoramic image with autocomplete

Microsoft Research Computational Photography Group recently released a new version of ICE. The following is a quote from the ICE website of changes included in ICE 2:

  • Redesigned user interface
    ICE has a new look that makes all the features more understandable and easier to use.
  • Automatic image completion
    ICE can now fill in any missing pixels around the edges of your panorama, making a smooth boundary even in cases where you missed a shot.
  • Improved workflow
    ICE now guides you through the steps required to make a great panorama. And you can back up a step to change settings, then see the effects of those changes without having to start over from scratch.
  • Full-resolution preview
    Panorama previews are no longer limited by your screen resolution. ICE now allows you to zoom in to see every detail of your stitched panorama, no matter how big, before you export.
  • Built-in Photosynth uploader
    ICE no longer requires the installation of a separate application to upload a panorama to the Photosynth web site. You can now upload and share your panorama directly from within ICE.

ICE will work on 32-bit or 64-bit versions of Windows Vista SP2, Windows 7, Windows 8.1, and Windows 10. For more information on Image Composite Editor from Microsoft Research Computational Photography Group, follow the links below:

ICE Homepage
ICE Support Forums

Creating stunning documents, spreadsheets and slide-shows with OpenOffice 4

With the cost of Microsoft Office going up, not to mention the subscription / non-subscription thing, it's nice to know there are alternatives out there. One of the best office alternatives has to be OpenOffice. And it just so happens that the Apache Software Foundation recently released a new version of their free productivity software, OpenOffice 4.

The main screen inside of OpenOffice 4

For those who are not familiar with it, OpenOffice is a suite of office productivity programs that rivals Microsoft Office. It has everything you could need for creating great-looking documents, spreadsheets, and slideshow presentations. Here's a complete list of all of the programs included in OpenOffice 4.

Program Equivalent to Program type
Writer Microsoft Word Word processor
Calc Microsoft Excel Spreadsheet
Impress Microsoft PowerPoint Multi-media slideshow presentation
Draw Microsoft Paint Graphic design
Base Microsoft Access Database
Math Design Science Mathtype Formula creation

OpenOffice 4 has some significant improvements over previous versions. A new Sidebar contains the most commonly used functions for that program, which can be docked, floating, or completely hidden. There is also much improved compatibly with Microsoft Office documents. The drawing, graphics, and gallery functions have also been enhanced, along with the copy & paste and drag & drop functionality.

The new Sidebar inside of OpenOffice 4 shown docked and floating

OpenOffice does use Java, but it's not required for installation, as it can be added later on. Compatibility with other document formats is pretty impressive, but Star Office is no longer supported. OpenOffice can automatically load/convert and convert/save Microsoft Office (Word, Excel, and PowerPoint) and Design Science Mathtype documents. The only file types that it cannot save to is the Microsoft Office 2007 - 2019 .???x formats.

And since OpenOffice is open-source, there are hundreds of third-party extensions to expand on the functionality of the applications. Add in a copy of GIMP or Paint.NET, and you have a complete and free desktop publishing package.

OpenOffice 4 is available for Windows, Linux, and Mac operating systems. For more information on OpenOffice 4, just follow the links below:

Apache OpenOffice Open Source Project

Download OpenOffice 4

Free computer diagnostics

Repairing a PC can sometimes be expensive, and that is why we offer free basic in-shop diagnostics. Give one of our professional and experienced technicians a call at (602) 795-1111, and let's see what we can do for you.

Check out our reviews

Geeks In Phoenix LLC, BBB Business Review

Customer service is #1

Here at Geeks in Phoenix, we take pride in providing excellent customer service. We aim to give the highest quality of service  from computer repair, virus removal, and data recovery.

Bring your computer to us and save

Repairing a computer can be time-consuming. That is why we base our in-shop service on the time we work on your computer, not the time it takes for your computer to work! From running memory checking software to scanning for viruses, these are processes that can take some time.

Contact us

If you have any questions, please feel free to give us a call at (602) 795-1111  and talk with one of our Geeks. Or you can send us a message from our contact page contact page , and one of our Geeks will get back to you as soon as possible. Or you can stop by and see us. Here are our hours and location.

Like Geeks in Phoenix on Facebook

Follow Geeks in Phoenix on Twitter

Watch Geeks in Phoenix on YouTube