Geeks in Phoenix

Geek Blog


Understanding Windows 10 updates

Updated October 28, 2020

In previous versions of Windows, we had service packs and critical / non-critical updates. But Microsoft changed all of that with Windows 10. To better understand Windows 10 updates, we need to take a closer look.

Understanding Windows 10 updates

With the release of Windows 10, Microsoft changed the concept of the Windows operating system. Microsoft calls it Windows as a Service. It is a new way to keep Windows 10 up to date.

Now the terminology Microsoft uses can be a little confusing. But when you break it down, it is quite simple. Let's start with the big picture, then work our way into the details.

Now Microsoft has created two (2) different categories for updates: Feature and Quality. Now, this is where things get a little confusing. When Windows 10 downloads updates, it refers to them by Version (Feature) and Build (Quality)

Everyone refers to Windows 10 by the Version and Build numbers. To better understand the difference between Feature (Version) and Quality (Build) updates, let's take a look at the About Windows program.

For this, we will need to use the Run dialog box. I like to press the Windows logo key Windows logo key + R to bring up the Run dialog box, but there are five (5) ways that you can do it. Here is a list of all of them.

The Run dialog box with the About Windows program name typed in
The Run dialog box with the About Windows program name typed in.

Once you have the Run dialog box up, type in winver and click on OK. The following dialog box will appear. The Version (Feature) number and the Build (Quality) number are on the same line.

The About Windows screen in Windows 10

Now let's take a look at the Windows 10 update history page.
The Windows 10 update history page
Here you will see Windows 10 updates broken down into Version (Feature) and Build (Quality). Now let's take a look and the difference between them.

Feature (Version) updates

Microsoft is planning on releasing Feature (Version) updates twice a year. The Feature (Version) updates will include all of the Quality (Build) updates released for the previous version (up to its release date).

And Feature (Version) updates will include any new programs and features the have been tested out first by Microsoft employees and then the Windows Insider Program.

Occasionally, Microsoft will also remove a feature or program from a Feature (Version) update. If you are missing a Windows program after you apply a Feature (Version) update to Windows 10, you will know why.

Support for older hardware is also going away. Microsoft has already started to do this with some discontinued Atom processor-based systems. If your computer doesn't run right after a Feature (Version) update, this could be the reason.

Now the names of Feature (Version) updates will vary. We have had Feature updates named Anniversary (Version 1607), Creators (Version 1703), and Fall (Version 1709). But Microsoft has since stopped giving names to the Feature updates and calls them by the version number (1903, 1909, 2004, 20H2, etc.).

The Version naming is like a date stamp and consists of the year and time of year it was released. The old naming convention was the first two (2) numbers were the year, and the last two (2) were the month. But Microsoft has recently changed the Windows 10 version naming convention.

Windows 10 versions will still have the same four (4) character version names, but they will follow a major-minor cadence. The first two (2) characters will always be the year that Microsoft released the update. The second two (2) characters will be either a full upgrade released in the first half of the year (H1) or a refreshed service pack released in the second half of the year (H2).

Now there is a reason you need to be able to identify the Windows 10 version you have. Microsoft is only supporting the three (3) most current versions. If you do not keep up on Feature (Versions) updates, you will stop getting Quality (Builds) updates.

Quality (Build) Updates

So, in previous Windows versions, you would get the twice-monthly updates: the second Tuesday of the month would be critical updates, and the fourth Tuesday of the month would be non-critical.

Now Quality (Build) updates can be a mixture of security and non-security fixes. And the Quality (Build) updates are cumulative, so each one contains all of the previous Quality (Build) updates for that version of Windows 10.

For example, let's say you install Quality (Build) update #1 and miss Quality (Build) update #2, Quality (Build) update #3 has everything from #1, and #2 included. No more having to do multiple updates when you install/reinstall Windows.

With Windows 10, Quality (Build) updates usually are released on the second Tuesday of the month, to coincide with security updates for previous Windows versions. If Microsoft is going to release a security update, they release it for all supported versions of Windows. Not just Windows 10.

Microsoft also releases Quality (Build) updates periodically too. But for now, you can always count on Quality (Build) updates on the second Tuesday of the month.

Things to remember about Windows 10 Updates

  • If you miss a Quality (Build) update, don't worry. The next one will bring you up to date.
  • Don't forget to install Feature (Version) updates when they come available. You never want to get more than two (2) Feature (Version) updates behind. That way, you will always get the latest security and non-security fixes for Windows 10.

Understanding long folder and file names in Windows

Updated April 15, 2024

Did you know that Windows limits the length of a file name? Did you know that the character limit also includes the folder name? And what about the Path? Let's look at the long folder and file names in Windows.

Understanding long folder and file names in Windows

I recently recovered files from several Windows computers for a client. He asked that I put them onto an external drive for storage, but I ran into a problem: the file names were too long.

Many people think the maximum length for a File's name in Windows is 255 characters. But that is not correct. Technically, Folders are also files, but they have a unique attribute designating them as Folders.

The full name of the File also includes the Folder and Sub-Folder names. So, the File's actual name also consists of the Folder and Sub-Folder name(s) as well. All of these names factor into the 255-character limit.

So, when you include the names of the Folder, Sub-Folder(s), and File together, it is called a Path. A Path is a string of Folder, Sub-Folder, File, backslashes, and sometimes a volume name (drive letter).

The Path to a Folder or File on your computer will initially contain a drive letter (C:, D:, etc.). A Path to a network Folder and File will contain just two (2) backslashes (\\) at the beginning. A Path can be up to 260 characters in length.

For example, let's say you have a file named 'My Text File.txt' in a Sub-Folder of your Documents Folder called 'Simply Text Files'. The complete Path for it would be:

C:\Users\username\Documents\Simply Text Files\My Text File.txt

The name of the File itself is only 16 characters, but with the name of the Folder and Sub-Folders included, it is 59 characters. And the complete Path is 62 characters. And yes, spaces do count as characters.

So, getting a long name error does not necessarily mean the actual name of the File is too long; it just means the length of the names of the Folder, Sub-Folder(s), and File altogether is. The simplest solution is to shrink the Folder or Sub-Folder(s) name(s) and leave the actual File name alone.

In my case, I was dealing with a couple of thousand File names that were too long. I needed help determining where all of the Files were on the drives, so I went looking online for a program that could help me with this issue.

What I found was a neat little program called TLPD (Too Long Path Detector).
Too Long Path Detector folder selection screen
It showed me where all the long file names were. Lucky for me, they were grouped in Folders and Sub-Folders with reasonably long names.

So, using the output from TLPD,
Too Long Path Detector text file output
I started shortening the Folder and Sub-Folder names. I kept running TLPD until all the Paths were down to under 225 characters. Then, I could copy all of the Files to an external drive for storage.

How to get to and use the Run dialog box in Windows

Updated April 15, 2024

There may be a time when you need to run a program in Windows that does not have a shortcut to it. Usually, this program is not often used. So here is how to start an application using the Run dialog box.

How to get to and use the Run dialog box in Windows

The Run dialog box is for running programs that you don't necessarily use that often and do not have a shortcut. These programs may be system applications or downloaded installation programs.

There are two (2) ways to use the Run dialog box. If you know the name of the application you want to start, type it into the Run dialog box and click OK.

For example, if you have Microsoft Word installed on your computer, you can type Winword (the actual name of Microsoft Word) in the Run dialog box and click OK. Microsoft Word will then start. That is because the program directory is in the Path (it is an environmental variable). The Windows system directory is in the Path by default.

If your program is not in the Path (the system variable used to locate executable programs), you must click Browse and manually find the program you want to start. Once you have the program's name in the Run dialog box, click on OK.

Now, bringing up the Run dialog box is relatively simple. The way you get to it is different in each version of Windows, but there is one keyboard shortcut that works for all versions.

Windows logo key Windows logo key + R

Here are all the ways to access the Run dialog box in the different versions of Windows.

How to bring up the Run dialog box in Windows 11

The Run dialog box in Windows 11

  1. Left-click on the magnifying glass to the right of the Start button to bring up the Search dialog box.
  2. Type Run into the Search box and left-click on the app Run.

Or

  1. Left-click on the Start button to bring up the Start menu.
  2. In the upper right-hand corner of the Start menu, left-click on All apps.
  3. Scroll down the list of programs and left-click on Windows Tools.
  4. Left-click on Run.

Or

  1. Right-click on the Start menu to bring up the Power User menu.
  2. Left-click on Run.

Or

  1. Press the Windows logo key Windows logo key + X to bring up the Power User menu.
  2. Press the R key.

Or

  1. Press the Windows logo key Windows logo key + R.

How to bring up the Run dialog box in Windows 10

The Run dialog box in Windows 10

  1. Type Run in the Search box (Cortana) on the right side of the Start button.
  2. Left-click on Run in the search results.

Or

  1. Left-click on the Start menu.
  2. Scroll down the list of programs until you come to the Windows System folder.
  3. Left-click on the Windows System folder to expand it.
  4. Left-click on Run.

Or

  1. Right-click on the Start menu to bring up the Power User menu.
  2. Left-click on Run.

Or

  1. Press the Windows logo key Windows logo key + X to bring up the Power User menu.
  2. Press the R key.

Or

  1. Press the Windows logo key Windows logo key + R.

How to bring up the Run dialog box in Windows 8.1

The Run dialog box in Windows 8.1

  1. Left-click on the Start button.
  2. When the Start screen appears, type Run. It will automatically bring up the Search dialog box with Run in the search field, and the results will appear below it.
  3. Left-click on Run.

Or

  1. Right-click on the Start button to bring up the Power User menu.
  2. Left-click on Run.

Or

  1. Press the Windows logo key Windows logo key + X to bring up the Power User menu.
  2. Press the R key.

Or

  1. Press the Windows logo key Windows logo key + R.

How to bring up the Run dialog box in Windows 7

The Run dialog box in Windows 7

  1. Left-click on the Start menu.
  2. Navigate to All Programs > Accessories.
  3. Left-click on Run.

Or

  1. Left-click on the Start menu.
  2. Type Run in the search box right above the Taskbar.
  3. Left-click on Run in the search results.

Or

  1. Press the Windows logo key Windows logo key + R.

Security and your computer

With the recent outbreak of data encrypting malware, keeping your computer secure is a significant issue. There isn't just one thing that you can do to secure your computer, but multiple. So here are few ways to make sure your computer is as secure as possible.

Security and your computer

Operating system security

Is your device up to date?

Keeping your operating system up to date is essential for security. Microsoft does a pretty good job of issuing patches and updates for Windows, especially when they discover a new vulnerability.

But if you are not keeping your OS up to date with patches and updates, you could be making your computer vulnerable to any current or future exploits. And if you are still using an OS like Windows XP or Windows Vista that does not have support from Microsoft anymore, you need to upgrade your OS.

If you have turned off Windows Update, turn it back on. And if Windows Update is not working correctly, here is how to fix it.

Troubleshooting Windows Update problems

Anti-virus security

Is your anti-virus up to date?

A good anti-virus program is essential for security. You can get an anti-virus program with all of the bells and whistles (firewall, identity protection, custom browser, etc.). Or you can get one with just a virus scanner. Either way, you have to have some form of protection.

Now Microsoft includes an anti-virus program inside of Windows (Windows Defender), and it works reasonably well. But there are plenty of other anti-virus programs out there, including a security suite your Internet Service Provider (ISP) may provide.

But if you want to know how they all stack up, go over to the independent IT security institute AV-Test. They test all of the most popular anti-virus programs regularly. They cover multiple platforms (Windows, Mac, and Android).

AV-TEST | Antivirus & Security Software & AntiMalware Reviews

I like using a layered approach to my computer security, using different programs that complement each other.

How to use layered security to protect your computer

Web browser security

Is your web browser up to date?

Having a secure web browser is mandatory in my book. And since web browsers have become targets for online exploits, you need to know your browser is safe and secure.

I like the fact that Google Chrome and Mozilla Firefox check for updates when you start them up. And they also get updated more frequently than Internet Explorer, or Microsoft Edge does.

There are two (2) things I like to do to my browsers to improve their security:

  1. Disable Adobe Flash. Hackers have been exploiting Adobe Flash for years now by getting bogus Flash ads into third-party ad networks.
  2. Anti-virus. I prefer an anti-virus program that integrates into the browser using an extension or add-on.

And since ads also are becoming an issue, I will sometimes recommend using an ad blocker like Adblock Plus. There is a version for almost every browser.

E-mail security

Is your e-mail secure
Is your e-mail secure?

E-mail is currently one of the most popular ways to spread malware. You have to be very careful with what e-mail attachments you open. Knowing how to spot a piece of spam e-mail is essential.

How to spot a piece of spam e-mail

I use the anti-spam program Mailwasher to filter out the junk and spam from my e-mail. I also have configured my anti-virus program to monitor Mailwasher for viruses, even though Mailwasher, by default, renders all mail in text format and cannot open attachments.

But when Mailwasher does download a suspicious attachment, my anti-virus program will scan it and flag it as such. I use the Pro version, but Mailwasher does have a free version that is sponsored by advertising.

Eliminate spam from your inbox with MailWasher

Password security

Are your passwords secure?

Reusing passwords is a big security no-no. It's nice to remember your passwords easily, but it can be a nightmare if someone were able to guess them. That is why you do not want to use the same password over and over again.

If you are like me, coming up with a unique password for every different place you log into can be hard. Luckily there are password generators that can make it easy to create secure passwords. One of my favorites is the Norton Identity Safe Password Generator.

Norton Identity Safe Password Generator

Using the Norton Identity Safe Password Generator, you can create passwords up to 32 characters long that have mixed case letters, numbers, and punctuation with no similar characteristics.

Now that you have generated a secure password, why not test it out. Gibson Research Corporation (GRC) has a bunch of cool security tools on their website, one of them being Password Haystack.

Password Haystack

Password Haystack is a brute force password calculator that will tell you how long it will take to guess any password. Go ahead and enter your chosen password and see how long it can take to hack it. You may be surprised at how little time it can take to crack it.

How to perform a clean Windows 10 installation

Doing computer repair for a living, I see quite a few computers that could benefit from a clean, fresh installation of Windows 10. Almost always, these computers started out running Windows 7 or Windows 8.1 and, at some point in time, were upgraded to Windows 10.
How to perform a clean Windows 10 installation

Then, of course, there are times that the registry has gotten corrupted or the hard drive has failed. But whatever the case, a clean, fresh installation of Windows 10 is always a great way to get your computer back to tip-top shape.

Now you might be thinking that just performing a reset of Windows 10 would work perfectly fine. And in most cases, you would be right. But if your computer originally came with Windows 7 or Windows 8.1, you could have problems. Let me explain.

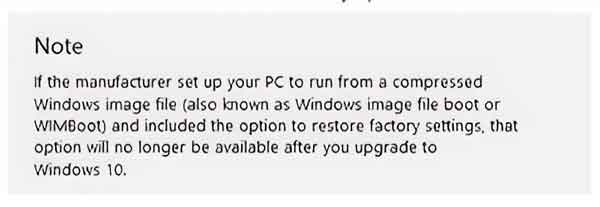
When you bought your computer new, it came with a hidden recovery partition with all of the installation files for your version of Windows. If that version was Windows 7 or Windows 8.1, the data got replaced when you upgraded to Windows 10.
The recovery media issue with upgrading to Windows 10

But the problem that I have encountered is the upgraded recovery partition sometimes doesn't work. So, when you try and reset Windows 10, it fails. A clean installation of Windows 10 fixes that issue. With a clean, fresh Windows 10 installation, you will know that everything will work.

The only down-side to a clean Windows 10 install is the fact that you have to reinstall all of the programs you installed. But if your system will not boot, then it is a moot point. You would have to reinstall them anyway.

Backup and inventory

So, the first thing to do is to backup your computer. You will need an external drive that is relatively large (I use 1TB, and 2TB drives myself) and a blank CD/DVD (system repair disk). Here is an article on how to use Windows 10 Backup.

Backup your files with File History and Windows Backup in Windows 10

The second thing to do is to take inventory of the hardware and software inside of your computer. Use a program like Belarc Advisor to create a list of hardware and software on your computer.

Make sure you print a copy of the results. You can also save a copy to an external drive if you like. But a printed copy will work the best, as you can check off items that you install after the reinstallation of Windows 10.

Create the Windows 10 installation media

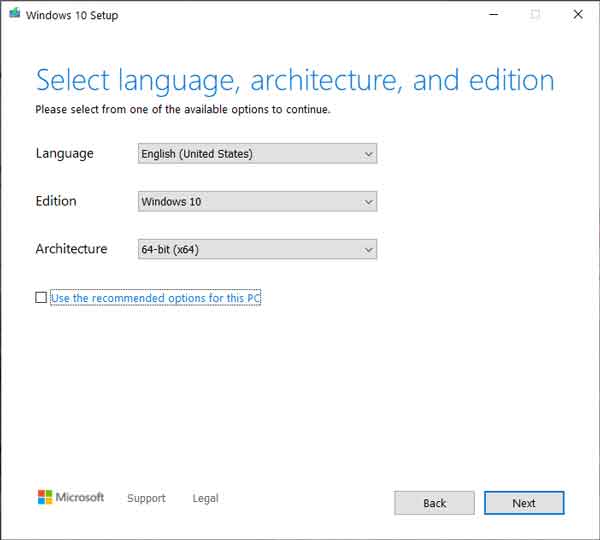
This step is relatively easy. All you have to do is download the Windows 10 media creation tool. It is a stand-alone program that does not require installation to run. Just double-click on the application, and you are ready to start.
Windows 10 Media Creation Tool options

You will need either a blank DVD or an 8GB USB drive to create the bootable installation media. If you run the media creation tool on the same computer as you are going to reinstall Windows 10 on, it will automatically select the recommenced options.

Clearing the hard drive

Now comes the time to wipe the drive or just the Windows 10 partition. If you have a Dell or HP computer, they have a diagnostic partition, so you may want to wipe just the OS partition only.

Keep in mind that if you upgraded from Windows 7 or Windows 8.1, the recovery partition that came with your computer to restore factory settings no longer functions. Sometimes it might be better to wipe the whole drive clean and be done with it. But that is entirely up to you.

I like to use the disk wiping tools included on the Ultimate Boot CD (UBCD). All you have to do is download the most current ISO image and burn it to a CD. You can create a bootable USB drive too. The instructions are on the UBCD website.

Now, since the UBCD uses a version of Linux, it may take a little work to get your computer to boot up. If your system has Unified Extensible Firmware Interface (UEFI) enabled, you will have to go into the BIOS and disable it temporarily.

Installing Windows 10

Now that your drive is wiped clean, it is time to install Windows 10. If you are using a DVD, turn your computer on, eject the DVD tray, insert the Windows 10 DVD you created, and restart your computer. If you are using a USB drive, plug it in, and start your computer.

Since there is no operating system, your computer will search all available media for a boot record. Once it finds the Windows 10 media, the installation will begin.

During the installation, you may get a dialog box requesting your Windows 10 product key. Windows 10 is a little different from previous versions of Windows, in that the product key is not stored on your computer, but in the cloud. Microsoft calls it Digital Entitlement.

With Digital Entitlement, you do not need to enter your product key during installation. Just click on the I don't have a product key link on the bottom of the screen. Once the installation is complete, Windows will automatically activate the first time your system can get online.

From here, all you have to do is install the programs and features you want. Then sit back and enjoy your clean, fresh Windows 10 installation.

Free computer diagnostics

Repairing a PC can sometimes be expensive, and that is why we offer free basic in-shop diagnostics. Give one of our professional and experienced technicians a call at (602) 795-1111, and let's see what we can do for you.

Check out our reviews

Geeks In Phoenix LLC, BBB Business Review

Customer service is #1

Here at Geeks in Phoenix, we take pride in providing excellent customer service. We aim to give the highest quality of service  from computer repair, virus removal, and data recovery.

Bring your computer to us and save

Repairing a computer can be time-consuming. That is why we base our in-shop service on the time we work on your computer, not the time it takes for your computer to work! From running memory checking software to scanning for viruses, these are processes that can take some time.

Contact us

If you have any questions, please feel free to give us a call at (602) 795-1111  and talk with one of our Geeks. Or you can send us a message from our contact page contact page , and one of our Geeks will get back to you as soon as possible. Or you can stop by and see us. Here are our hours and location.

Like Geeks in Phoenix on Facebook

Follow Geeks in Phoenix on Twitter

Watch Geeks in Phoenix on YouTube