In my Geek Tips article outlining my Beta test of Microsoft Windows 7, I needed a computer to install it on. What I built is sweet, specification wise, but the case steals the show. Still, photos do not do this case justice, so here's a video. Check out the Geeks in Phoenix Windows 7 test system inside the Antec Skeleton!
350db973-aef5-411e-ad77-6963634f139c|0|.0|96d5b379-7e1d-4dac-a6ba-1e50db561b04
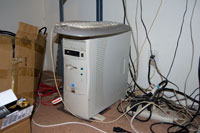
I finished assembling the Windows 7 test system in about three hours. The wring for the Antec Skeleton case proved to be a challenge. But I was ready for it, like the Antec P-180 I have also has a unique wring layout (the power supply is located at the bottom of the case, instead of the top, as with most mid-tower designs).
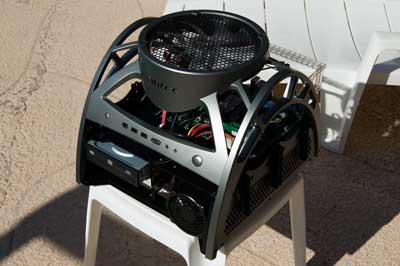
I was a little taken away the first time I started it up. The 250mm multi-led fan on top does a great job of cooling and looks very cool when running. Still, photos just cannot capture the look of this system in operation. So I am creating a video of the system running and will post the link here to it on YouTube when it's finished. The first thing I did was go into the system BIOS.

The Main screen shows that the Intel Core2 Quad Q8400 processor has a 64-bit architecture, and Core Multiplexing Technology is enabled.
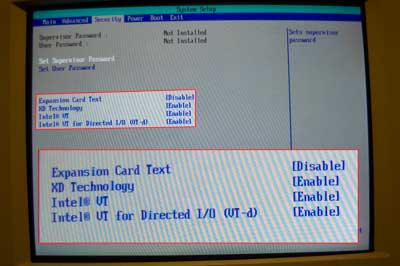
The Security screen shows that Intel VT and Intel VT for Directed I/O is enabled. We are ready to load up Windows 7 RC1. I booted to the installation DVD, started the install and had it done in about 20 minutes.
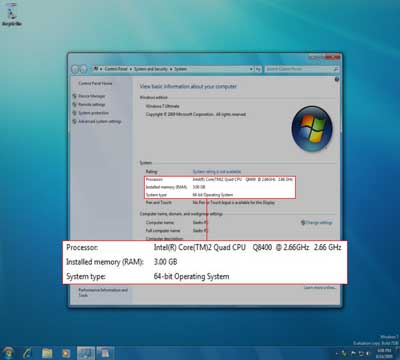
The System properties dialog box shows the system type as the 64-bit version. I am ready to load some software.
8465799f-eded-43f9-8ce4-c5351f496164|0|.0|96d5b379-7e1d-4dac-a6ba-1e50db561b04
Antec cases have always been great investments, as I have owned several. They range from ...
an old Antec AT Server Tower, circa '97-98, |
Antec Mid-tower |
of course, the Faux Stone and Chalkboard is one, |

and my Antec P180, with dual air-flow chambers |
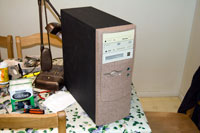
I guess it won't be a surprise when I tell you I decided to go with Antec. Their designs are terrific. And the latest one is sweet. It's called the Skeleton. Click here to see it in operation.
Here are the specifications on it:
| Case Type |
Open Case Design |
| Color |
Metallic Silver |
| Dimensions |
13”(H) x 14.8”(W) x 16.5”(D)
33.02 (H) x 37.6 cm (W) x 41.9 cm (D) |
| Weight |
15.5 lbs / 7 kg |
| Cooling |
1 x Super Big Boy 250mm Multi-LED Fan
1 x 92mm Hard Drives Fan |
| Drive Bays |
2 x Quick Release 5.25” Bays
2 x Quick Release 3.5” Bays
4 x Externally Mounted 3.5” Bays |
| Motherboard Size |
Mini-ITX, MicroATX, Standard ATX |
| Front I/O Panel |
1 x IEEE 1394 Firewire
2 x USB 2.0
1 x eSATA
AC’97/HD Audio In and Out |
It's build time.
dd08bdb9-e373-4dac-9b7d-503544e9dfa5|0|.0|96d5b379-7e1d-4dac-a6ba-1e50db561b04
Well, I went shopping, and here is what I came up with. I like to utilize local vendors whenever possible, but this system had a processor requirement that I could not find cheaply from my favorite vendor. I wanted a Quad-core processor that has Virtual Technology (VT). I also want to be able to assign programs to cores (very cool!). I did a little research and found the Intel Q8400 processor a good match. It has Quad cores, Virtual Technology, and was the cheapest I could find in-stock locally. My first stop was at Fry's Electronics, where I picked up a ...
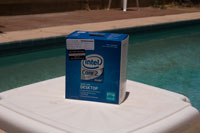
Intel Core 2 Quad Q8400
I then went over to my friends at Technology Partners Inc, where I picked up the rest of the components (less the case, that's coming). Here's the list of parts:
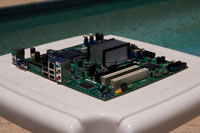
Intel DG41RQ Motherboard |
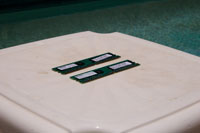
Buffalo DDR2 PC6400 Memory (2gb x 2) |

Microstar NX8400GS Video Card |
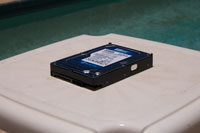
Western Digital 320 GB Hard Drive |
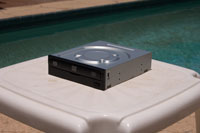
Liteon 24x DVD-RW |
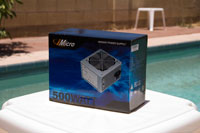
iMicro 500 watt Power Supply |
All these components have standard specifications, except for the motherboard. Considering that I am going to use a 64-bit operating system, I need to have a larger amount of memory. Using a 64-bit operating system, I am also getting past the 4 gigabyte memory limit that plaques 32-bit. The Intel DG41RQ has a maximum memory capacity of 8 GB (2 x 4GB). Since 2GB modules are relatively inexpensive, I decided to go with 4GB of memory (2 x 2GB) for right now.
Since Windows 7 is built on Windows Vista, finding drivers was simple. Intel and NVidia, both have Windows 7 32 and 64-bit drivers on their web sites.
I guess it's time to build this system. But I still need a case. I think I'll see what Antec has been up to.
840f1c9a-bdf3-4d52-aa6d-e0a409fd9115|0|.0|96d5b379-7e1d-4dac-a6ba-1e50db561b04
Utility Manager enables users to check an accessibility program's status and start or stop an accessibility program. Users with administrator-level access can designate to have the program start when Utility Manager starts. Users can also start accessibility programs before logging on to the computer by pressing the Windows logo key  + U at the Welcome screen.
The built-in accessibility programs available from the Utility Manager are Magnifier, Narrator, and On-Screen Keyboard. Narrator, a text-to-speech program, starts when Utility Manager opens. This gives users who are blind or have impaired vision immediate access to the Utility Manager.
Using Utility Manager, you can tell Windows to automatically start accessibility programs each time you log on to your computer, when you lock your computer desktop, or when Utility Manager starts. For example, you can specify that Magnifier starts automatically the next time you log on to your computer. This eliminates the need for you to go through the steps of opening Magnifier each time you log on to your computer.
Open Utility Manager by pressing the Windows logo key + U.
Notes:
- You can also open Utility Manager by clicking Start, pointing to Programs, pointing to Accessories, pointing to Accessibility, and then click Utility Manager. Please note, however, that you will have limited program management capabilities. You will only be able to start or stop accessibility programs from within Utility Manager.
- If your computer is connected to a network, network policy settings may prevent you from using Utility Manager.
- The accessibility tools that ship with Windows are intended to provide a minimum functionality level for users with special needs. Most users with disabilities will need utility programs with more advanced functionality for daily use.
4145cb16-ce93-4f85-8d9f-874b5ac3d1dc|0|.0|96d5b379-7e1d-4dac-a6ba-1e50db561b04