Geeks in Phoenix

Geek Blog


What to do when your laptop computer does not start

Are you having a problem starting up your laptop? Is it not turning on when you press the power button? If so, here is what to do if your laptop does not start.

What to do when your laptop computer does not start

If you're reading this, chances are your laptop is not starting up. Don't worry; you're not alone. Laptop startup issues are common and can be caused by a variety of reasons. In this blog post, we'll discuss the steps you can take to troubleshoot and fix the issue.

Disconnect external devices

If your laptop is not starting up, it could be due to an external device connected to it has failed. Disconnect all external devices, including USB drives, external hard drives, and printers. Try booting up your laptop again and see if it works.

Check the AC jack

When you plug in the AC adapter, does it make a solid connection with the jack? Does it wiggle back and forth when it does plugin? If it does, you can try holding it to one side or the other and see if your laptop will power on. If your laptop powers up, then you will need to have the AC jack replaced.

Check the power source

A failed power adapter is the most common cause of a laptop not powering on. What usually happens is that the power adapter output will gradually diminish over time and eventually not have enough output to power the laptop and charge the battery.

When the output from the charger drops below a certain level, the laptop will turn to the battery for power. When the battery runs out of power, your laptop will not start. If you have a spare laptop charger, now is the time to try it.

If you keep your AC adapter plugged in all the time and it is over three years old, you may need to get a replacement. If it is the original charger that came with your laptop, there should be a model number on it that you can use to order a new one.

Note: The following procedures require the disassembly of your laptop computer. If you do not feel comfortable taking your laptop apart, don't hesitate to contact a local computer repair technician.

Check the battery

If you find the AC charger to be in good working order, then it is time to check the battery. On most laptops, you will need to partially disassemble it to gain access to the battery. Most of the time, it means you have to remove the base cover (bottom).

To find out the correct way to disassemble your system, you will need to find a service manual for it. A quick Google search for the make and model of your laptop plus 'service manual' should find you a manual. For example: Dell XPS 8950 service manual.

Once you have a service manual, grab your smartphone or digital camera to take photos as you go along. The manual will show you how to take your laptop apart, but it does not show the wire colors, actual screw locations, etc. Taking photos as you disassemble your system makes it much easier to reassemble.

Now that you have the base cover off, you will need to disconnect the battery. To determine if the battery is causing the problem, you should try starting the laptop with the battery disconnected using just the AC adapter.

First, we need to release any residual electrical charge that may be left in the system. With the battery disconnected, press and hold the power button down for 15 - 30 seconds. Once done, you can connect the AC adapter and attempt to start your laptop without the battery.

Starting your laptop without the base cover can be tricky, since you have the AC adapter plugged in and be able to press the power button. With the base cover off, swing up the base so it is 90 degrees from the display. Depending on the location of the power button and power jack, you will need to either place your laptop on the left side, right side, or the back of the display.

Once you have your laptop set up, go ahead and try powering it up. If it does start, let it start up and then carefully shut it down. Disconnect the AC adapter, reconnect the battery, reconnect the AC adapter, and try to start it up. If your laptop starts, it just needed a power reset to bring it back to life. Shut it down and reassemble it per the service manual.

If your laptop starts using just the AC adapter but not with the battery connected, you know the battery has failed and needs to be replaced. You can run your laptop without the battery connected temporarily, but you may need to set the date and time when you start the computer.

Reseat the components

If your laptop did not start using just the AC adapter, disconnect the AC adapter and press and hold the power button down for 15 - 30 seconds to discharge any of the residual power left in the laptop.

Following the service manual, proceed to reseat the components that are removable/reconnectable. (drives, memory modules, and wifi card). After reseating components, try powering your laptop up using just the AC adapter.

If your laptop still does not start up, check for any signs of power going through the motherboard. Are there any lights that turn on? Do any fan(s) move when you press the power button? If not, there is a good chance that the motherboard has failed.

In conclusion, laptop startup issues can be frustrating but can be resolved. Try these steps to troubleshoot and fix the problem. If, after following the steps outlined in this blog and your laptop still does not start, you may need to seek help from a computer repair technician.

Locating and installing missing storage drivers for a clean Windows install

Have you ever encountered a situation where you are trying to install Windows on your computer, but the installation process does not find any available drives to install the operating system? This can be a frustrating experience, but there are several steps you can take to find a driver and complete the installation process. In this article, we will show you how to locate and install missing storage drivers when performing a clean install of Windows.

Locating and installing missing storage drivers for clean Windows install

If you're installing Windows for the first time (clean), and there are no drives listed to install Windows on, don't worry. This issue is common and can be resolved with a few simple steps. The problem is that Windows does not have a generic driver in its installation media for your storage controller.

This was common in the '90s when you had to load the storage controller driver(s) from a floppy disk by pressing F6 when prompted for a drive to install. That is why they are called F6 drivers. In fact, some of the hardware manufacturers still use the F6 folder name in their storage driver packaging.

Now, when it comes to requiring third-party storage controller drivers to install Windows, it usually occurs with RAID (Redundant Array of Inexpensive Disks) storage controllers. But recently, I have also had to use manufacturer drivers for the SATA (Serial AT Attachment) storage controllers used with 11th-generation Intel processors.

Identify the missing storage drivers: This will require having the manufacturer name and model number of your motherboard or controller card. Please make a note of this information, as it will help you locate the missing drivers in the next step.

Download the missing storage drivers: Once you have identified the missing storage drivers, the next step is to download them. You can download the drivers from the manufacturer's website. Some driver downloads are self-extracting install programs, so just download the driver package.

When you download the drivers, make sure you download the correct drivers for your operating system and system architecture (32-bit or 64-bit). Once you have the driver package downloaded, use an archive program like 7-Zip to extract the storage driver package to a separate folder manually.

Copy the drivers to a USB drive: Next, you must copy the downloaded drivers to a USB drive. Make sure the USB drive is formatted in FAT32 or NTFS format and has enough free space to accommodate the drivers. Create a new folder on the USB drive and name it something like Windows Drivers. Then, copy the downloaded drivers to this folder.

Install the missing storage drivers: Now that you have the missing storage drivers on a USB drive, you can install them during the Windows installation process. Here's how:

  1. Boot your computer from your Windows installation media and proceed through the installation process.
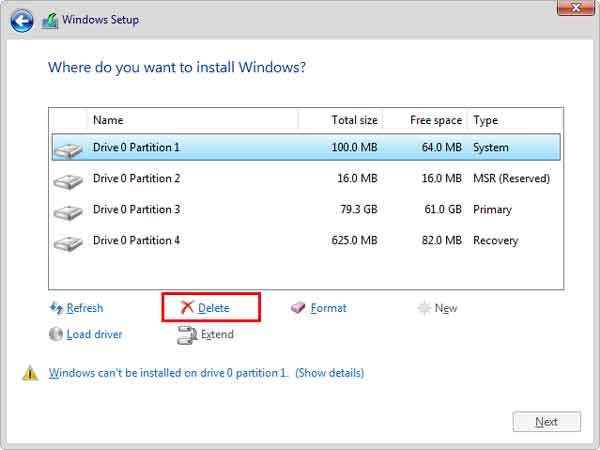
  2. When you reach the Where do you want to install Windows screen, and no drives are shown, insert the USB drive with the storage drivers and click Browse to locate the drivers.
  3. Navigate to the folder on the USB drive where you saved the drivers and select the appropriate driver file.
  4. Click OK to install the driver.

Once the driver is installed, you can proceed with the Windows installation without any further issues.

In conclusion, locating and installing missing storage drivers during a Windows installation from a USB drive is a relatively simple process. By following the steps outlined in this article, you can resolve the issue and proceed with the installation smoothly.

How to edit the programs that autostart in Windows

Do you have a program that automatically starts when you log in to Windows that you do not want to do that anymore? Or maybe you have too many programs starting when you log in to Windows? If so, here is how to edit the programs that autostart in Windows.

How to edit the programs that autostart in Windows

Autostart programs are a great convenience for users as they allow commonly used programs to start automatically when the computer boots up, saving time and effort. However, these autostart programs can accumulate over time, slowing the bootup process.

Now, there are only two (2) locations that can automatically run a program: the Startup folder and the Registry. There are two (2) types of autostart programs: System-wide or user-specific. And then, there are the different ways to edit the autostart programs.

Now you can edit the autostart programs using a couple of different applications, Task Manager and Autoruns. Task Manager is built into Windows, and Autoruns is a Microsoft utility that must be downloaded (see link below).

With Task Manager and Autoruns, you can toggle on or off any autostart program to test how it will affect the performance of your computer. And with Autoruns, you can even delete items that automatically start.

Task Manager: Task Manager is a built-in tool in Windows that allows users to monitor and manage running processes. To access Task Manager, press the Ctrl + Shift + Esc keys or right-click on the taskbar and select Task Manager. Navigate to the Startup tab to see a list of programs set to autostart. To disable a program from autostarting, right-click on it and select Disable.

Autoruns: Autoruns is a free tool from Microsoft that provides a comprehensive list of all autostart programs, including those from the Startup folder, Registry, Task Scheduler, and other locations.

Autoruns for Windows

Once downloaded, run the program and navigate to the Logon tab to see a list of programs set to autostart. To disable a program from autostarting, uncheck the box next to it. To delete a program, right-click on the entry and select Delete.

You know how to disable, enable, and delete autostart programs, but what if you want to add a program? This requires manually editing either the Startup folder or the Registry.

Startup Folder: The Startup folder is a simple and easy way to add programs to autostart. To access the Startup folder, press the Windows Logo key Windows logo + R to bring up the Run dialog box. Then type shell:startup and press Enter. This will open the user-specific Startup folder. Or navigate to the following folder in File Explorer (show hidden items must be turned on).

C:\Users\YourUsername\AppData\Roaming\Microsoft\Windows\Start Menu\Programs\Startup

Once you have the user-specific Startup folder open, right-click on an empty space on the right-hand pane, select New > Shortcut, and then navigate to the program to want to autostart. For reference, here is the location for the read-only system-wide Startup folder.

C:\ProgramData\Microsoft\Windows\Start Menu\Programs\StartUp

Registry: The Registry is a powerful tool that stores configuration settings for Windows and many programs. Improperly editing the Registry can cause your computer to run incorrectly and even fail to boot, so backing up the Registry is recommended before making any changes.

How to backup the Registry in Windows

To access the Registry, press the Windows Logo key Windows logo + R to bring up the Run dialog box. Then type regedit and press Enter. Navigate to the following key:

HKEY_CURRENT_USER\Software\Microsoft\Windows\CurrentVersion\Run

This key contains a list of programs set to autostart for the current user. To add a program to autostart, right-click on an empty space in the right-hand pane and select New > String Value. Enter the name of the program and the path to its executable file.

For reference, here is the location for the system-wide Registry key.

HKEY_LOCAL_MACHINE\Software\Microsoft\Windows\CurrentVersion\Run

In conclusion, autostart programs are a great convenience for users but can also slow down the bootup process. Using the tools mentioned in this article, users can easily manage and edit autostart programs from various locations in Windows.

Play all of your favorite multimedia files and disks with VLC Media Player

Are you looking for a program to play optical disks (BD, DVD, CD) in Windows? Maybe you are feeling frustrated by having to have multiple media players to handle the various file formats you encounter? If so, you'll be happy to know there's a solution: VLC Media Player.

Play all of your favorite multimedia files and disks with VLC Media Player

VLC Media Player is a remarkable media player that can handle a wide range of formats, including MPEG-1/2, DivX® (1/2/3/4/5/6), MPEG-4 ASP, XviD, 3ivX D4, H.264 / MPEG-4 AVC, WMV 1/2/3, QuickTime, RealVideo, and many more. This gives you the flexibility to play just about any media file you come across without the hassle of switching between different players.

But that's not all: VLC Media Player is also highly versatile when it comes to operating systems. Whether you're using Windows, Linux, Mac OS X, Unix, iOS, or Android, there is a version of VLC Media Player for your device. This means you can enjoy your media files on your preferred platform without worrying about compatibility issues.

You can also change the appearance of the VLC Media Player by using skins. There are quite a few skins available for download, or you can create your own with the VLC Skin Editor. Note: Skins do not work on the Mac OS version of VLC.

Another great thing about VLC Media Player is that it's completely free. There are no annoying ads or in-app purchases, so that you can enjoy uninterrupted media playback. VLC Media Player is open-source and produced by the non-profit origination VideoLAN.

In summary, VLC Media Player is an excellent choice for anyone looking for a media player that's both versatile and easy to use. For more information on the VLC Media Player, follow the link below.

VLC Media Player

How to estimate the power required for your custom-built computer

Whether you are building a new computer or replacing/upgrading your existing one, one of the most important considerations is the Power Supply Unit (PSU). The PSU is responsible for delivering power to all the components in your system, including the motherboard, CPU, graphics card(s), and other peripherals. Choosing the correct PSU is crucial to ensure stable and reliable performance and prevent damage to your components.

How to estimate the power required for your custom-built computer

Two (2) components in your computer will consume most of the power: the motherboard and the graphics card(s). The motherboard uses a relatively small amount of energy but supplies power to the CPU, memory, PCIe slots, and USB ports.

To determine the appropriate wattage for your PSU, you must first consider the power requirements of your components. Here are some guidelines to help you estimate how many watts your PSU should be:

  • CPU: The power consumption of your CPU depends on its model and clock speed. Generally, high-end CPUs require more power than budget models. You can find the power requirements of your CPU on the manufacturer's website.
  • Graphics card(s): If you plan on using a dedicated graphics card(s), these will be one of the most power-hungry components in your system. High-end graphics cards can consume up to 450 watts under load, so check the manufacturer's specifications before choosing a PSU.
  • Motherboard: Your motherboard's power consumption is relatively low compared to other components, but it still requires some power. Make sure to choose a PSU that can provide enough power for all the motherboard components, including the CPU and memory.
  • Storage: Hard drives and SSDs consume very little power, so you don't need to worry about them when choosing a PSU.
  • Other components: If you plan to use other components, such as a sound card, network adapter, or USB devices, make sure to factor in their power requirements when estimating your PSU wattage.

Now, some online power supply calculators can estimate the power requirements given the specifications of the components. You can use these websites to calculate a rough estimate of the amount of power your computer will require. Here are a few online power supply calculators.

Newegg - Power Supply Calculator

PC builds - Power Supply Calculator

Cooler Master - Power Supply Calculator

Once you have a rough estimate of the power requirements for your components, add some extra headroom to ensure stable and reliable performance. A good rule of thumb is to choose a PSU that can provide at least 20% more power than your estimated requirements.

In conclusion, choosing the suitable PSU is crucial to ensure stable and reliable performance for your computer. By estimating the power requirements of your components and adding some extra headroom, you can choose a PSU that meets your needs and provides room for future upgrades.

Free computer diagnostics

Repairing a PC can sometimes be expensive, and that is why we offer free basic in-shop diagnostics. Give one of our professional and experienced technicians a call at (602) 795-1111, and let's see what we can do for you.

Check out our reviews

Geeks In Phoenix LLC, BBB Business Review

Customer service is #1

Here at Geeks in Phoenix, we take pride in providing excellent customer service. We aim to give the highest quality of service  from computer repair, virus removal, and data recovery.

Bring your computer to us and save

Repairing a computer can be time-consuming. That is why we base our in-shop service on the time we work on your computer, not the time it takes for your computer to work! From running memory checking software to scanning for viruses, these are processes that can take some time.

Contact us

If you have any questions, please feel free to give us a call at (602) 795-1111  and talk with one of our Geeks. Or you can send us a message from our contact page , and one of our Geeks will get back to you as soon as possible. Or you can stop by and see us. Here are our hours and location.

Like Geeks in Phoenix on Facebook

Follow Geeks in Phoenix on Twitter

Watch Geeks in Phoenix on YouTube