Geeks in Phoenix

Geek Blog


Get better search results by setting your precise location in Windows 10

Have you ever used your favorite browser to search for a business close to you, only to have it return a list of business miles away from you? If so, then you may want to set your precise location in Windows 10.

Get better search results by setting your precise location in Windows 10

Usually, Windows 10 can get close to your relative location using a combination of various sources. These include the IP address your ISP (Internet Service Provider) provides, GPS (Global Positioning Service), wireless access points, and cell towers.

Despite all of these resources, there will be times when Windows 10 cannot determine your exact location. That is when you will need to set your precise location manually.

Setting your location manually can also help in planning business and personal trips, like vacations. For example, you can manually set your location to the address of a hotel you will be staying at and find restaurants close to that location.

Now you have to remember that Windows 10 has two (2) different types of programs, UWP (Universal Windows Platform) and Desktop, and they both have different ways of determining location.

UWP apps will typically ask for permission to access your location. These are the programs that use GPS and wireless access points to triangulate your location. You will find them listed in the Choose which apps can access your precise location section of the Location category of Windows Settings.

Desktop apps do not ask for permission to access your location and do not appear in the allowed access list. These programs include all of your browsers, including Google Chrome, Mozilla Firefox, Microsoft Edge, etc.

And since the majority of searches are performed using a web browser, setting your location manually will be the only way to get precise search results for your location.

How to manually set your location in Windows 10

  1. Open Windows Settings by either:
    • Left-click on the Start Windows logo key button and then left-click on the gear icon (Settings).
    • or
    • Right-click on the Start Windows logo key button and then left-click on Settings from the Power User menu.
  2. Left-click on Privacy.
    Default view of the Windows 10 Settings app with the Privacy category outlined
  3. Scroll down the left-hand column and left-click on Location.
    The Location section inside of the Windows 10 Settings
  4. Scroll down the right-hand column until you find Allow desktop apps to access your location and make sure it is switched on.
    Allow desktop apps to access your location switch inside of the Windows 10 Settings
  5. Scroll back up the right-hand column and left-click on the Set default button under Default location. The Windows Maps program will then open.
    Set default location button inside of the Windows 10 Settings
  6. In Windows Maps, left-click on the Set default location button.
    Set default location button inside of the Windows Maps
  7. Type in the address you want to use as your location. Windows Maps will display a list of addresses that it feels are a match.
    The default location form inside of the Windows Maps
  8. Left-click on the correct address.
    Select default location inside of the Windows Maps
  9. Close Maps and Settings, and you will be all set.

If you are using a laptop and your location changes regularly, you can always go back into the Windows 10 Settings and modify it as needed.

How to reuse a HDD or SSD

So you upgraded the drive in your computer and now have an extra drive that you do not know what to do with. There are a couple of things you can do with it. So here is what you can do with your old drive.

How to reuse a HDD or SSD

I have written several articles on how to clone the drive in your Windows-based computer. But I have never written an article on what to do with the drive that you replaced.

When it comes to the old drive, there are two options; reuse it or recycle it. Either way, you will need some additional hardware to utilize the old drive.

To reuse it inside of your computer, you will need a spare drive carriage, mounting screws, a 7-pin SATA data cable, and a spare 15-pin SATA power connection. If you want to connect it externally, you will need a drive enclosure (2.5" or 3.5").

To recycle it, you will need to erase all of the data on the drive. I like to encrypt the drive with BitLocker first, then perform a seven-pass DoD (Department of Defense) disk wipe. So even if someone were able to recover any data, it would still be encrypted.

Now, was the old drive bootable (contained the operating system)? If so, then there will be a boot record that needs to be deleted before you can reuse it.

If you plan on reusing the drive, simply erasing all of the data on the drive should work. If you plan on recycling it, then you will need to securely erase all of the data so no one can successfully recover anything from it.

If the drive was used only for storage, then erasing all of the data will work. If it was the boot drive in your computer, we have to erase all of the data and delete the boot record so that any computer that it is connected to does not accidentally boot up onto it.

Time to erase the drive

The first thing you have to do is attached the drive to your computer, either by turning the computer off and installing the drive inside of your computer. Or by connecting it externally using a drive case, docking station, or a USB adapter.

Remember that if the drive was originally a boot drive and you install it inside of your computer, your system may try and boot on that drive. It is recommended that you wipe the drive of any boot record and boot partition before installing it inside your computer.

Several drive manufacturers have software that can erase the data from one of their drives. Western Digital, Seagate, and Samsung are a few that have that type of software. In fact, Seagate's Seatools for Windows will work on any manufacturer's drive.

There is also third-party software that can perform DoD (Department of Defense) disk erasing. The UBCD (Ultimate Boot CD) has several programs that can perform a DoD disk wipe (I like using Darik's Boot and Nuke). If you are planning on recycling the drive, a DoD wipe is recommended.

There have been times when I have seen a manufacturer's software fail when it comes to erasing data from a drive. It usually happens when the drive in question was originally a boot drive.

As you can see from the following screen capture,
The properties of a hidden partition in Windows 10 Disk Management
the original boot/recovery partition can not be deleted in Windows 10 Disk Management application.

In cases like that, I have found using the Windows Diskpart application works great. It is a command-line-only program, but you can use it to delete any type of partition if you are very careful.

Using Diskpart to erase a drive

Note: Misusing Diskpart can erase a disk that you may not want to be wiped, so be extra careful and double-check the disk number before proceeding.

To ensure that you erase the correct drive, let's open Windows 10 Disk Management and verify the disk number.

  1. Open Disk Management by either:
    • Right-clicking on the Start Windows logo key button and select Disk Management from the context menu
    • or
    • Left-clicking on the Start Windows logo key button, scroll down the application list and expand the Windows Administrative Tools folder. Then left-click on Computer Management. Then under Storage, you will find Disk Management.
  2. Locate the disk in question. It will be labeled Disk #.
    The disk number of a drive in Windows 10 Disk Management
  3. Open a Command Prompt with Administrative permissions (click here for more details).
  4. Type diskpart and then press enter.
  5. Type list disk and press enter.
    The list disk command in diskpart
  6. Type select disk #, replacing the # with the disk number found in Disk Management.
    The select disk command in diskpart
  7. Type clean and press enter.
    The clean command in diskpart
    The list disk command in diskpart showing a the empty disk
  8. Type exit to close Disk Management.
  9. Type exit again to close the Command Prompt.

Time to format the drive

All partitions will now be gone, and the drive is ready to be reformatted. Let's go back into Disk Management and reformat the drive. When you open Disk Management, you should be prompted to initialize the disk.

The initialize disk dialog box in Windows 10 Disk Management

If the drive is smaller than 2 Terabytes, use the MBR (Master Boot Record) partition style. Any drive larger than 2 Terabytes will need to use the GPT (GUID Partition Table) partition style.

Once you initialize the disk, just right-click on the unallocated space and select New Simple Volume.
The create a new volume dialog box in Windows 10 Disk Management
You will be prompted for the volume size, assigning a drive letter or path, and what format you want the partition. Using the selected defaults is recommended.

My five favorite virus and malware removal tools

Having your computer get infected with a virus or malware can be an actual stressful situation. And finding software that can remove the infection can be even more stressful. So here are my five favorite virus and malware removal tools.

My five favorite virus and malware removal tools

As a computer repair technician, I have used many different tools over the years to remove viruses, malware, and adware. I have seen plenty of software that works like a charm, only to be bought out by their competitor or never updated.

Now some programs have withstood the test of time. Some of them you have to install fully, some you just download and run. But all of the programs listed here have been around for several years.

Anti-virus programs

The AV Test user interface

I get asked quite often about what anti-virus software I recommend. This is a tricky question to answer because there are so many decent free and paid AV programs out there.

I suggest checking some of the independent anti-virus review sites and see what is recommended. I personally like AV Test as they review only anti-virus and security software.

Windows 10 does include an AV program called Windows Defender, and it does rank pretty high, but it does have a limited feature set. If you are looking for AV software with a bunch of bells and whistles, Windows Defender may not be what you are looking for.

One of the first things you may want to do is check and see if your Internet Service Provider (ISP) provides a branded version of AV software. Sometimes you can get a complete security suite from your ISP for free.

But remember that the majority of AV programs look for viruses and malware, not adware or junkware. That is why I use several different programs for cleaning up an infected computer.

AV Test

AdwCleaner

The AdwCleaner user interface

When it comes to cleaning up a compromised Internet browser, nothing beats AdwCleaner. It can find the most hidden malicious browser extensions and reset your network adapter all at the same time.

AdwCleaner requires no installation; just download and run. It also does not require an Internet connection but will download program and database updates if it can connect to the Internet.

AdwCleaner

Malwarebytes

The Malwarebytes user interface

As the name implies, it does a great job of finding and removing malware. It is also fantastic at finding and eliminating Probably Unwanted Programs (PUP) and junkware.

This program does have to have an Internet connection to complete its installation, and it is configured in a full 14-day trial mode. You can deactivate the trial license and just run it when you want to perform a scan.

The only thing I do not like about it is that it sets itself to start with Windows automatically. You can easily change this by right-clicking on the Malwarebyte icon in the Taskbar and deselect Start with Windows.

Malwarebytes

SUPERAntiSpyware

The SUPERAntiSpyware user interface

This program is excellent at finding those pesky little cookies that browsers seem to collect. It also does an excellent job of finding and removing PUPs and junkware.

This program does require full installation but does not need Internet access to complete the install. The full version does have some cool features, but if you are just trying to clean up your system, the basic version will work.

SUPERAntiSpyware

Microsoft Safety Scanner

The Microsoft Safety Scanner user interface

The Microsoft Safety Scanner is a stand-alone scanner, just download and run. It does a fantastic job of finding malware that has dug itself deep inside of Windows.

It does have only three options: Quick Scan, Full Scan, and Customized Scan. The Quick Scan looks in areas of Windows that are most likely to contain viruses, spyware, and malware. The Customized Scan is similar to the Quick Scan but allows scanning of a user-specified folder.

The Full Scan does just that; it scans every file on your computer. This is the most thorough scan but can take hours or even days to complete. But if you are looking for something that may be deeply embedded in Windows, this is the type of scan you want to perform.

Now the Microsoft Safety Scanner is time-stamped and will only run for ten days after you download it, so you will need to download a new version every time you want to perform a system scan.

Microsoft Safety Scanner

How to find compatible computer parts online

Updated March 15, 2024

Building your own computer or upgrading your existing system can be a dream or a nightmare. Simply finding parts that are compatible with each other can be challenging. But some really helpful websites can make finding the correct parts easy.

How to find compatible computer parts online

There is no greater satisfaction than being able to say you built or upgraded your computer yourself. Whether upgrading your computer's memory or drive or building a new system from the ground up.

However, finding compatible computer parts can be daunting. Every part has a specific set of requirements and features, and it's essential to ensure they match up with the other components in your build.

For example, a CPU requires a specific type of motherboard socket, and each motherboard supports particular types of memory. It's essential to cross-check each component's specifications before purchasing to ensure compatibility.

If you're working on an older PC, say five to ten years old, you will have to use the different component specifications to find compatible parts. When looking for parts to upgrade an older computer, the best place to start is the motherboard/system manual. This is where you find all the specifications for finding compatible components for your computer.

If you are considering upgrading a relatively new computer or building a new one, the following websites are extremely helpful. Just enter a few details on your component or computer, and they can tell you what hardware will work with it.

When it comes to finding compatible computer parts, the websites are divided into two categories: complete computers /separate components and memory.

Complete computers / separate components

Let's start with websites that can help you find every part of a custom-built computer. Several websites will list components that work together, but only a few genuinely allow you to customize the different components.

The following websites allow you to select any component (motherboard, processor, etc.) and assemble a list of compatible parts for a complete system. You can also use them to find compatible parts to upgrade your existing computer.

PC Part Picker

Build My PC

PC Builder

PC-Builder.io

Another website is Newegg. It has a section specifically for custom PC building, similar to the ones above. The only difference is that it links to products it or its affiliates sell.

The PC Part Picker, Build My PC, PC Builder, PC-Builder.io, and Newegg websites can also help find individual components. As long as the manufacturer still sells the component, you can use any of these websites to find compatible parts for your computer.

Let's say you recently built a computer and want to upgrade the processor. You would have to find your specific motherboard, and these websites will show you what processors are compatible with it.

Memory

But as I always say, the biggest bang you can get for your buck is a memory upgrade. Most memory manufacturers have what they call memory finders. Just find your computer's or motherboard's make / model; their websites will show you which memory modules will work in it.

Crucial

Kingston

Corsair

Newegg

CDW

FYI - If you are trying to get the lowest price on a component, you can check a vendor's website to see if they match prices. I have used price matching to get some terrific deals on hardware.

Please let us know if you found a website with a computer parts configurator we have not listed. Just leave a note in the comments at the bottom of this article.

Five free Windows 10 utilities that do not require installation

Some of my favorite programs for performing computer diagnostics are the kind that you just download and run. These applications are simple to use and can be deleted when I am finished with them. So here are some of my favorite portable programs for Windows 10.

Five free Windows 10 utilities that do not require installation

Since I repair computers for a living, I use many different programs during my typical workday. Most of them I can store on USB drives for quick access.

But there are some programs that I like to download before I use them, as they are portable applications and do not require installation. Since they do not get installed, the only way to get the latest updated version is by downloading them.

Some of these programs have time stamps on them and will expire after a certain amount of time. So downloading them when I need them makes the most sense. The hardest thing about downloading them is remembering where you saved them.

All of the applications mentioned in this are article can run on any version of Windows currently supported by Microsoft. And the best thing of all is that they all are free to use.

CPU-Z
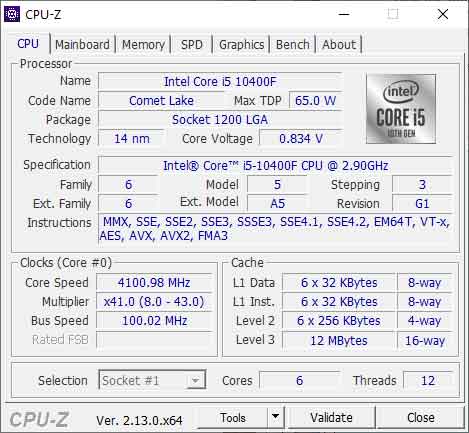
Portable program - CPU-Z

This is a convenient utility that displays the details of the installed processor, motherboard, memory, and graphics card in any given computer. This way, you do not have to disassemble a computer to determine what components it has installed.

CPU-Z comes in handy when you are looking to add or upgrade your computer's memory modules. I use it when a customer wants to upgrade the installed memory, as it displays the exact part number of all of the installed memory modules.

There are portable (ZIP) and installable (EXE) versions of CPU-Z and versions customized for particular motherboard vendors. If you are going to use CPU-Z to measure system performance between different BIOS settings, the installed version may be the best bet.

But if you are only going to run it a couple of times, then the stand-alone version will work quite well. All you have to do is extract the files inside of the ZIP archive, and you are ready to go.

For more information on CPU-Z, just follow the link below.

CPU-Z

Advanced IP Scanner
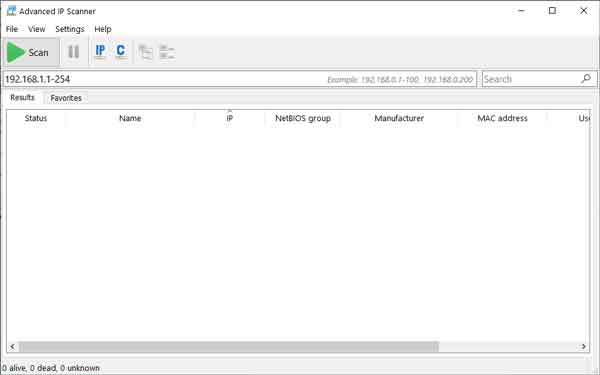
Portable program - Advanced IP Scanner

Have you ever added a new device to your network and then could not find it? That is where Advanced IP Scanner comes in handy. It can scan your network and find network devices, shared folders, and shared printers. You can even use it to access other network computers remotely.

Advanced IP Scanner can be installed or run as a stand-alone program. When you download the program, it comes as an EXE file. When executing it, you have the option of installing it or just running it.

If you are only going to use it a couple of times, then the stand-alone version will work. If you are going to use it regularly, you may want to perform a complete installation.

For more information on the Advanced IP Scanner, follow the link below.

Advanced IP Scanner

Adwcleaner
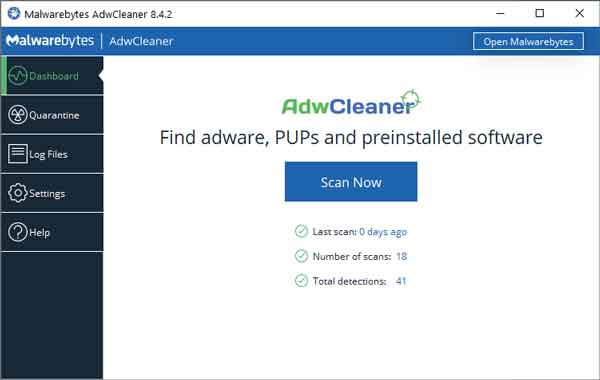
Portable program - Adwcleaner

This is by far my favorite tool for cleaning up Internet browsers. Just download and run Adwcleaner to remove adware and PUPs (Probably Unwanted Program) from your favorite browser.

Unlike the rest of the programs in this article, when Adwcleaner downloads its latest database, it also checks for a new version of itself. It will download an updated version but does not remove the previous version. It has to be removed manually.

Besides cleaning up browsers, it will also clean up and reset the TCP/IP network stack back to the default settings. And if you only need to run it a couple of times, it can delete itself and all of its quarantine files.

For more information on Adwcleaner, follow the link below.

Adwcleaner

Microsoft Safety Scanner
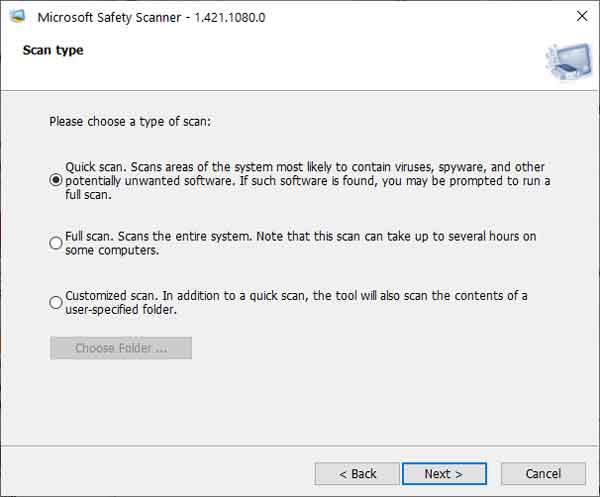
Portable program - Microsoft Safety Scanner

When it comes to scanning for viruses and malware, Microsoft's Safety Scanner is a powerful utility. Even though the user interface is kind of sparse, the true power is built into it.

Since this program is updated on a pretty regular basis, you will defiantly want to download it when you are ready to perform a scan. Keep in mind that this program is date stamped and will run only for ten (10) days after it was downloaded.

There are only a couple of choices regarding the types of scans it will perform; Quick, Full, or Customized. Be warned that if you choose a full scan, it can take hours or even days to complete, depending on how much data your drive(s) contains.

Remember that the Microsoft Safety Scanner is for manually scanning for malware and viruses and does not replace the need for a full-time anti-virus program.

For more information on Microsoft's Safety Scanner, follow the link below.

Microsoft Safety Scanner

Sysinternals Suite
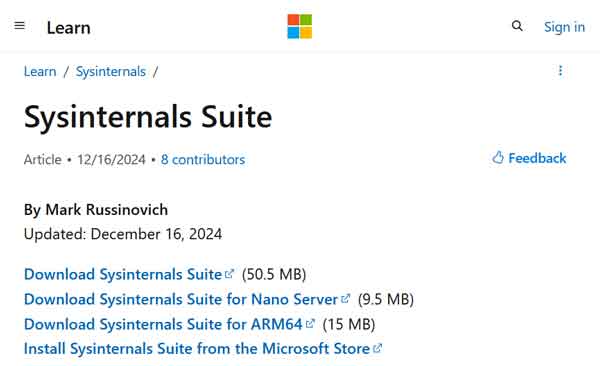
Portable program - Sysinternals Suite

With over seventy utilities, Microsoft's Sysinternals Suite has the most extensive set of diagnostics tools. Sysinternals have been around for more than two decades and have become a staple in computer technicians' toolbox.

Every single program in the suite is a stand-alone program and does not require installation. You can download the complete suite of utilities in a single ZIP file or a single utility separately; it is your choice.

Now you have to remember that the Sysinternals Suite does not automatically update any of its programs. But there are script files out there that can download updated files.

There is also the Sysinternals Live service that allows you to run the tools directly from the web. That way, you will always have the latest and greatest version of any of the utilities.

For more information on Microsoft's Sysinternals Suite, follow the link below.

Sysinternals Suite

Free computer diagnostics

Repairing a PC can sometimes be expensive, and that is why we offer free basic in-shop diagnostics. Give one of our professional and experienced technicians a call at (602) 795-1111, and let's see what we can do for you.

Check out our reviews

Geeks In Phoenix LLC, BBB Business Review

Customer service is #1

Here at Geeks in Phoenix, we take pride in providing excellent customer service. We aim to give the highest quality of service  from computer repair, virus removal, and data recovery.

Bring your computer to us and save

Repairing a computer can be time-consuming. That is why we base our in-shop service on the time we work on your computer, not the time it takes for your computer to work! From running memory checking software to scanning for viruses, these are processes that can take some time.

Contact us

If you have any questions, please feel free to give us a call at (602) 795-1111  and talk with one of our Geeks. Or you can send us a message from our contact page contact page , and one of our Geeks will get back to you as soon as possible. Or you can stop by and see us. Here are our hours and location.

Like Geeks in Phoenix on Facebook

Follow Geeks in Phoenix on Twitter

Watch Geeks in Phoenix on YouTube