Geeks in Phoenix

Geek Blog


How to create a recovery drive in Windows 10 and Windows 11

Computer problems happen when you least expect them. But having the software to repair your computer is essential. So here is how to create a recovery drive in Windows 10 and Windows 11.

How to create a recovery drive in Windows 10 and Windows 11

So what is a recovery drive? It is a bootable USB drive with all the system tools that normally appear in the advanced options menu. This is the menu that appears when your computer fails to boot correctly.

If you have not heard of a recovery drive, you are not alone. A good majority of Windows users do not know about this great device. Sadly, most learn about having a recovery drive only after their system has experienced a problem.

Now it is easy to confuse a recovery drive with a system repair disk, as they perform the same functions. But with a recovery drive, you can also reinstall Windows if you need to.
The recover from a drive option in the recovery drive boot menu
System repair disks have been around for decades, but recovery disks first appeared in Windows 8.

What is the difference between a recovery drive and a system repair disk? Essentially they are the same; the only difference is the media you use to create them. A recovery drive uses a USB drive, and a system repair disk uses, as the name implies, a CD / DVD. And with more computers coming without optical (CD/DVD/BD) drives, most people can only use a recovery drive.

The list of options is the same as if your computer did not boot correctly and you got the advanced options screen. Startup Repair, Command Prompt, Uninstall Updates, UEFI Firmware Settings, System Restore, and System Image Recovery.

How to open Recovery Drive inside of Windows 10

  1. Left-click on the Start button Windows logo to bring up the Start menu.
  2. Scroll down the list of programs and left-click on Windows Accessories.
  3. Double left-click on Recovery Drive.

or

  1. Using the search box on the right side of the Start Windows logo button, type in Recovery Drive,
  2. Left-click on it in the search results.

How to open Recovery Drive inside of Windows 11

  1. Left-click on the Start button Windows logo to bring up the Start menu.
  2. In the upper right-hand corner of the Start menu, left-click on All apps.
  3. Scroll down the list of programs and left-click on Windows Tools.
  4. Double left-click on Recovery Drive.

or

  1. Left-click on the magnifying glass to the right of the Start button Windows logo to bring up the Search dialog box.
  2. In the Search dialog box, type Recovery Drive.
  3. In the list of results, Recovery Drive should be highlighted.
  4. Left-click on Recovery Drive.

How to create a recovery drive

The requirements for creating a recovery disk are pretty simple, a USB drive that is 16GB or larger. I would recommend 32GB just to be on the safe side. Note: The USB drive you use for the recovery drive will be erased and reformatted when you create it. Please copy or move anything on the drive you want to keep before creating the recovery drive.

I would also like to mention that the time it takes to create a recovery drive that includes system files can be long. It may take a few hours, so be prepared to allow your computer the time it needs to complete the creation of the recovery drive.

The first screen that appears when you open the Recovery Drive app is where you decide whether or not to include a backup copy of Windows.
Create a recovery drive screen in the Recovery Drive program
Since you would likely only be using this drive if your computer will not function properly, I recommend including the systems files in the recovery drive.

If you decide to include the system files, you will need to update the recovery drive periodically. I would update every six to twelve months; that way, if you do need to reinstall Windows from the recovery drive, it will be as current as the last time you updated the recovery drive.

The next screen asks you what drive you want to use for the recovery drive.
Select the USB drive screen in the Recovery Drive program
Select the drive and click on Next. One final warning screen appears.
Create a recovery drive warning screen in the Recovery Drive program
Just click on Create. Now just read some email or social posts because this will take some time. Once the recovery drive has been created, remove it and put it in a safe place.

How to fix no sound in Windows 10 and Windows 11

Did you just notice that you do not have any sound in Windows 10 or Windows 11? Not getting any audible notices when you receive a new email or delete a file? Here are 4 things you can do to fix no sound in Windows 10 or Windows 11.

How to fix no sound in Windows 10 and Windows 11

Losing the audio from your Windows-based computer can be really frustrating. One minute you hear a video playing in your browser, and the next minute you hear nothing. This problem is more common than you think. So here are 4 things you do to restore the sound in Windows 10 and Windows 11.

Check to see if the default audio device has been muted

The most common problem I have seen is the default audio device gets accidentally muted. I have gone on several service calls for no audio, only to find the volume has been muted. A quick check can save you time and money.

How to check if the default audio device has been muted in Windows 10 and Windows 11

  1. Left-click on the speaker icon on the right-hand side of the Taskbar.
    Umute the audio device in Windows
  2. In the popup that appears, look at the speaker icon on the left side of the volume slider.
  3. If there is an X to the right of the speaker icon, left-click on the speaker icon to unmute the device.

Check the default audio device

This is the most common issue regarding the loss of sound in Windows. With more computers coming with a built-in sound card and graphic cards with HDMI and Display Port (DP) connections, you have to make sure you are using the correct device for audio.

If you connect your monitor to your computer using an HDMI or DP connection, you must ensure your monitor has speakers to playback audio. If your monitor does not have speakers built-in, you need speakers or headphones to hear the audio.

How to check the default audio device in Windows 10 in Windows 11

  1. Left-click on the speaker icon on the right-hand side of the Taskbar.
    Select the default audio device in Windows
  2. Left-click on the audio device you want to use for sound.
  3. Move the volume slider left and right to hear a sample tone. If you do not hear the sample tone, select a different device and try moving the volume slider again. You have found the correct audio device when you hear the sample tone.

Run the audio troubleshooter

The Playing Audio troubleshooter is simple to use and can be extremely helpful when you are in a hurry. Once you select the device to test, the troubleshooter scans for any issues and offers recommendations on what you might try to restore your computer's audio.

How to run the audio troubleshooter in Windows 10 and Windows 11

  1. Right-click on the speaker icon on the right-hand side of the Taskbar.
    Playing audio troubleshooter
  2. Left-click on Troubleshoot sound problems.

Remove and reinstall the driver for your audio device

If you have tried all of the previous solutions, this will usually fix 99% of the problems with your computer's audio issues. There are two (2) different ways to remove and reinstall the drivers for your audio device.

The first way is to use the existing driver already installed in the Windows driver catalog. Often, the audio device configuration gets corrupted, and simply removing and reinstalling the driver with the device defaults will work to resolve sound problems.

The second way is to download a new driver package from the manufacturer's website. Most computers nowadays have sound cards built into the motherboard, but there are times when the user needs a more advanced sound card. That is when you find a separate sound card may have been installed.

Either way, you will need to find the make and model of your motherboard or sound card and go over to their website, and download the latest driver package. Here is how to remove and reinstall the drivers for your audio device.

How to remove and reinstall the driver for your audio device in Windows 10 and Windows 11

To remove the existing driver for any device inside Windows, you need to get to Device Manager. There are a couple of different ways to get to Device Manager, the first way is through the Start Menu, and the second way is using the Power User menu.

How to bring up the Device Manager in Windows 10

  1. Left-click on the Start button Windows logo to bring up the Start menu.
  2. Scroll down the list of apps and left-click on Windows Administrative Tools to expand the folder.
  3. Left-click on Computer Management.
  4. Under Computer Management (Local), left-click on Device Manager.

or

  1. Right-click on the Start button on bring up the Power User menu.
  2. From the context menu that appears, left-click on Device Manager.

How to bring up the Device Manager in Windows 11

  1. Left-click on the Start button Windows logo to bring up the Start menu.
  2. In the upper right-hand corner of the Start menu, left-click on All apps.
  3. Scroll down the list of programs and left-click on Windows Tools.
  4. Left-click on Computer Management.
  5. Under Commuter Management (Local), left-click on Device Manager.

or

  1. Right-click on the Start button Windows logo on bring up the Power User menu.
  2. From the context menu that appears, left-click on Device Manager.

Once you have Device Manager open, scroll down the list of devices until you get to Sound, video and game controllers. Double left-click on the Sound, video, and game controllers category to expand it.

Device manager open to sound devices

Find the audio device in the list that appears that you want to remove and reinstall. Right-click on that device and select Uninstall device from the context menu that appears. A dialog box will appear, warning you about uninstalling the device.

Make sure you check the box next to Delete the driver software for this device and then left-click Uninstall.
Uninstall sound device in Device Manager
Then restart your computer. Once your computer restarts, Windows will automatically reinstall the driver with the factory defaults. You should now have audio.

If you still do not have any sound, install the latest software package from the manufacturer's website. Once done, restart your computer for the changes to take effect.

My three favorite programs for working remotely in Windows 10 and Windows 11

With the recent turn of events, COVID-19 and increasing gas prices, more and more people are looking to work remotely. So here are my three favorite programs to work remotely on Windows 10 and Windows 11.

My three favorite programs for working remotely in Windows 10 and Windows 11

TeamViewer

Screen capture of TeamViewer

When it comes to remotely connecting to another computer, you cannot beat TeamViewer. It allows you to connect to a computer and ultimately control it. You can do almost anything you usually would be able to do if you were sitting right in front of that system.

You can open and save files, send e-mail, and print to any printer connected to that computer. The only thing you cannot do is physically add or remove devices, like USB drives. For more information on TeamViewer, follow the link below.

How to remotely access your personal computers with TeamViewer

LogMeIn Hamachi

Screen capture of LogMeIn Hamachi

Let us say you have all the programs you need for work but just need to be able to access the files on a remote computer or network. This is where LogMeIn Hamachi can come in handy. It is a full-featured VPN (Virtual Private Network) that allows you to open files and folders on a remote computer or network.

The one feature that stands out is working on files on a remote system or network and printing them to a printer connected to your computer. For more information on LogMeIn Hamachi, follow the link below.

How to set up a Virtual Private Network on Windows 10 or Windows 11 using LogMeIn Hamachi

Quick Assist

Screen capture of Quick Assist

So maybe you have a coworker that needs some help formatting an Excel spreadsheet, but they are not at the exact location as you. With Quick Assist, you can easily connect to another Windows 10 or Windows 11 computer.

Since Quick Assist is built into Windows 10 and Windows 11, all you need is a Microsoft account, and you can help out that coworker with their spreadsheet. For more information on Quick Assist, follow the link below.

Provide remote assistance in Windows 10 and Windows 11 with Quick Assist

How to change the location of personal folders in Windows 11

With more and more computers coming with two (2) drives, managing the free space can be daunting. And the biggest space hog on your computer is your personal folders. So here is how to change the default location of your personal folders in Windows 11.

How to change the location of personal folders in Windows 11

Most computers that have two (2) drives will have one Solid State Drive (SSD) for the operating system and program files and one Hard Disk Drive (HDD) for data. And by default, Windows 11 saves everything to the same drive as the operating system.

But after a while, your personal folders can get quite large, with all of the music, pictures, and videos you save to your computer. And with Windows 11 saving all of these files on the same drive as the OS and program files, the possibility of running out of free space is quite real.

And if that drive is an SSD, your personal folders are taking up valuable real estate that could be used for other uses, like more programs. So why not move your personal folders to another drive?

Now relocating your personal folders is relatively easy, but there are a few guidelines you want to be aware of. When it comes down to it, the location of your personal folders is set inside of the registry. I include the instructions on restoring the locations of your personal folders via the registry later in this article.

Note: You can remap your personal folders to any drive or folder that has a drive letter assigned to it in File Explorer. It is recommended only to use drives that are built into your computer, not external and network drives. Remember that if you lose connection with an external or network drive, you will also lose connection to your personal folders.

How to change the personal folder location in Windows 11

  1. Open File Explorer using one of the following:
    • Left-click on the File Explorer icon (manilla folder) on the Taskbar.
    • Press the Windows logo key Windows logo + E at the same time.
    • Use the Power User menu by right-clicking on the Start Windows logo button and selecting File Explorer.
  2. In the left-side column, left-click on This PC.
  3. In the right-side column, double left-click on the drive you want to use for your personal folders. The contents of that drive will appear in the right-hand column.
  4. Right-click on any blank space in the right-hand column, and a context menu will appear..
  5. From that context menu, select New > Folder. Give the new folder a unique name, like User files. If there are multiple users on this computer, you will want to create sub-folders for each user.
  6. Double left-click on the new user folder you just created. You now need to make six (6) sub-folders inside this folder. Named them: Desktop, Documents, Downloads, Music, Pictures, and Videos.
  7. Now navigate to C:\Users\your user name. There you will find all of your personal folders.
  8. Right-click on the Desktop folder and select Properties from the context menu that appears.
  9. Left-click on the Location tab and left-click on the Move... button.
  10. From the Select a Destination dialog box that appears, navigate to the new location for the Desktop folder you just created in Step 6. Once selected, left-click on Select Folder.
  11. On the Desktop Properties dialog box, left-click on Apply. You will be prompted to move the contents of this folder from the old location to the new one. Left-click on Yes and let Windows proceed to move this folder.
  12. Repeat steps 7- 10 for the remaining personal folders (Documents, Downloads, Music, Pictures, and Videos).

To restore the default location of your personal folders, just navigate to the personal folder you want to restore and right-click on it. From the context menu that appears, select Properties and then Location. Left-click on the Restore Default button and follow the prompts. If you receive an error when trying to restore the default location of any personal folder, you can manually change the location by editing the registry.

Note: Editing the registry incorrectly can render your computer unusable! If you do not feel comfortable editing your computer's registry, please contact a local computer repair technician for assistance.

How to open the Registry Editor in Windows 11

  1. Left-click on the Start button Windows logo to bring up the Start menu.
  2. In the upper right-hand corner of the Start menu, left-click on All apps.
  3. Scroll down the list of programs and left-click on Windows Tools.
  4. Double left-click on Registry Editor. If prompted for an administrator password or confirmation, type the password or provide confirmation.

or

  1. Left-click on the magnifying glass to the right of the Start button to bring up the Search dialog box.
  2. Type Registry Editor into the Search box and left-click on the app Registry Editor. If prompted for an administrator password or confirmation, type the password or provide confirmation.

or

  1. Press the Windows logo key Windows logo key + R to bring up a Run dialog box.
  2. In the Open field, type regedit and left-click on OK. If prompted for an administrator password or confirmation, type the password or provide confirmation.

When you have the Registry Editor open, navigate to the following key:

HKEY_CURRENT_USER\Software\Microsoft\Windows\CurrentVersion\Explorer\User Shell Folders

Here is a list of the six (6) personal folders, the registry key, and the default value. Change only the keys for the folders you are having problems with. Once you are done editing the registry, log out or restart your computer for the changes to take effect. For a complete list of user folder keys, check out how to manually change the user files location in the registry.

Folder Registry key Default value
Desktop Desktop %USERPROFILE%\Desktop
Documents Personal %USERPROFILE%\Documents
Downloads {374DE290-123F-4565-9164-39C4925E467B} %USERPROFILE%\Downloads
Music My Music %USERPROFILE%\Music
Pictures My Pictures %USERPROFILE%\Pictures
Videos My Video %USERPROFILE%\Videos

How to check and repair system files in Windows 11

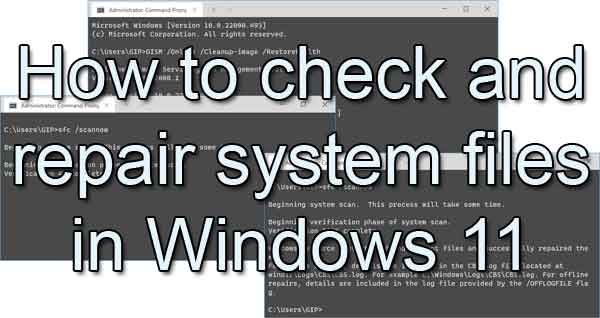
When it comes to repairing Windows-based computers, I always do one thing: check for corrupt system files. Corrupt system files can cause all sorts of problems, so here is how to check and repair system files in Windows 11.
How to check and repair system files in Windows 11

Repairing system files is not complex, but it can be time-consuming. Going through all of the steps outlined in this article can take several hours. Once you start a scan, you will have to allow it to complete, so be prepared to watch your computer work. And all of the links included in this article will open in a new window.

We first need to check the drive's file structure that the operating system is installed on. It is usually drive C:. For this, we will use the disk error checking program built into Windows 11.

There are a couple of different ways to run it (standard and advanced), but the most thorough way is by using the advanced method (see link below). It may take some time to run, but it is the most thorough error checking you can perform.

How to check your drive for errors in Windows 11

Now that we have checked the drive for errors, we must check for corrupted system files. For this, we will use the built-in System File Checker (SFC). Like most of the programs in this article, this program has to be run from an Administrative Command Prompt.

How to open a Command Prompt with Administrator privileges in Windows 11

SFC has multiple syntaxes and parameters you can use with it. Here are all of the syntaxes and parameters with examples of their use.

SFC [/SCANNOW] [/VERIFYONLY] [/SCANFILE=<file>] [/VERIFYFILE=<file>] [/OFFWINDIR=<offline windows directory> /OFFBOOTDIR=<offline boot directory> [/OFFLOGFILE=<log file path>]]

  • /SCANNOW - Scans integrity of all protected system files and repairs files with problems when possible.
  • /VERIFYONLY - Scans integrity of all protected system files. No repair operation is performed.
  • /SCANFILE - Scans integrity of the referenced file, repairs file if problems are identified. Specify full path <file>.
  • /VERIFYFILE - Verifies the integrity of the file with full path <file>. No repair operation is performed.
  • /OFFBOOTDIR - For offline repair, specify the location of the offline boot directory.
  • /OFFWINDIR - For offline repair, specify the location of the offline windows directory.
  • /OFFLOGFILE - For offline repair, optionally enable logging by specifying a log file path.

Examples:

  • SFC /SCANNOW
  • SFC /VERIFYFILE=c:\windows\system32\kernel32.dll
  • SFC /SCANFILE=d:\windows\system32\kernel32.dll /OFFBOOTDIR=d:\ /OFFWINDIR=d:\windows
  • SFC /SCANFILE=d:\windows\system32\kernel32.dll /OFFBOOTDIR=d:\ /OFFWINDIR=d:\windows /OFFLOGFILE=c:\log.txt
  • SFC /VERIFYONLY

System File Checker running in an Administrative Command Prompt inside of Windows 11
We want to check all of the Windows 11 protected system files, so type the following into an Administrative Command Prompt and press Enter.

SFC /SCANNOW
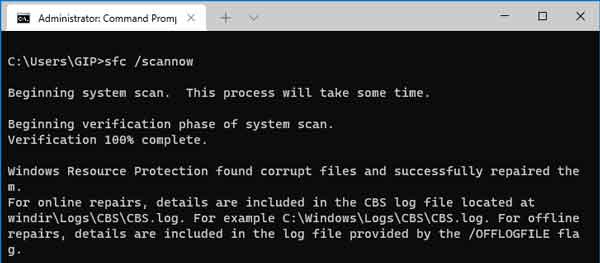
System File Checker results in an Administrative Command Prompt inside of Windows 11
Now four (4) possible results can appear when SFC is done scanning. They are:

Windows Resource Protection did not find any integrity violations.
All system files are acceptable, and you are good to go.

Windows Resource Protection could not perform the requested operation.
There may be another program preventing SFC from running. In this case, boot the system up into safe mode and run SFC from there.

Windows Resource Protection found corrupt files and successfully repaired them.
All system files are now correct, and you're ready to go. Just restart your computer to finalize the repairs. If you want to view the repair details, type the following into an Administrative Command Prompt and press Enter.

findstr /c:"[SR]" %windir%\Logs\CBS\CBS.log >"%userprofile%\Desktop\sfcdetails.txt"

It will create a text file on your desktop named sfcdetails.txt that has all of the details of the repaired files.

Windows Resource Protection found corrupt files but was unable to fix some of them.
If you received this message, you will need to repair the hidden Windows image. To do this, we will need to run the Deployment Image Servicing and Management (DISM) program.
Deployment Image Servicing and Management running in an Administrative Command Prompt inside of Windows 11
To restore the health of the Windows image, type the following into an Administrative Command Prompt and press Enter.

DISM /Online /Cleanup-image /Restorehealth

Once DISM finishes, run SFC /SCANNOW again. This time no integrity violations should be found. If, after several attemps at automatically repairing the corrupt system file(s) fails, you may have to fix them manually. To view the details of the files that could not be automatically repaired, type the following into an Administrative Command Prompt and press Enter.

findstr /c:"[SR]" %windir%\Logs\CBS\CBS.log >"%userprofile%\Desktop\sfcdetails.txt"

It will create a text file on your desktop named sfcdetails.txt. You will need to search through it and find what file(s) could not be repaired

How to manually repair corrupt system files

Note: To replace a corrupt system file, you must have a known good copy of the file(s) in question. A good file source is another computer or virtual machine running Windows 11. Since I do computer repair for a living, I have all of the versions of Windows that are still supported by Microsoft running inside virtual machines.

The first thing to do is note the location (path) and name of the file(s) that need to be replaced from the sfcdetails.txt file. Once you have another copy of the corrupt file(s), you will need to take administrative ownership of the file(s). To do this, modify the following command with the path\filename of the file you want to replace and then type it into an Administrative Command Prompt and press Enter.

takeown /f path\filename

Example: takeown /f C:\Windows\FileToBeReplaced.dll

Next, you will have to grant administrators full access to the file(s) being replaced. To do this, modify the following command with the path\filename of the file you want to replace and then type it into an Administrative Command Prompt and press Enter.

icacls path\filename /grant administrators:F

Example: icacls C:\Windows\FileToBeReplaced.dll /grant administrators:F

The third thing to do is copy the new file(s) and replace the corrupt one(s).To do this, modify the following command with the path\filename of the file you want to replace and then type it into an Administrative Command Prompt and press Enter.

copy path\filename path\filename

Example: copy C:\Temp\FileToBeReplaced.dll C:\Windows\FileToBeReplaced.dll

Free computer diagnostics

Repairing a PC can sometimes be expensive, and that is why we offer free basic in-shop diagnostics. Give one of our professional and experienced technicians a call at (602) 795-1111, and let's see what we can do for you.

Check out our reviews

Geeks In Phoenix LLC, BBB Business Review

Customer service is #1

Here at Geeks in Phoenix, we take pride in providing excellent customer service. We aim to give the highest quality of service  from computer repair, virus removal, and data recovery.

Bring your computer to us and save

Repairing a computer can be time-consuming. That is why we base our in-shop service on the time we work on your computer, not the time it takes for your computer to work! From running memory checking software to scanning for viruses, these are processes that can take some time.

Contact us

If you have any questions, please feel free to give us a call at (602) 795-1111  and talk with one of our Geeks. Or you can send us a message from our contact page contact page , and one of our Geeks will get back to you as soon as possible. Or you can stop by and see us. Here are our hours and location.

Like Geeks in Phoenix on Facebook

Follow Geeks in Phoenix on Twitter

Watch Geeks in Phoenix on YouTube