When I'm working on my computer, the one thing I hate having to do is navigating File Explorer to get to a folder. Windows 8 has a handy feature built-in called Libraries. With Libraries, I can get to my documents, music, pictures, videos, and frequently used folders with just a couple of clicks. Here's how to work with Libraries inside of Windows 8.
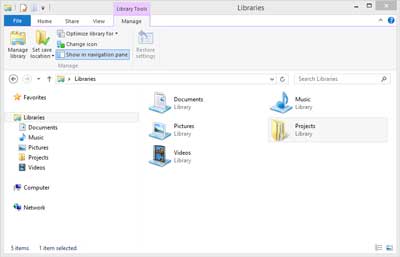
View of Libraries inside of Windows 8 File Explorer
What is a library?
Libraries are collections where you can get to all your documents, music, pictures, and other files in one single place. In some ways, a library works like a folder: you can use it to browse and sort files. But unlike a folder, a library gathers files that are stored in several locations. This is a subtle but significant difference. Libraries don't hold your items. They pull from folders that contain your items and let you open and arrange the items in different ways. For example, if you have music files in folders on your PC and an external drive, you can get all of your music files from the Music library.
There are four default libraries (Documents, Music, Pictures, and Videos), but you can create new libraries for other collections. You can also add and remove folders from libraries. Libraries can include up to 50 folders.
What folder locations are supported in libraries?
You can include folders in a library from many different locations, such as your C drive, an external drive, or a network. Only folders can be included in libraries. Individual files and other items can't be included.
How to create a new library
- Swipe in from the right edge of the screen or press the Windows logo key
 + C to bring up the Charms bar and then tap or left-click Search.
- Enter File Explorer in the search box, and then tap or left-click Apps. Tap or left-click File Explorer in the search results
or
Press the Windows logo key + E.
- Tap or left-click Libraries.
- Tap or left-click the Home tab, tap or left-click New item, and then choose Library.
- Enter a name for the library, and then press Enter.
How to add a folder to a library
If the folder you want to add is on an external hard drive, make sure the drive is connected to your PC and that you can open it.
- If you're viewing the New Library page in File Explorer, tap or left-click Include a folder, select the folder, and then tap or left-click Include folder.
If you don't have the New Library page open, continue following these steps.
- Swipe in from the right edge of the screen or press the Windows logo key + C to bring up the Charms bar and then tap or left-click Search.
- Enter File Explorer in the search box, and then tap or left-click Apps. Tap or left-click File Explorer in the search results
or
Press the Windows logo key + E.
- Expand the location to find the folder you want to add, and then select it. (For example, if you're going to add a folder from a network, expand the network location and select the folder.)
- Tap or left-click the Home tab, tap or left-click Easy access, choose Include in library, and then select the library to which you want to add the folder.
Notes:
- If you don't see the Include in library option for a network folder, it means the folder isn't indexed. Follow the steps below to add the folder to a library.
- Folders on removable media (such as CDs and DVDs), network-attached storage (NAS) devices, and some USB flash drives can't be included in a library.
How to add a network folder that isn't indexed to a library
If your PC is running Windows 8 Pro or Windows 8 Enterprise, the easiest way to do this is to make the folder available offline and then add the offline folder to a library by following the steps above.
If you don't want to make the folder available offline because you don't want to keep the folder contents on your PC, go to the PC where the network folder is located, and make sure the folder is in an indexed location. If it isn't, add the folder to the indexed locations or move the folder to an indexed location.
If neither of these options works for you, follow these steps to add the folder to a library. Note that doing this will make searching, sorting, and filtering in the whole library slow. For best results, we recommend creating a new library for the network folder alone.
How to add a network folder that is not indexed to a Library in Windows 8
- Swipe in from the right edge of the screen or press the Windows logo key + C to bring up the Charms bar and then tap or left-click Search.
- Enter File Explorer in the search box, and then tap or left-click Apps. Tap or left-click File Explorer in the search results
or
Press the Windows logo key + E.
- Tap or left-click Computer and create a folder on your drive for your network folders, for example, c:\share.
- Create another folder within that folder, for example, c:\share\music.
- Select the subfolder you just created, tap or left-click the Home tab, tap or left-click Easy access, choose Include in library, and then select the library to which you want to add the folder.
- Delete the folder.
- Open a Command Prompt with Administrator privileges (click here for complete instructions)
- Enter mklink /d, and then enter the path of the folder you just deleted and the path of the network folder. For example, mklink /d c:\share\music \\server\music. If either of the folder names has spaces, encase the path(s) inside of quotes. For example, mklink /d "c:\shared files\music" "\\server\shared music". This creates what is called a symbolic link.
How to remove a folder from a library
If you don’t need a folder in a library anymore, you can remove it from the library. When you remove a folder from a library, the folder and everything in it is still kept in its original location.
- Enter File Explorer in the search box, and then tap or left-click Apps. Tap or left-click File Explorer in the search results
or
Press the Windows logo key + E.
- Select the library where you want to remove a folder.
- Tap or left-click the Library Tools tab, and then tap or left-click Manage library.
- In the dialog box that appears, select the folder you want to remove, tap or left-click Remove, and then tap or left-click OK.
962bf748-1ce0-47a1-ba2f-99c285aee55b|0|.0|96d5b379-7e1d-4dac-a6ba-1e50db561b04